¶ Check name for domain
Email domains must not lead to the main domain of the company. For example, if there is already a domain ngdialogue.no, any other domains must be subdomains like info.ngdialogue.no, my.ngdialogue.no, etc.
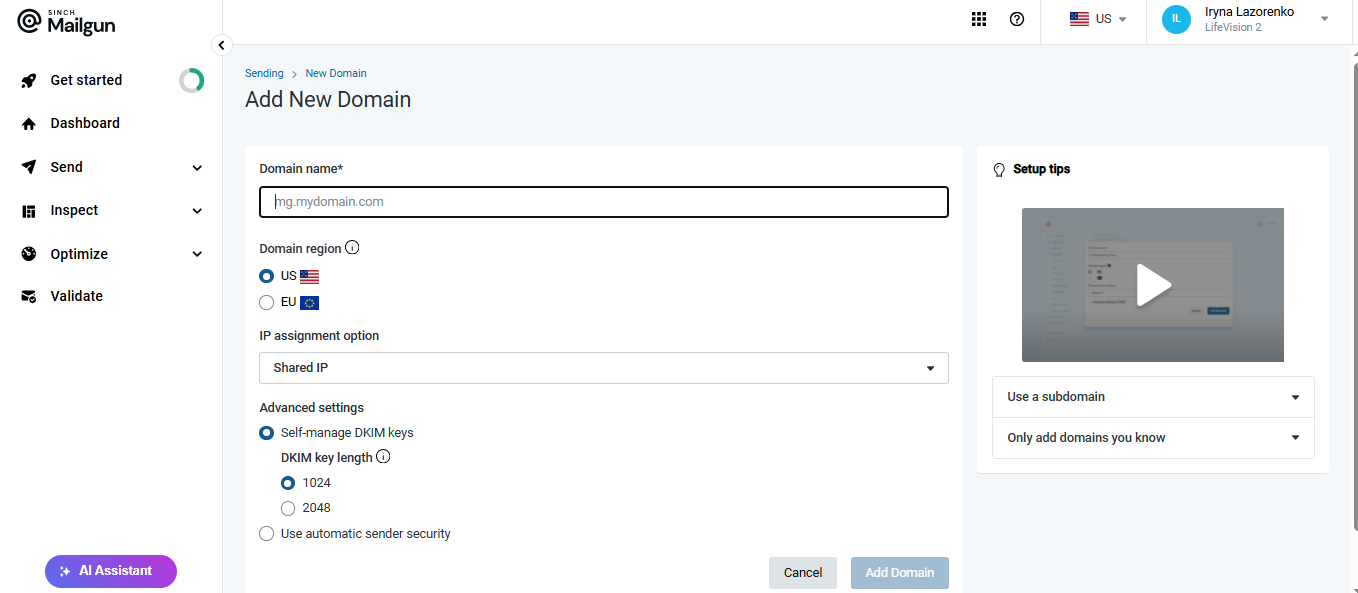
¶ Create domain (dev team)
Click Add new domain:

Add the details:
¶ Add DNS Records to Hosting Provider
Log in to your hosting provider and navigate to the DNS section. This area is called ‘DNS’ at Cloudflare, but we’ve seen it called ‘Networking’ in Digital Ocean and ‘Zone Editor’ in cPanel.
Next, you’ll be asked what type of DNS records you want to add. We’ll go through each one individually.
¶ TXT Records
The first records Mailgun asks you to add are TXT records. We will add two separate TXT records, one for SPF and one for DKIM. These are required to send and receive email with Mailgun.
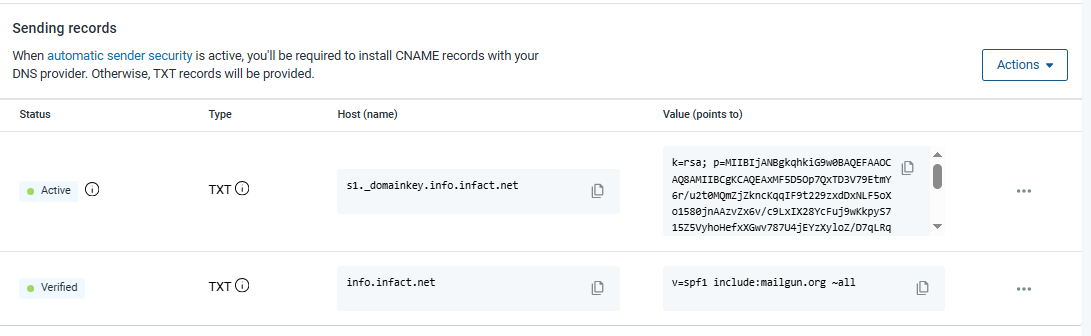
If you’re using a subdomain, add a new TXT record with mail.yourdomain.com as the hostname (with certain providers, you may just have to enter the subdomain, which would just be mail in this case) and the appropriate value Mailgun provides. You can leave TTL as the default option.

Clicking Add Record will add your first DNS entry for your domain!
Add another TXT record for mx._domainkey.mail.yourdomain.com. Cloudflare only shows the subdomain, so your result will look like this:

¶ MX Records
Next, you need to add MX records. Mailgun requires you to add two separate MX records.
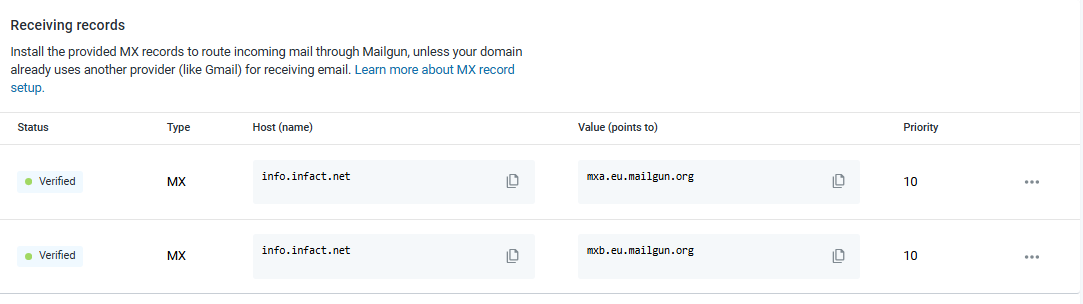
You will add the MX records the same way you did with the TXT records. The hostname in this case is mail.yourdomain.com You’ll also be asked for priority, which should be 10.
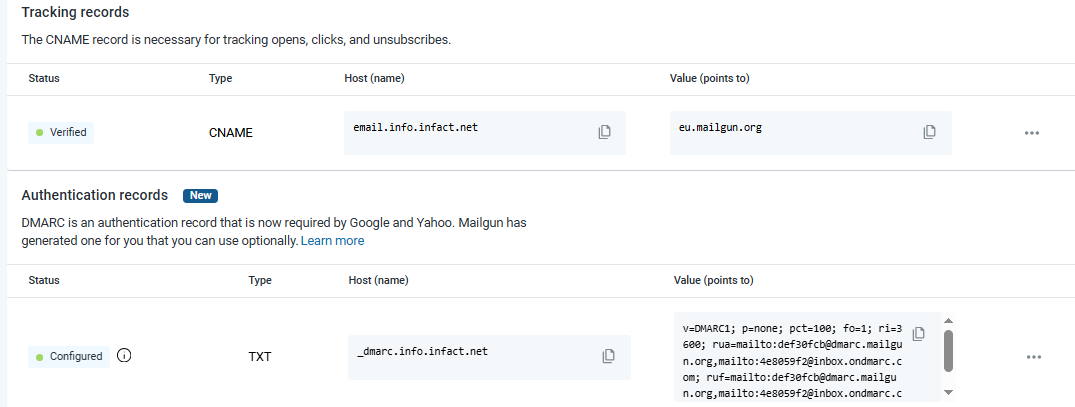
¶ CNAME and DKIM Record
Lastly, you will need to add a CNAME and a DKIM record.
Add them same way as the others. The hostname here is email.mail.yourdomain.com
¶ Step 3: Wait (up to 24 hours)
It can take up to 24 hours for DNS changes to propagate across the internet. In our experience, it usually happens faster than that, but don’t get discouraged if it doesn’t happen immediately.
If you’re impatient like us, you can also use the ‘Check DNS Records Now’ button on the DNS Settings page.
Common providers include: