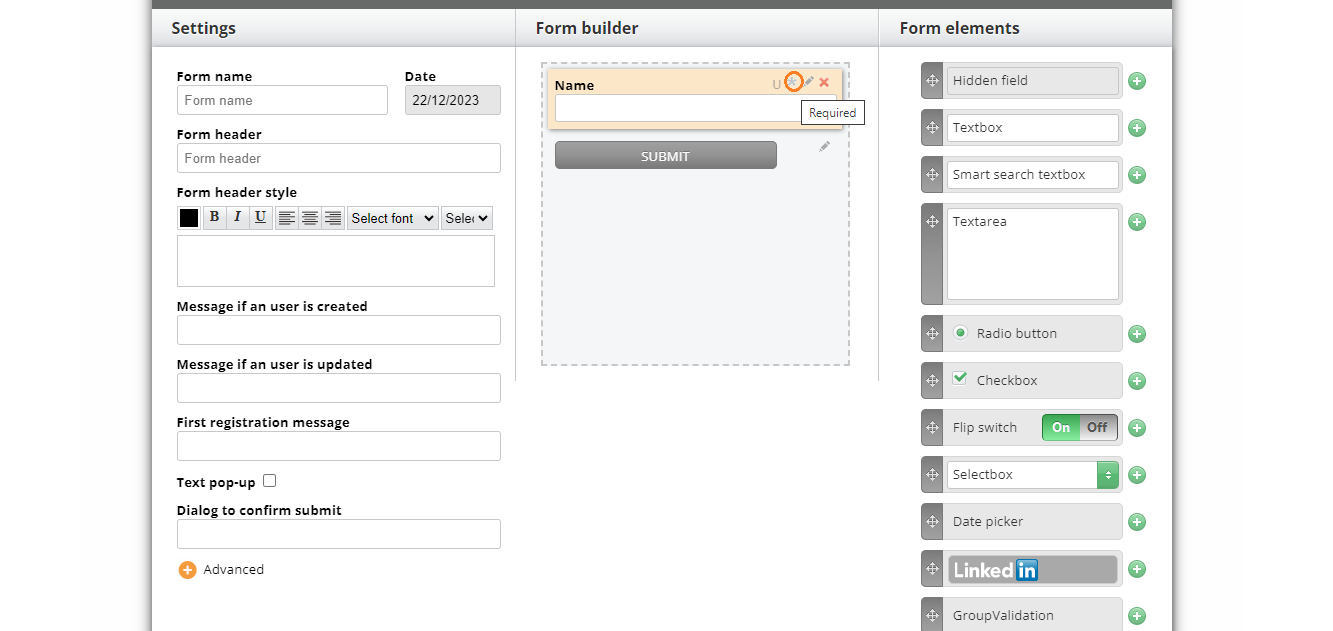
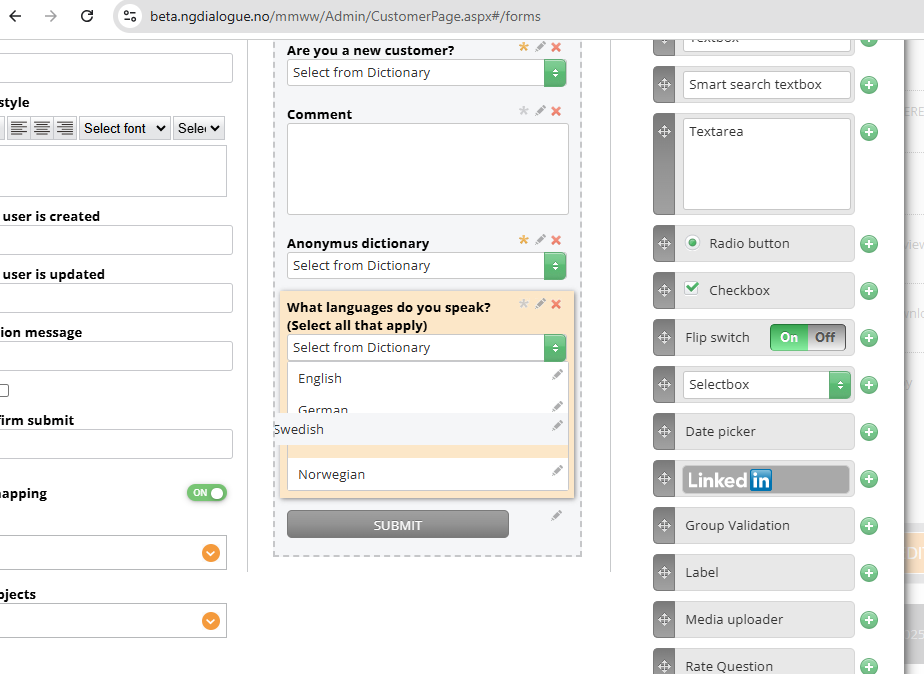
There are two ways to add an element to the form builder:
Drag and drop one of the form elements
Click a plus button
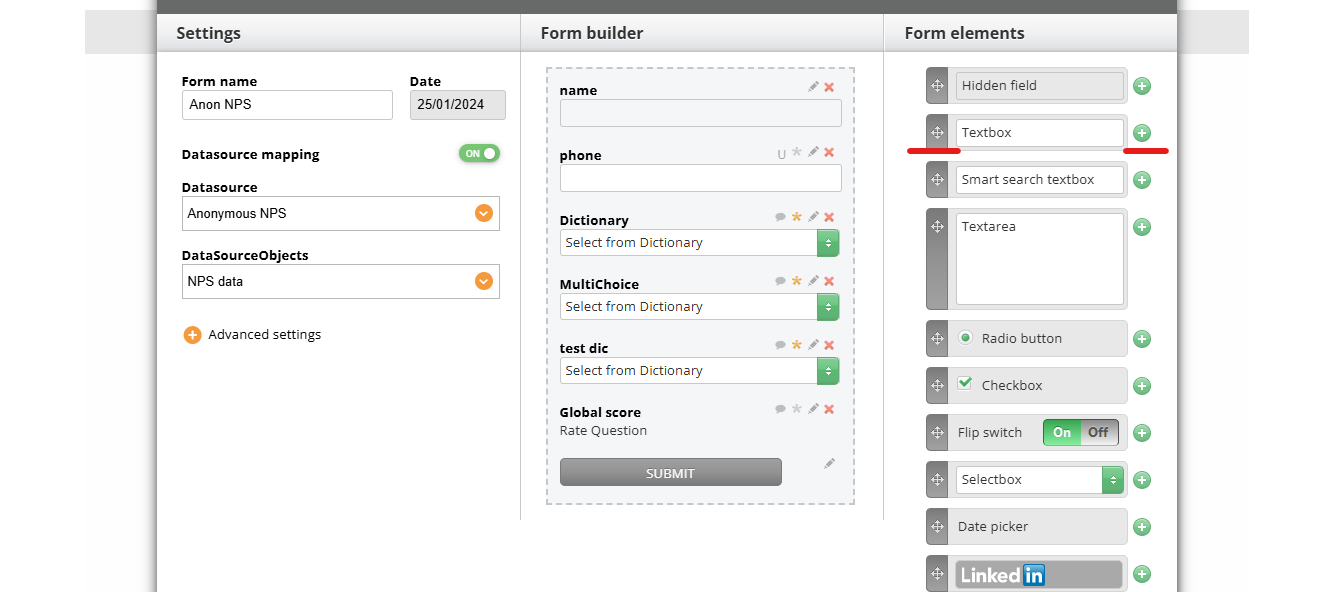
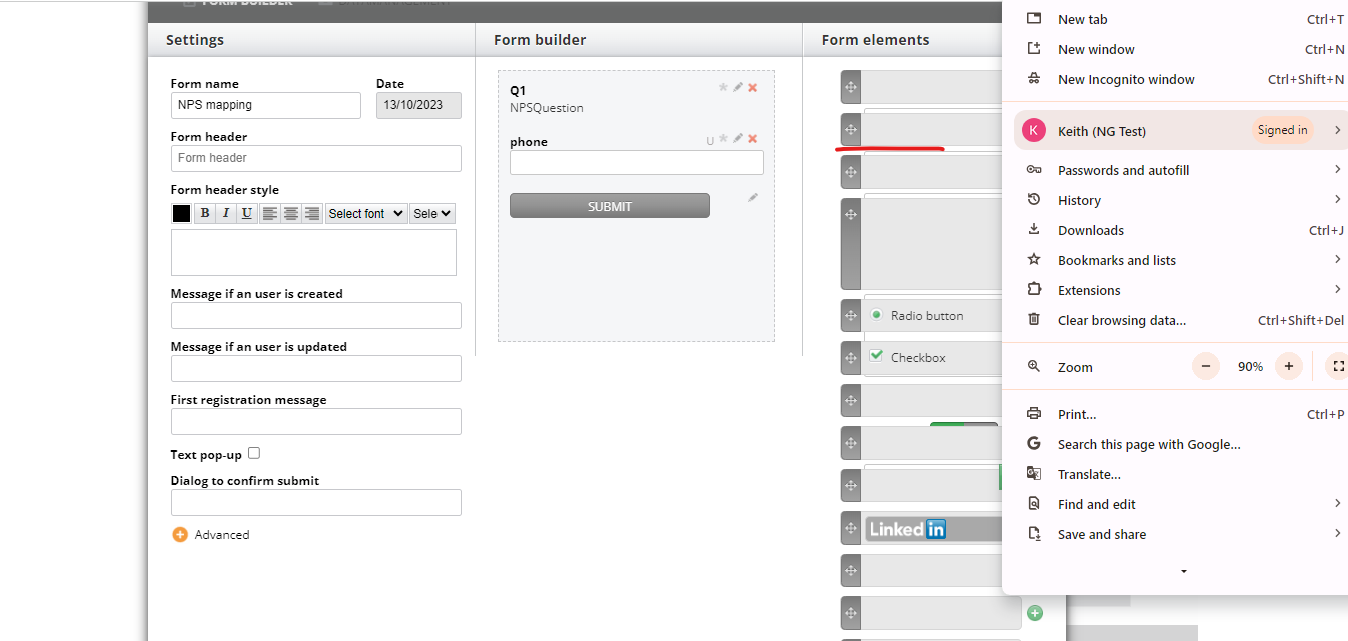
Please note that if some of your form elements are not visible (see the screenshot), it is due to your browser zoom not being 100%. Set it to 100%
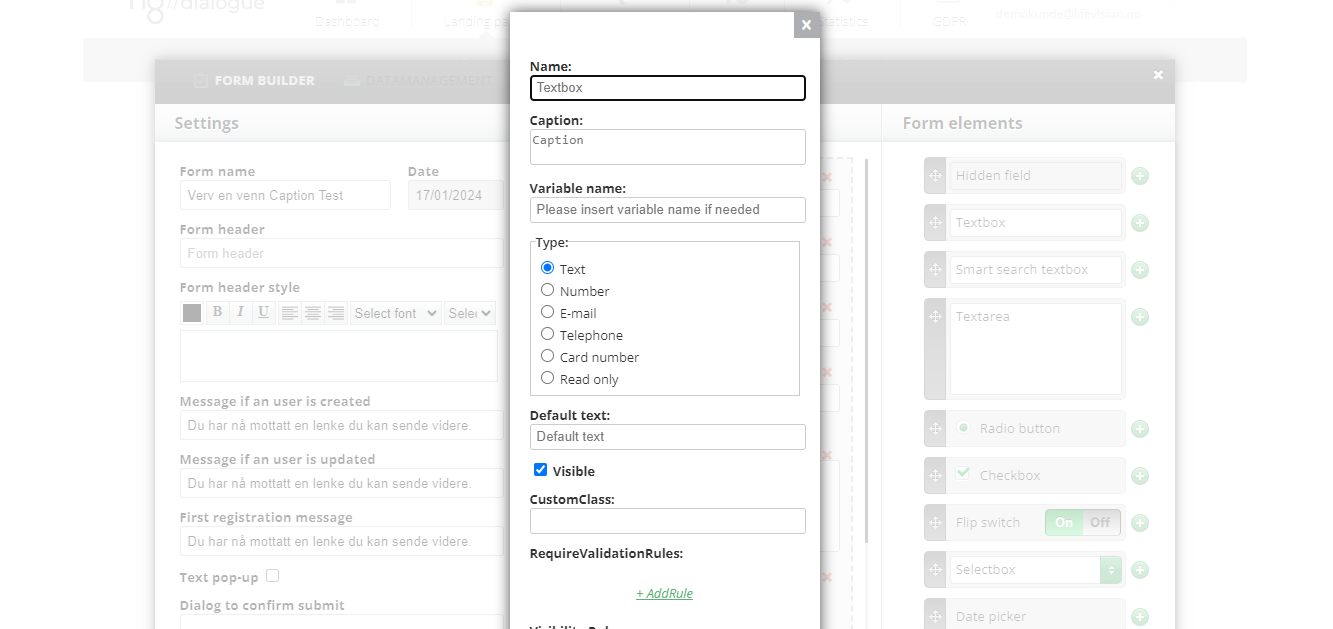
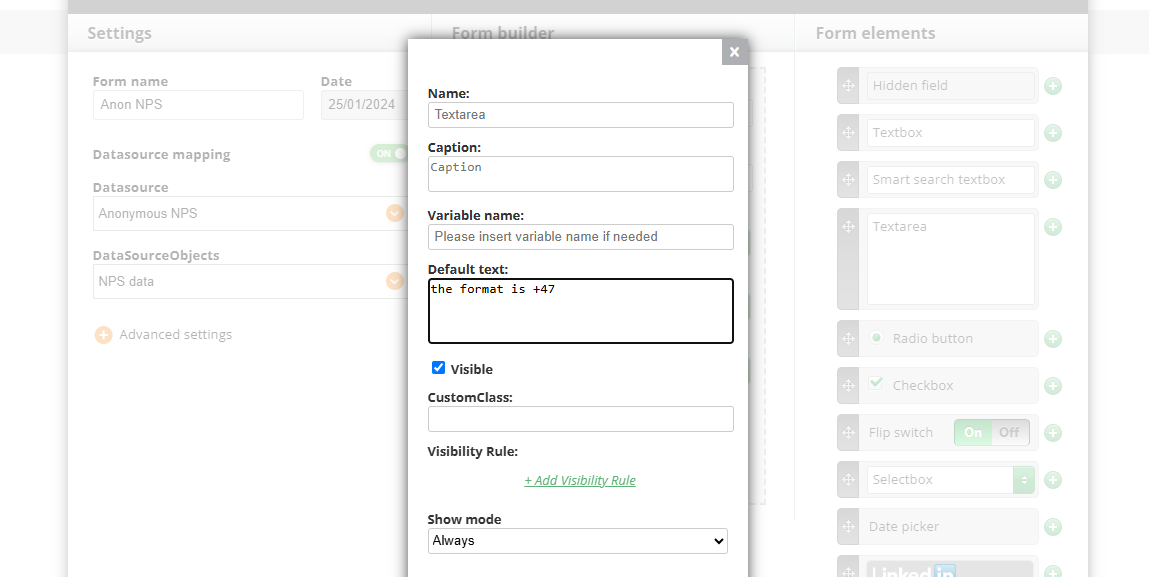
For example, add Textbox and the following dialog will appear. When editing a textbox form element in the type section, none of the available types is selected (in the sample, we selected a textbox). Remember that if you select any, undoing this action (making none unselected again) will be impossible in this form.
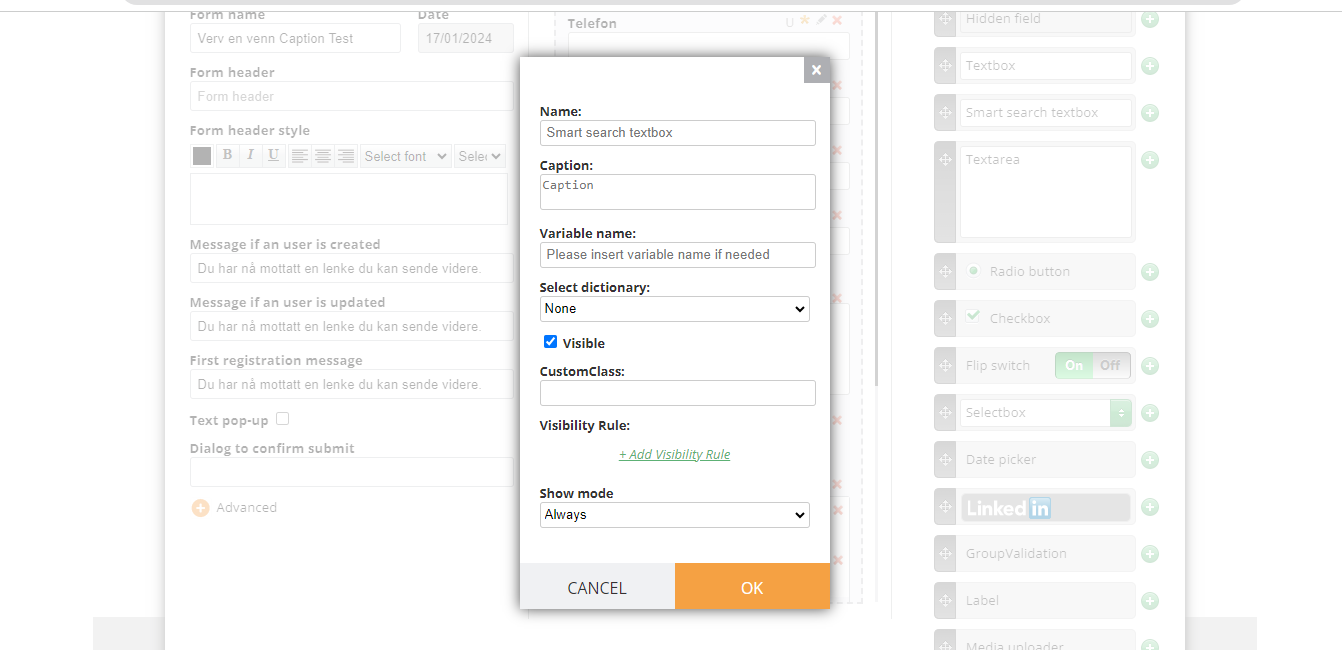
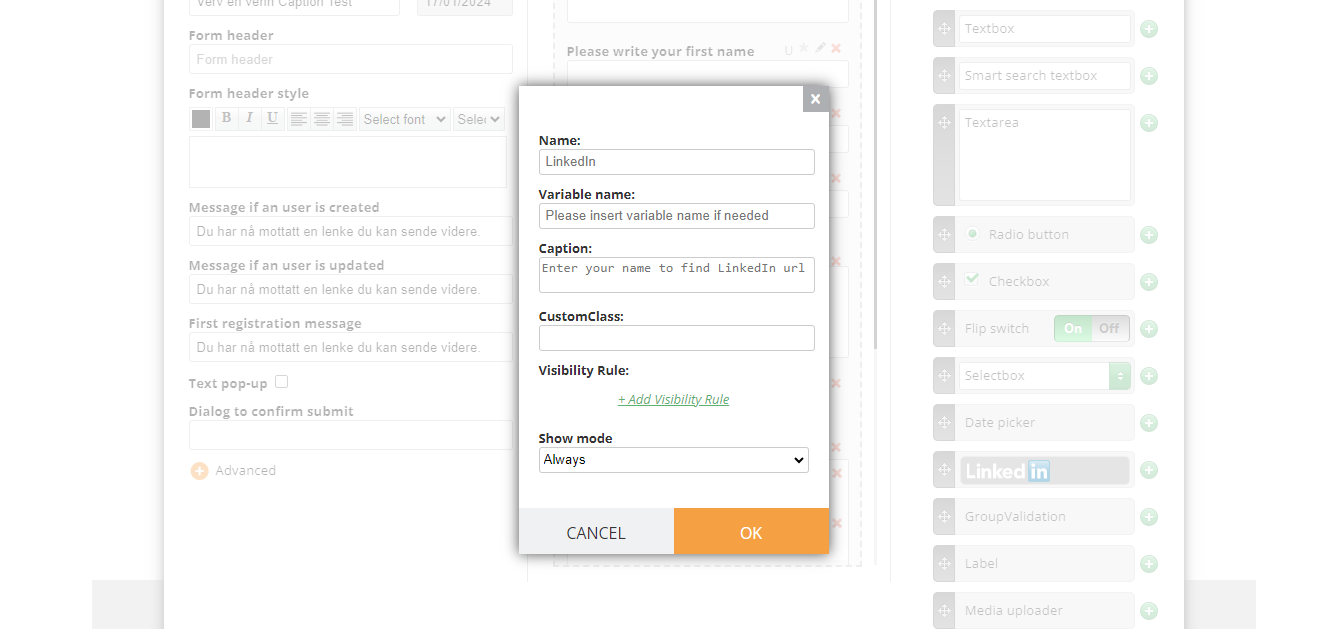
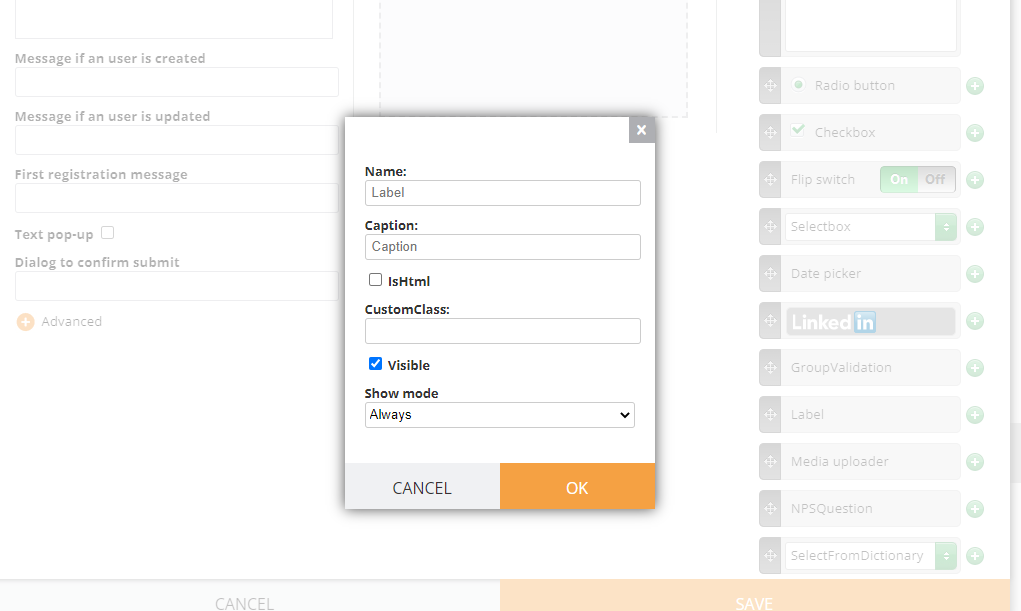
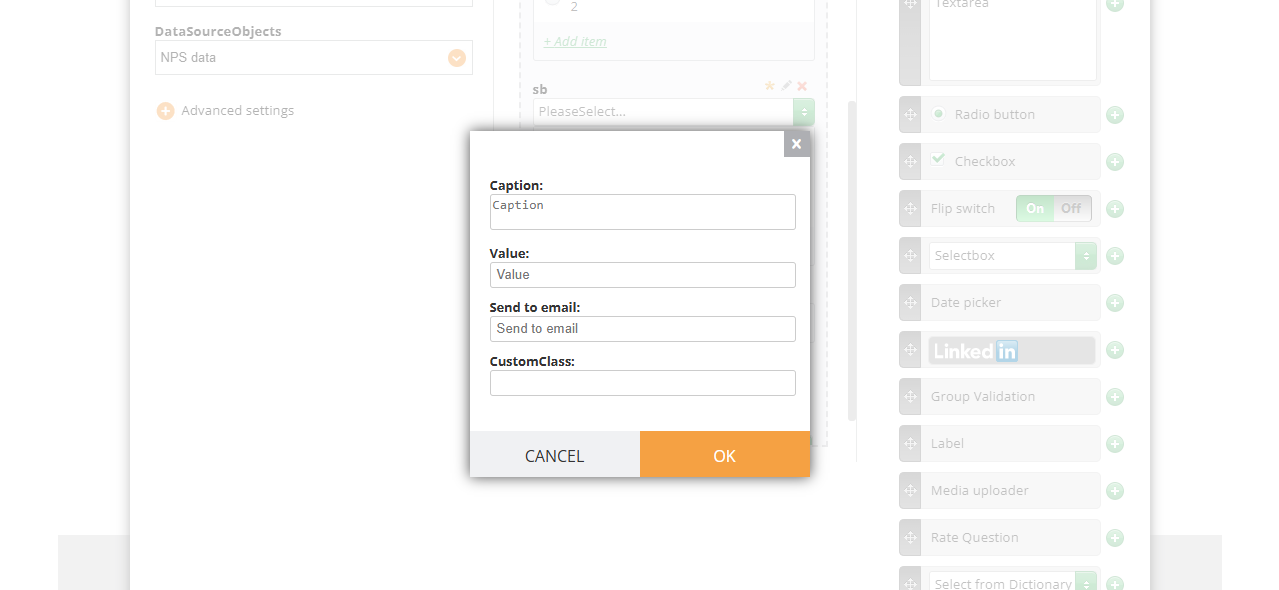
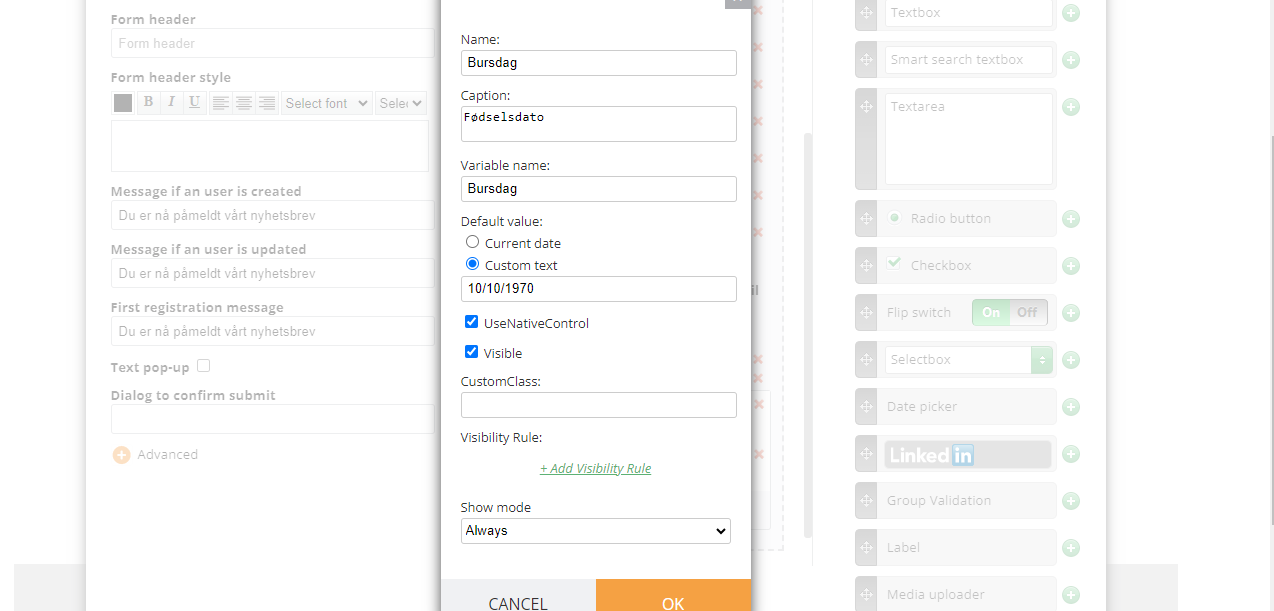
Name - an internal name of the element (first_name);
Caption - text that will be seen in the interface and for those who fill in the form (First Name);
Variable name - optional but you may need it to1) set up confirmation actions or 2) include variables in the Excel report 3) if you name your variable firstname, you can add this variable when sending out the campaign and personalise the text “Hello %%first_name%%” the system will automatically add the recipient's first name to the text;
Type - attribute of data that tells how to use it.
NB! Phones and email must be always set up as Telephone and E-mails respectively, it is needed for correct data processing and subsequent usage;
Default text - text that is seen in the field (optional). You may include some hints for recipients:
Custom class - you can use any custom CSS class that was set up for the landing page that contains this global form.
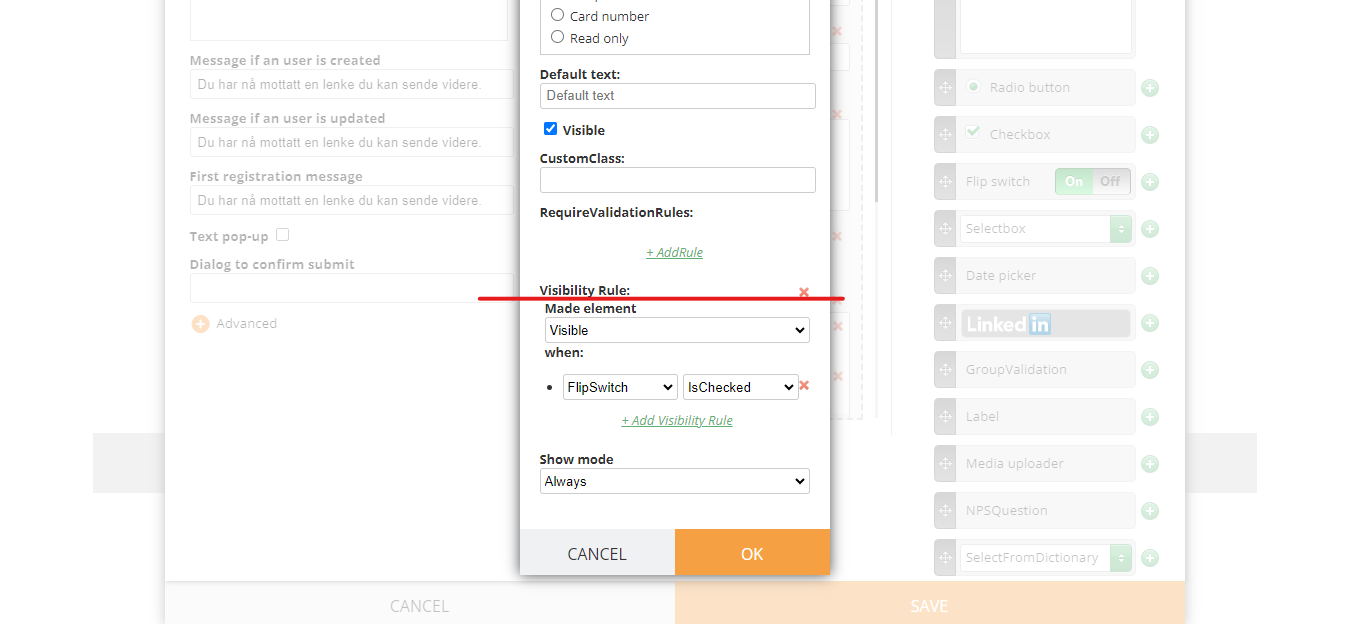
Visibility rule - The visibility rule allows you to show the element depending on the other element's value.
Note! "No Fields Aailable" is shown when the fields that appear before this one either:
Do not exist yet (this is the first field in the form)
Are not compatible with visibility conditions, for example, they do not contain selectable options such as radio buttons, dropdown choices, checkboxes, or rating controls.
Visibility rules can only be created based on fields that provide selectable values.
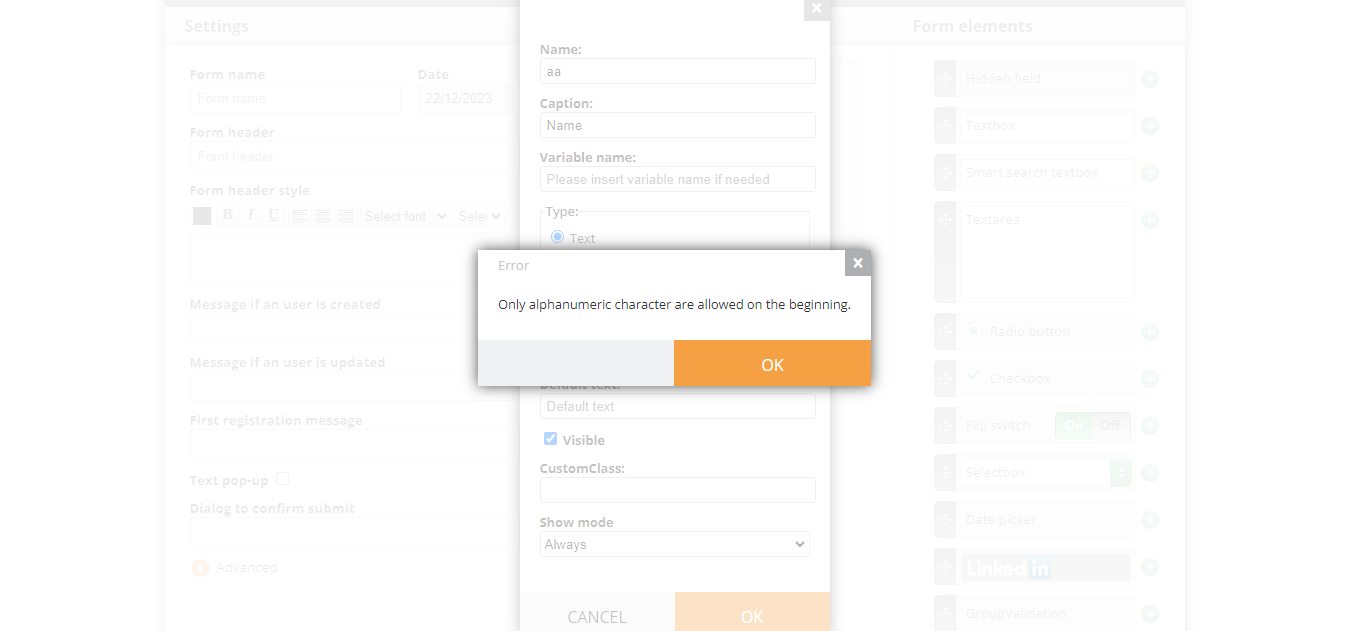
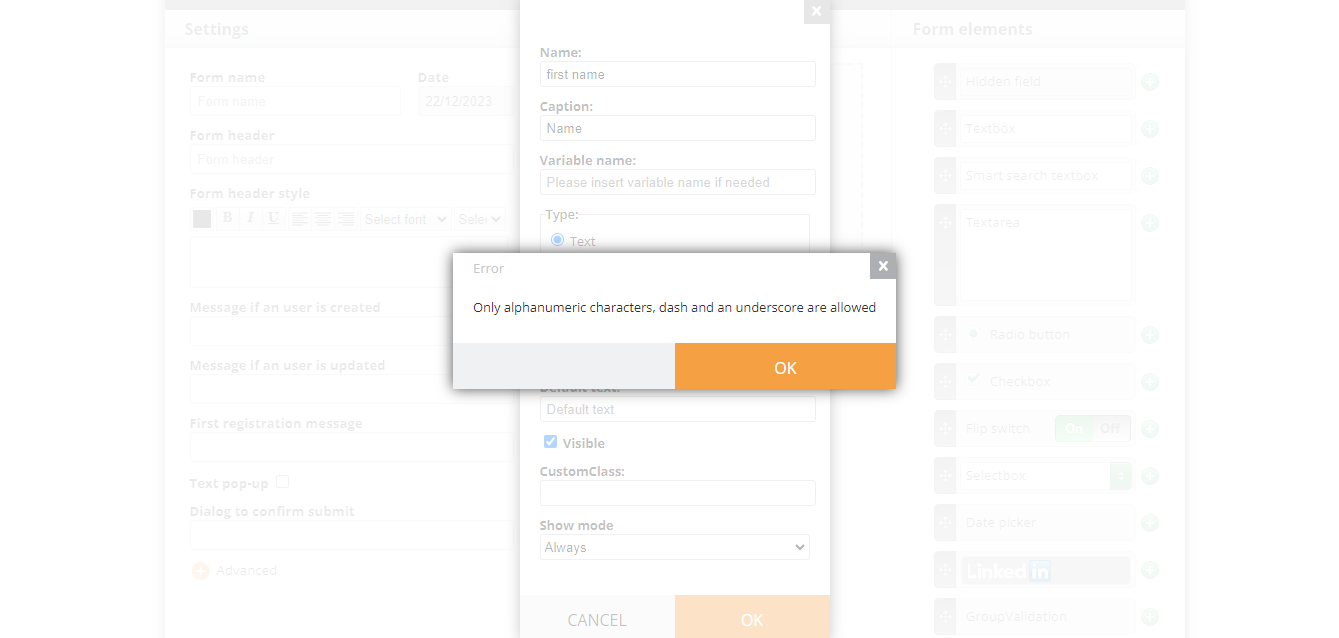
¶ Limitations regarding symbols you can use for a name
only standard Latin alphabet symbols can be used; Alphanumeric, also known as alphameric, simply refers to the type of Latin and Arabic characters representing the numbers 0 - 9, the letters A - Z (both uppercase and lowercase), and some common symbols such as @ # * and &. For example, Cyrillic symbols or the Umlaut like ä, ö, and ü cannot be used;
you cannot use space either. To write two or more word phrase, use dash - or underscore _;
names have to be unique, no duplicates are allowed;
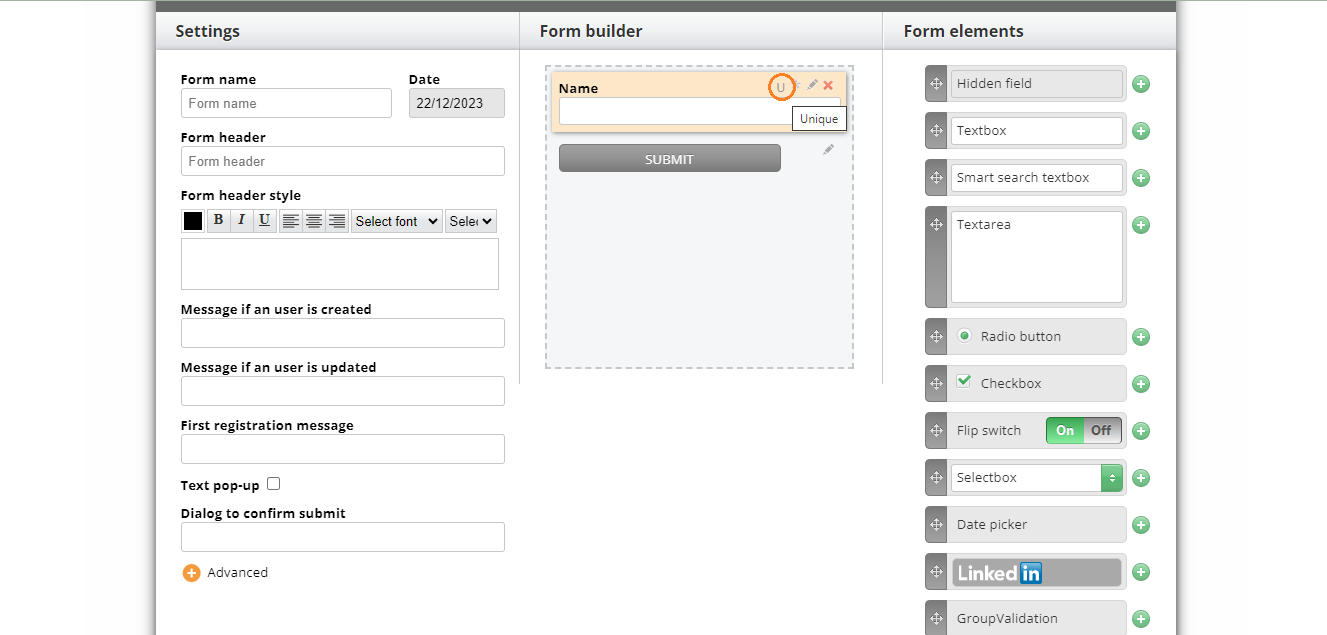
this is not a rule for Caption, it can be written with any symbols using space or be a duplicate;
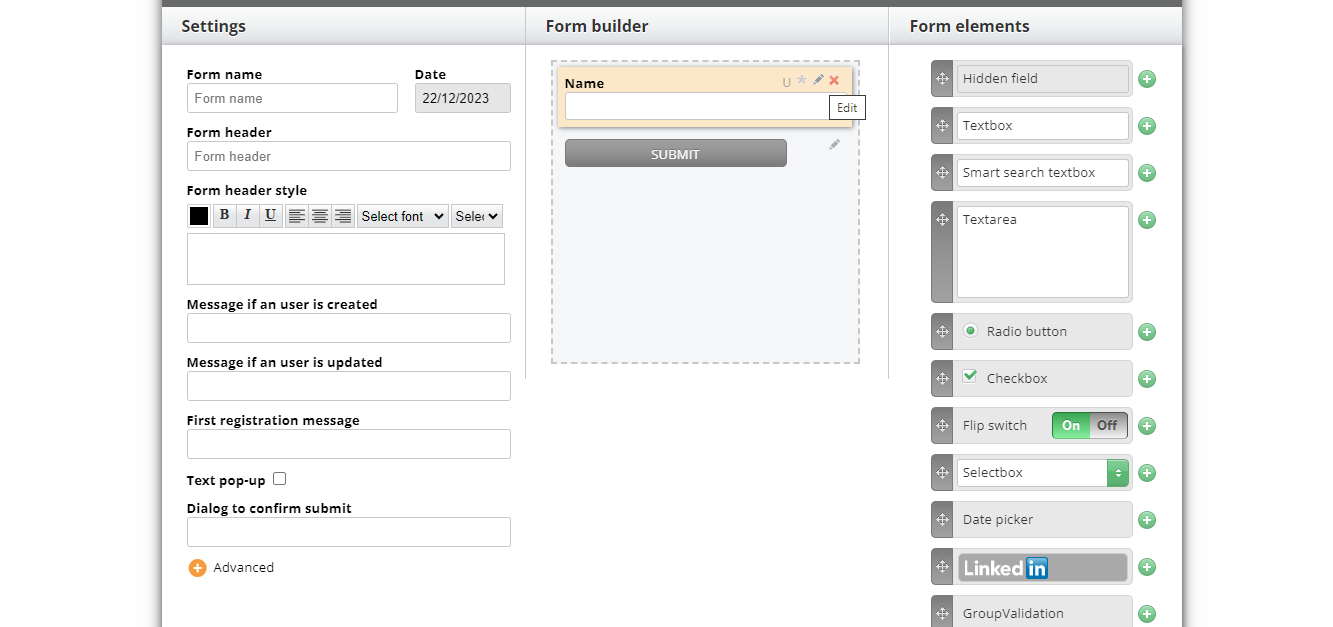
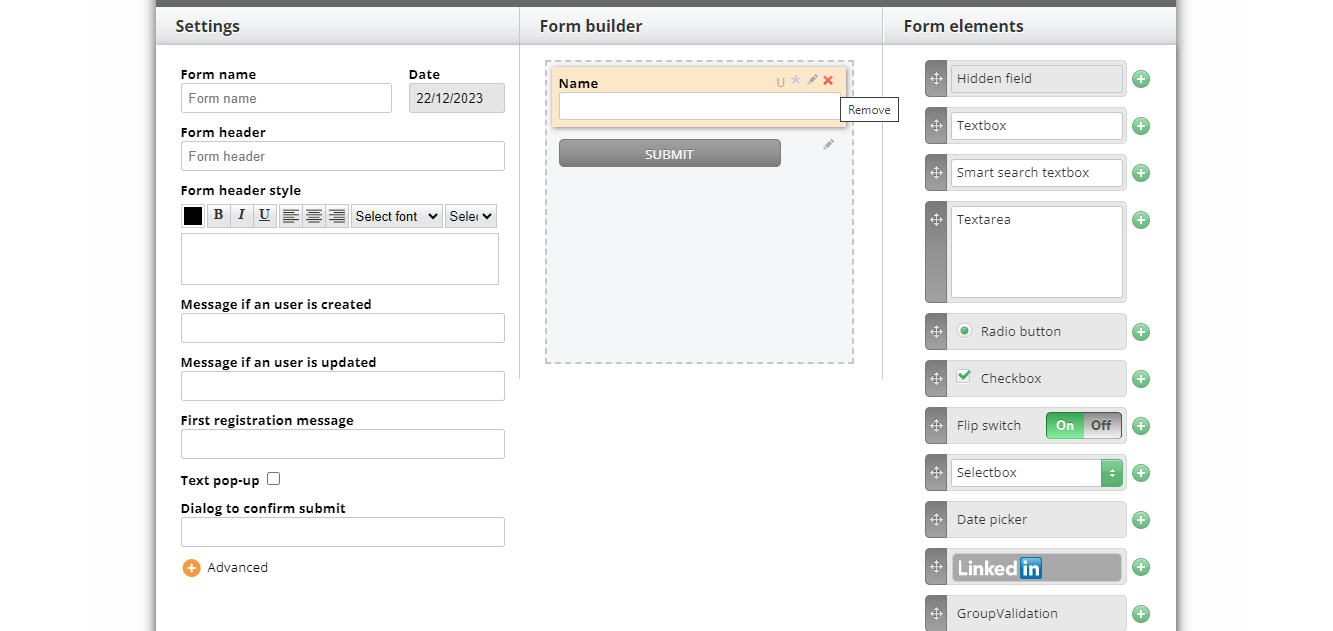
U - “unique”. This feature means that data submitted to this field has to be unique. For example, if you send out one campaign once a year to get updates from your customers, the customer won't be able to submit the same information as this feature requires the data not to be a duplicate;
* - “required” means a user will not be able to submit the form without entering data in this field;
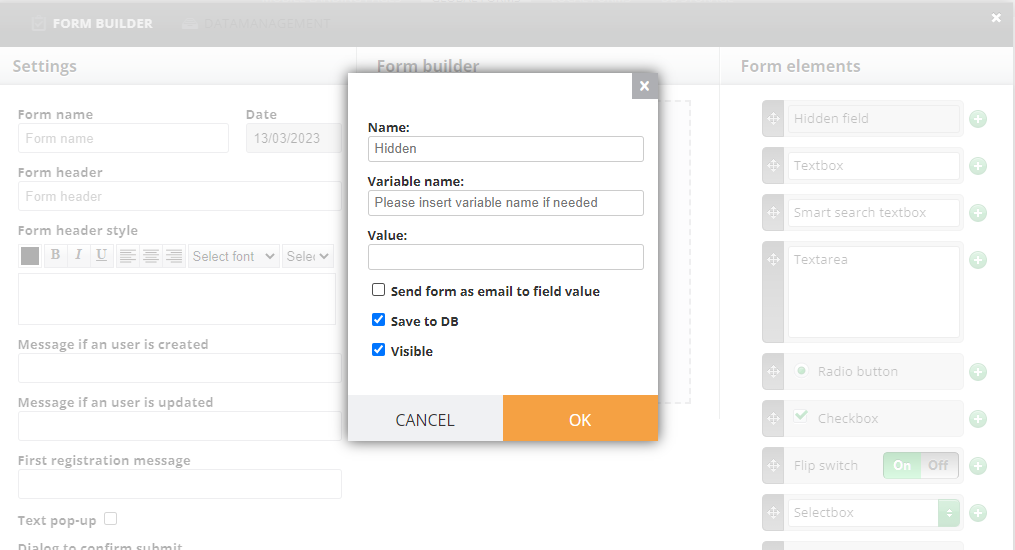
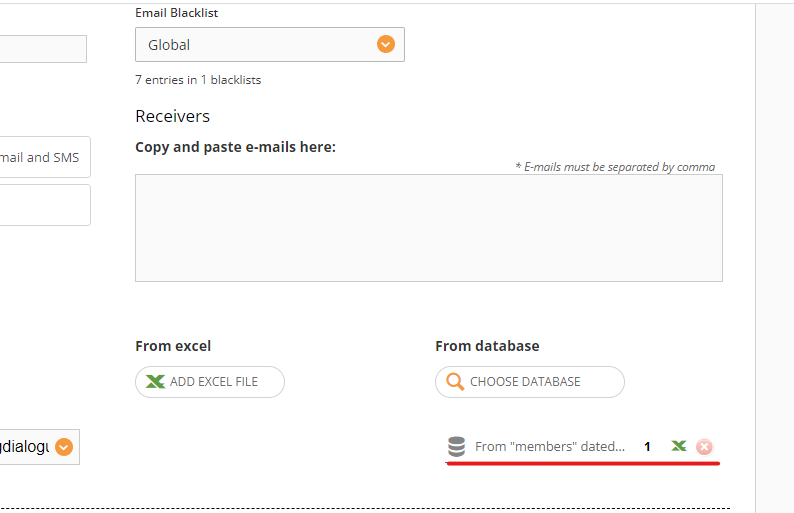
Hidden fields are not seen by the recipient but they allow you to see additional information when the form is submitted. For example, a name, customer id or city.
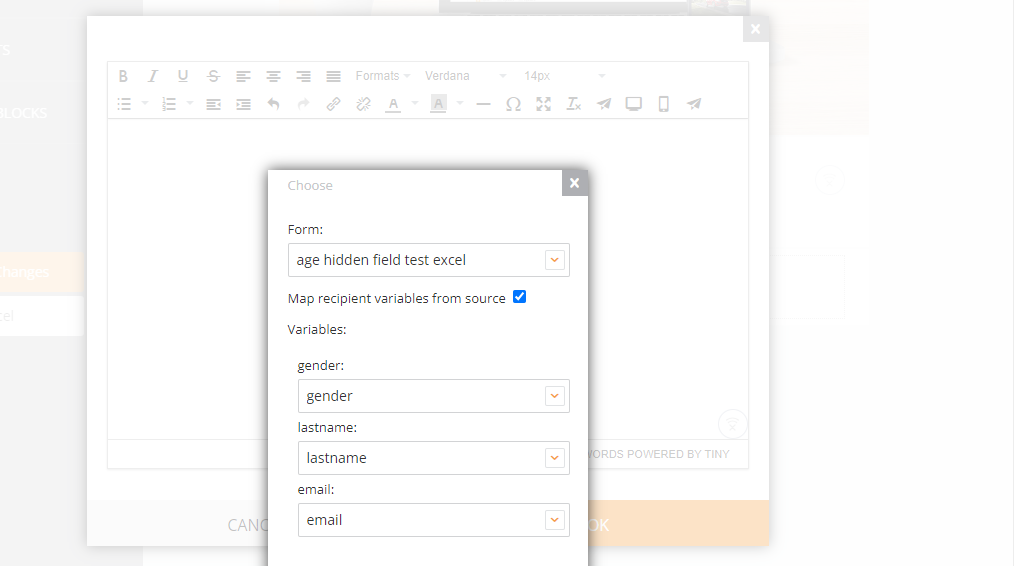
To get this hidden field work, you need to map the member either via Excel or datasource (as the data in hidden field cannot be entered by the recipient, it needs to be taken from somewhere like an Excel file).
adding recipientsmapping fieldsin this case the hidden field won't work the same as if you just open the landing page link without memberlink and type in the data
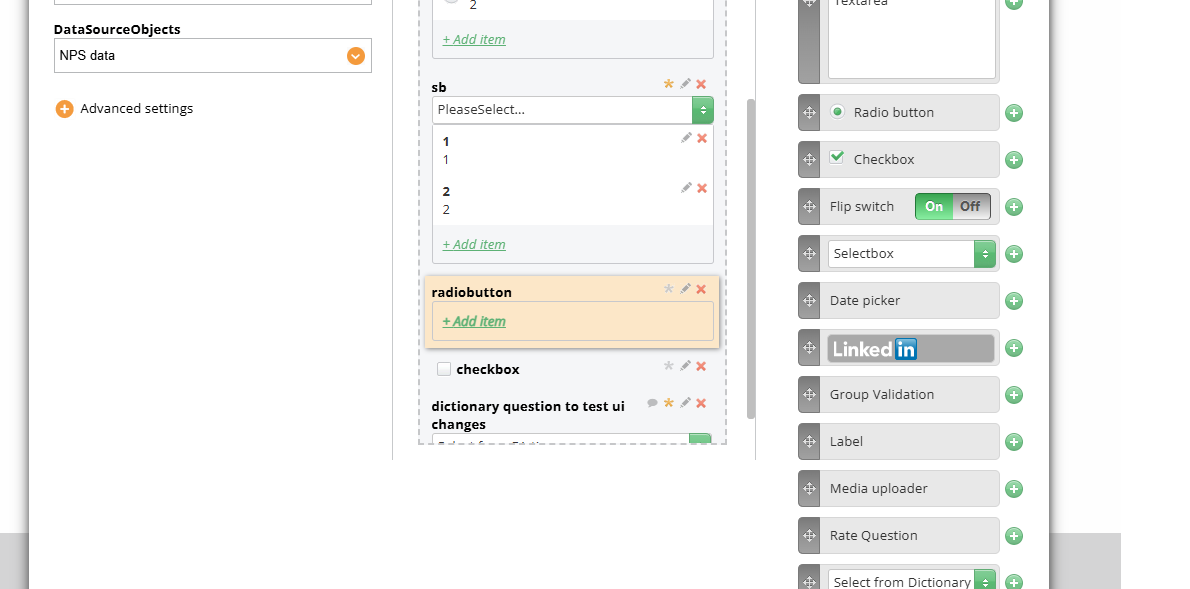
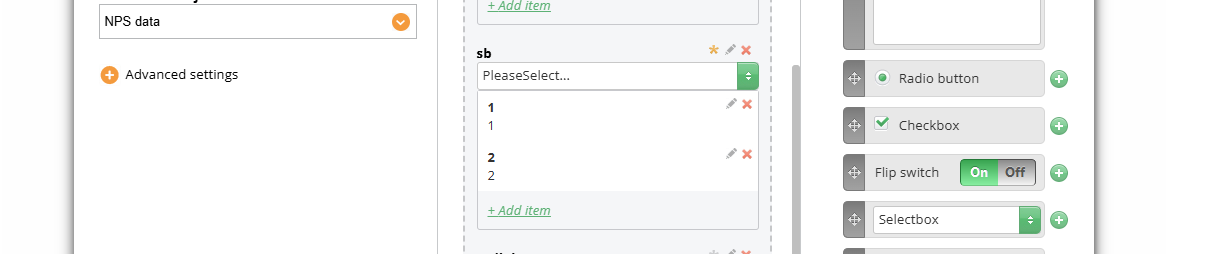
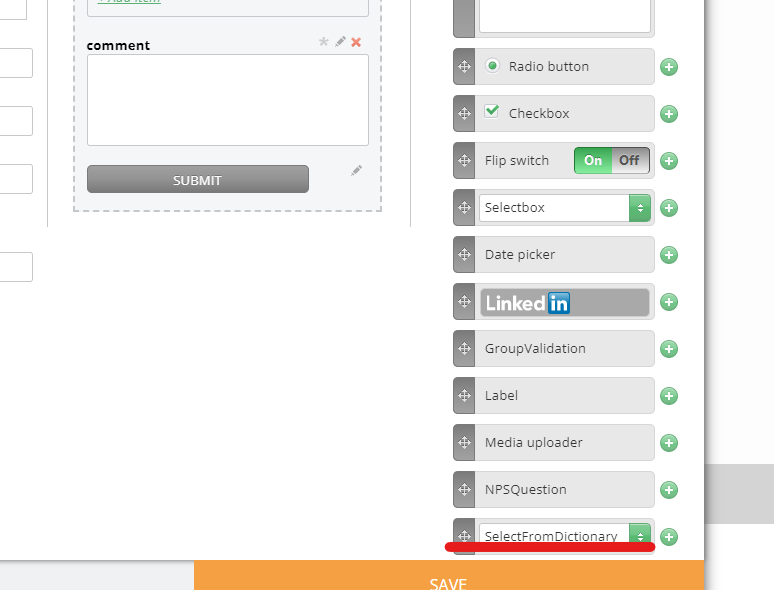
It works similarly to SelectFromDictionary but for forms without a datasource mapping. When we have a lot of options to choose from, and it’s easier to put them in one Excel file than to look for via Select Dictionary than add each dictionary manually via a radio button. It makes it possible to search in the dictionary, i.e. you start typing and it should prompt you with the available options. All other options are designed for a small number of elements, within 20.
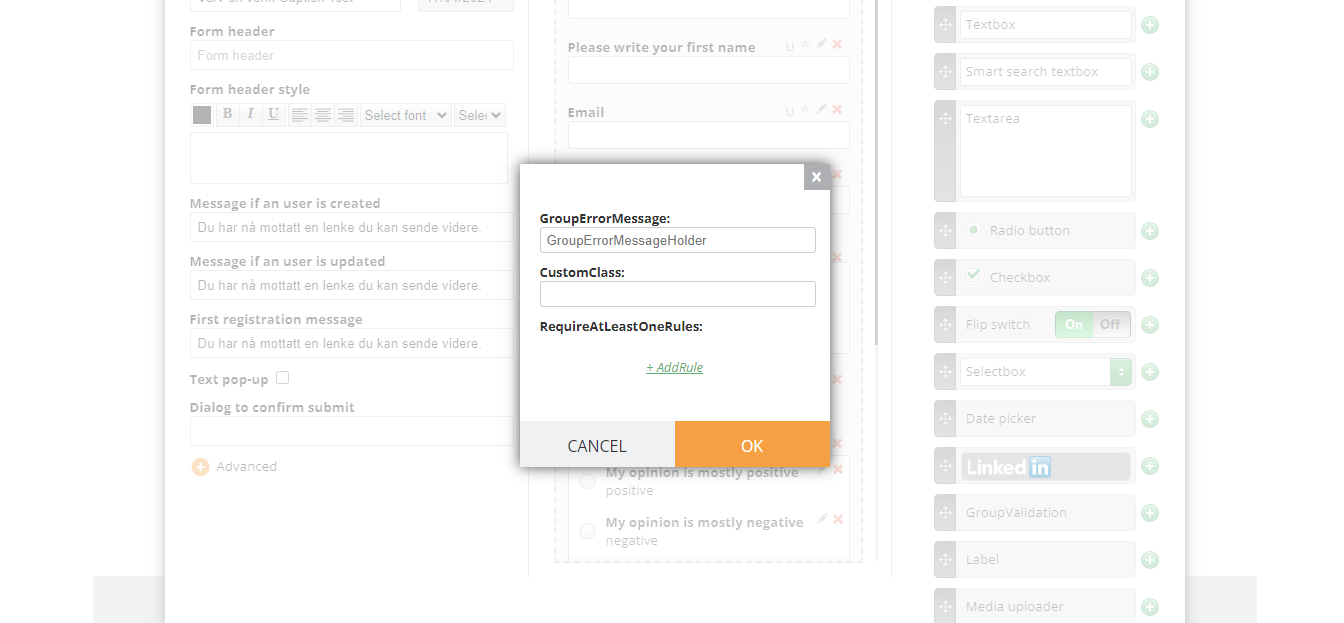
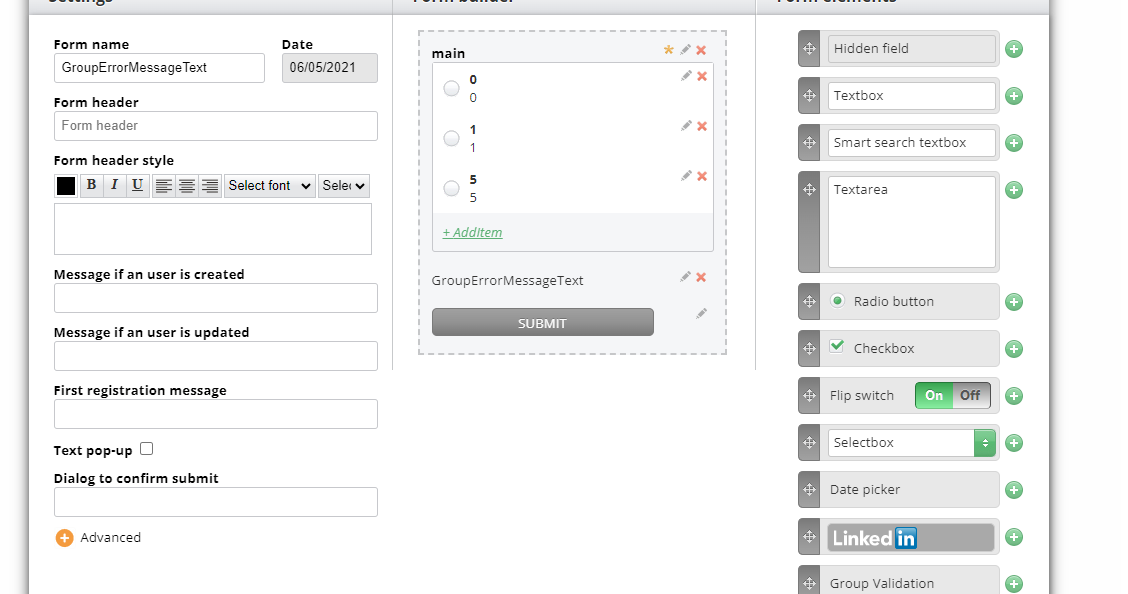
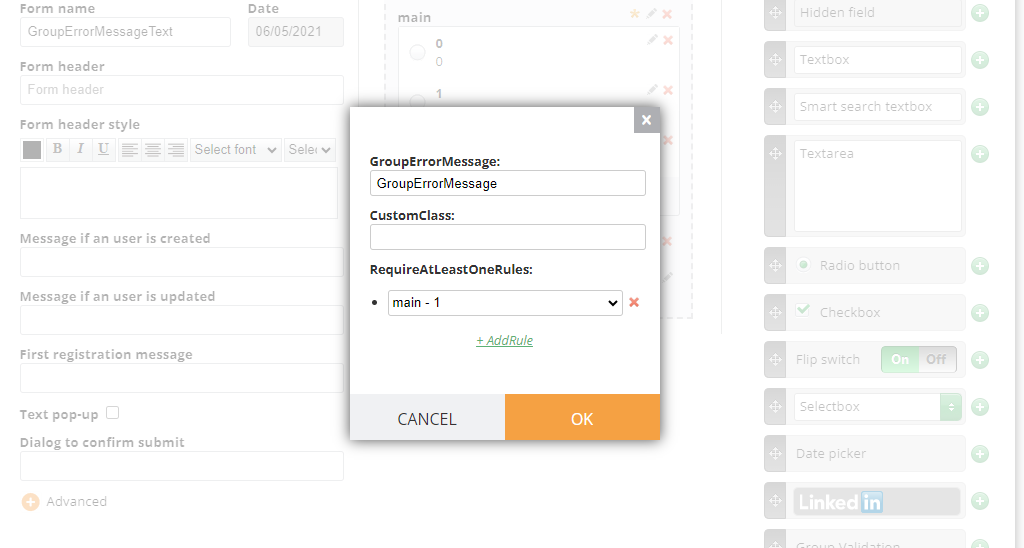
This element is used to show the error separately. If you need to check any of the boxes, for example. Or if you choose one, you must choose the other and without it the form cannot be submitted.
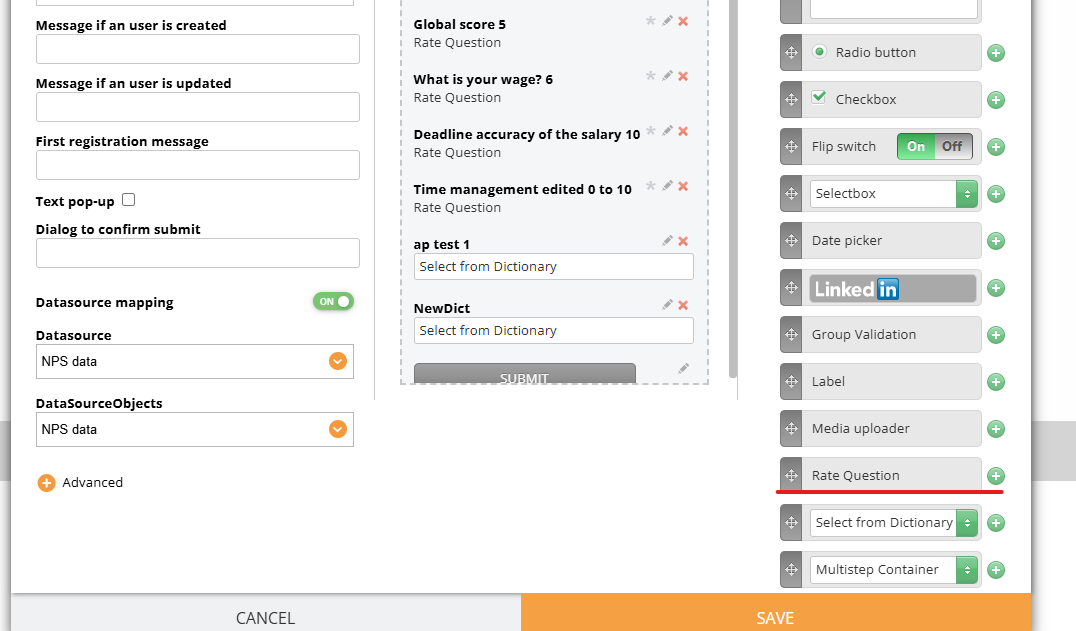
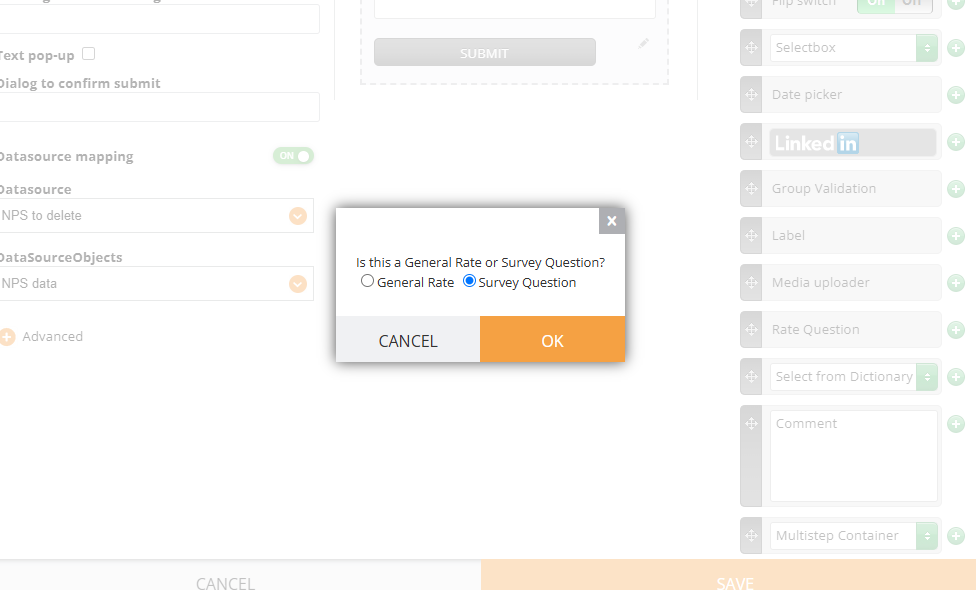
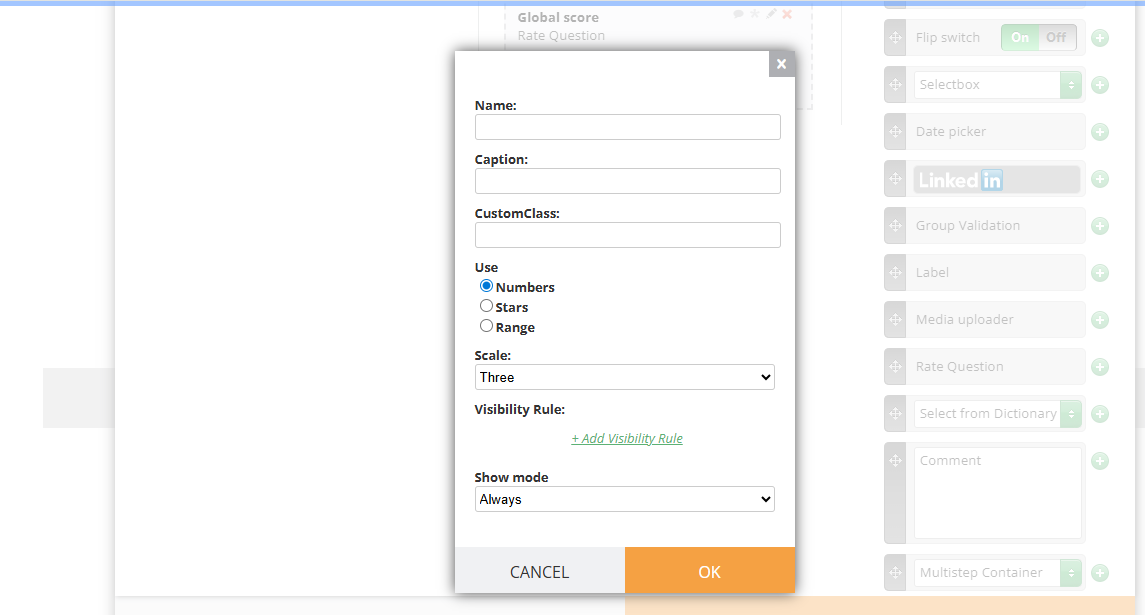
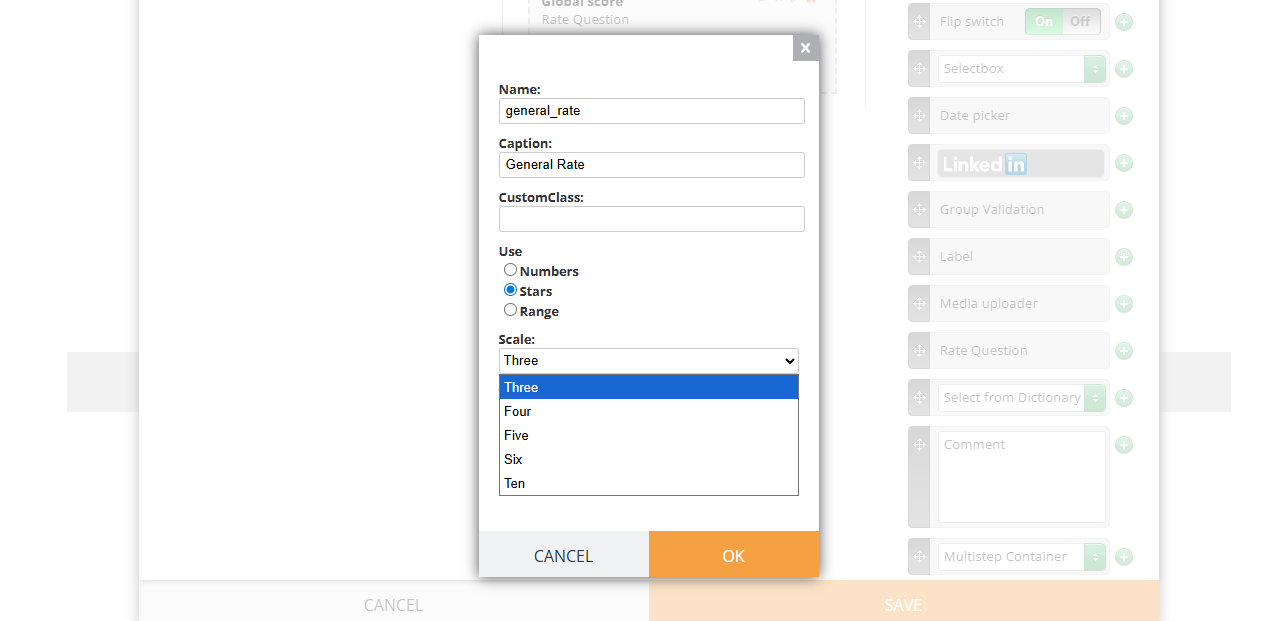
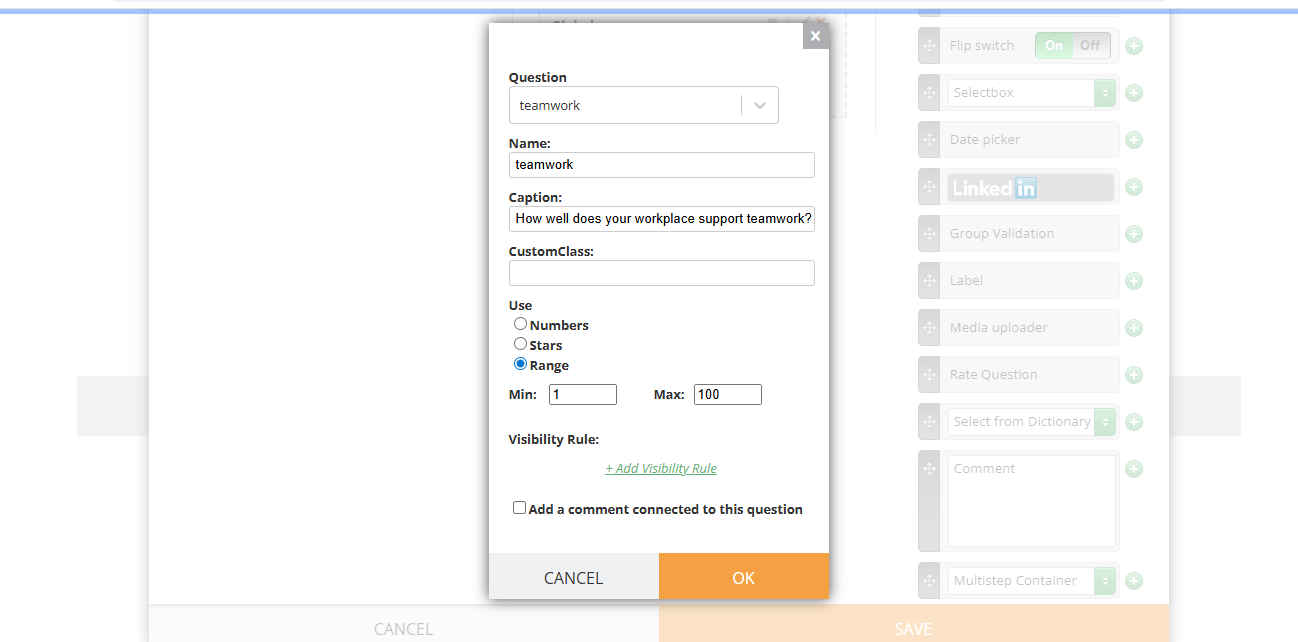
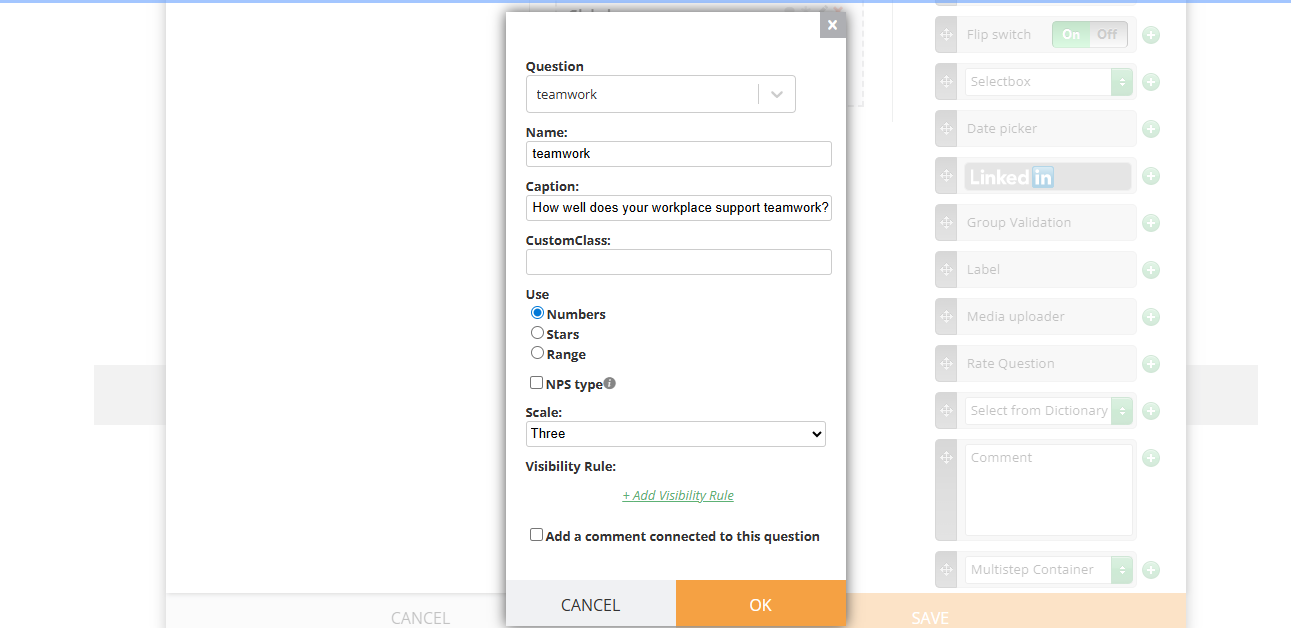
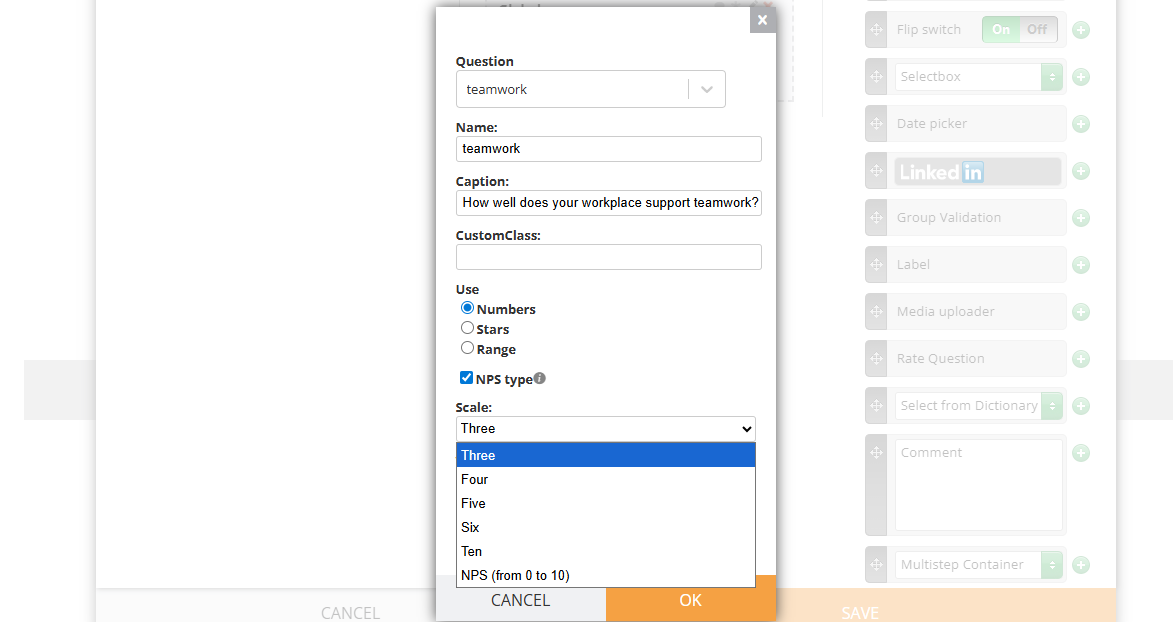
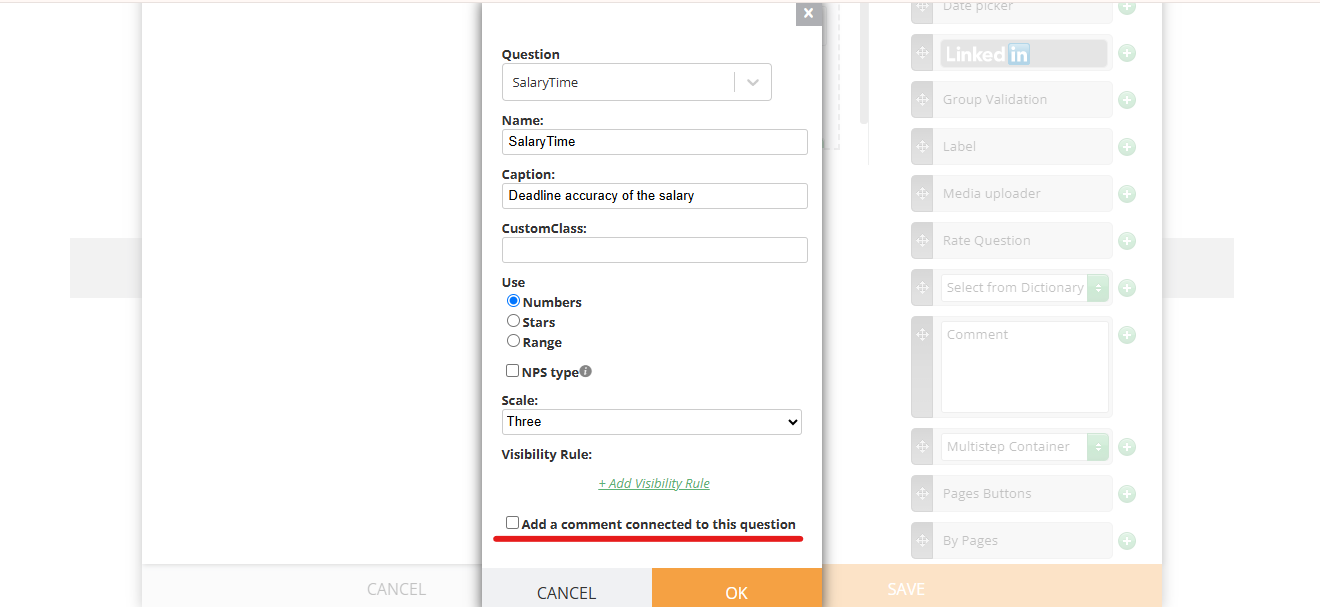
When you select Rate Question, you can choose the subtype. General Rate is used for the surveys with form data collection only (without datasources and mapping), meanwhile Survey Question is used for NG Surveys (the questions added via Dashboard and then mapped to the form).
If the General Rate is used, you just add the name (internal), caption (visible to users), select Numbers or Stars and then scale.
The Scale:
Also, a Range can be used for a user to enter a number from 1 to 100.
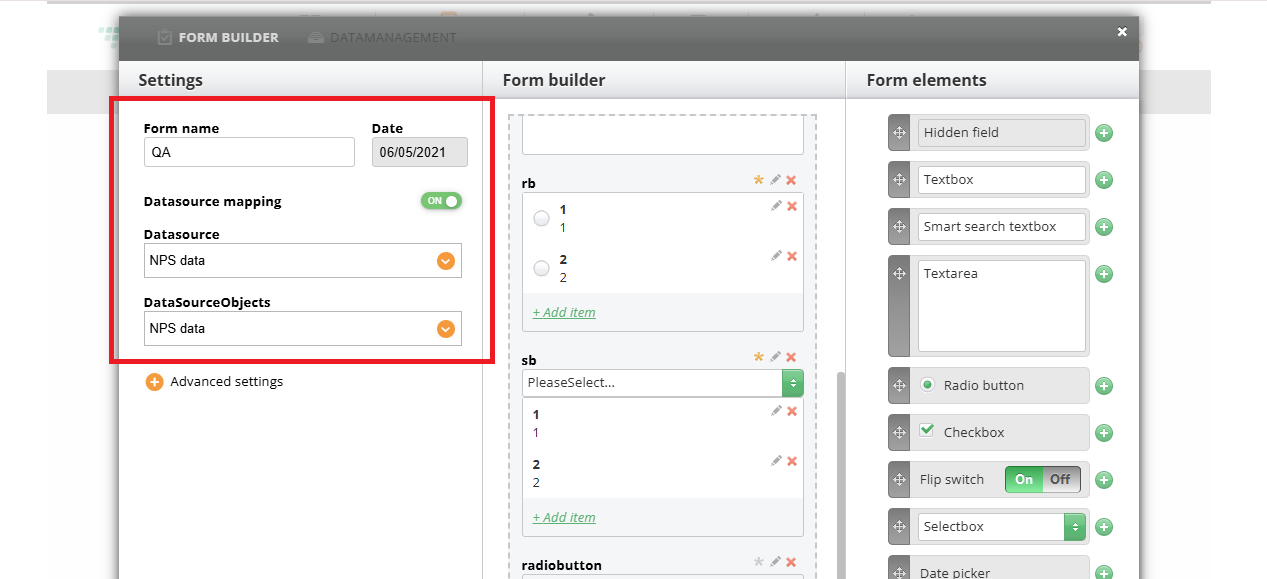
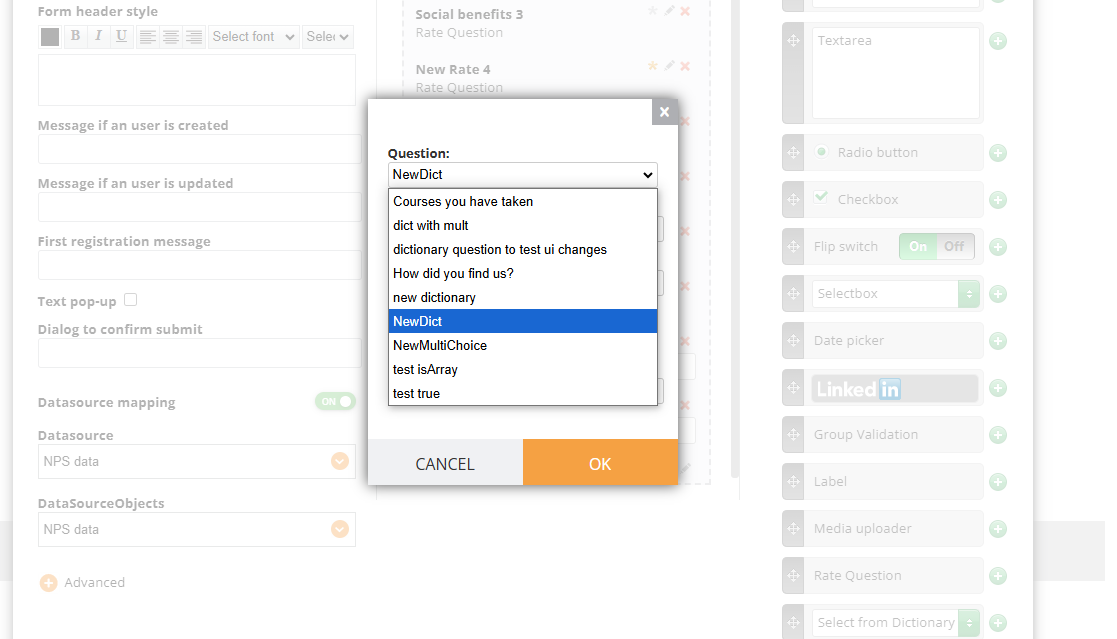
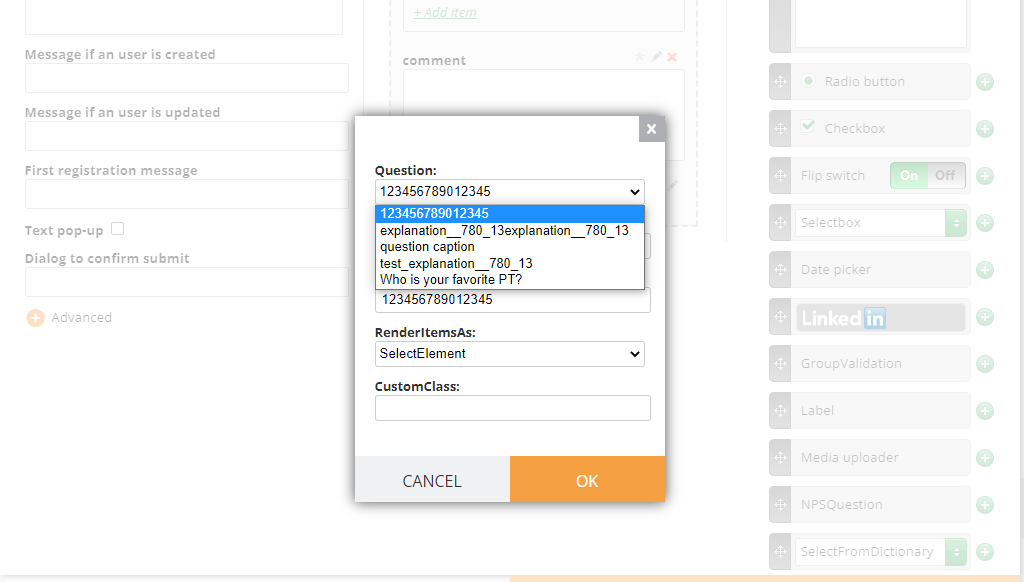
If you use Datasource mapping, use Survey Question. You do not need to manually type in the caption and map each question: simply select it from the list of questions previously added via Dashboard:
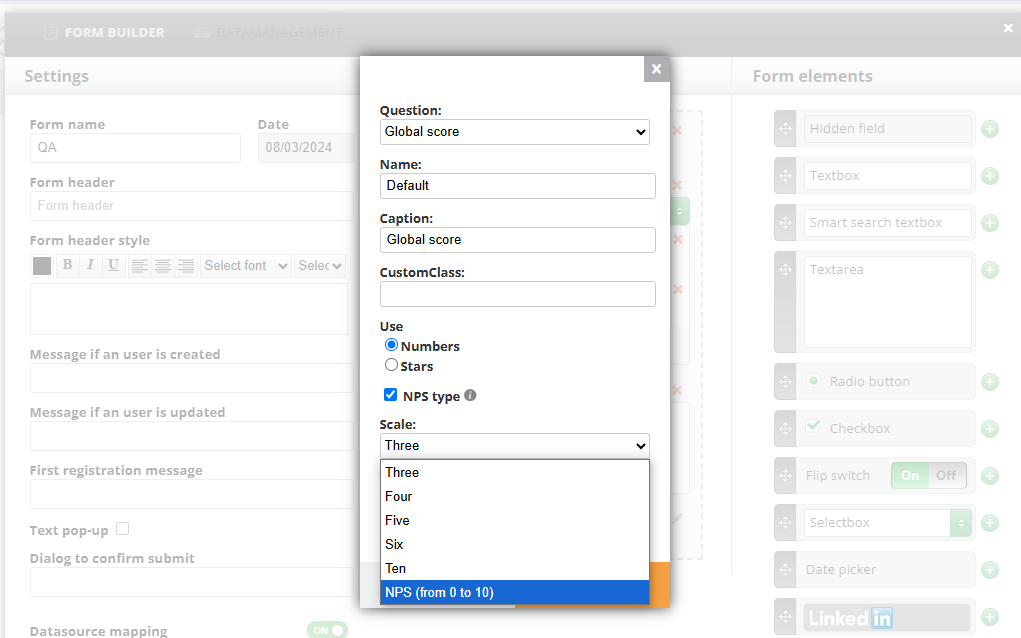
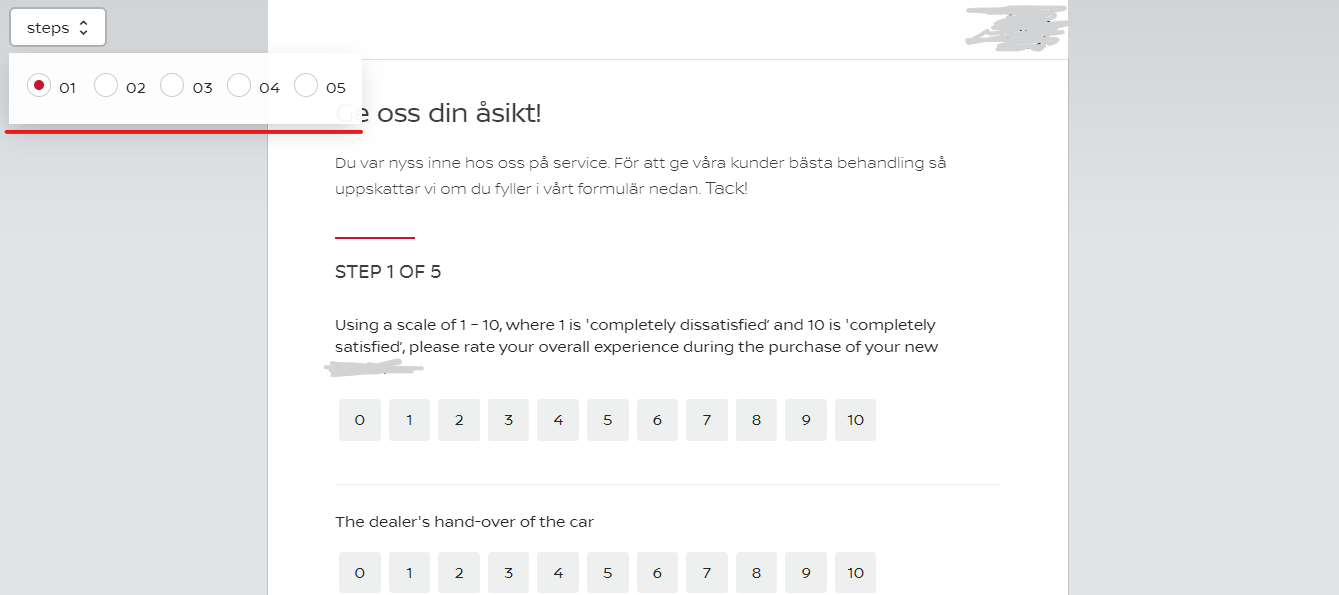
Scale options are the same, if NPS type is on, there is one extra option from 0 to 10:
Range:
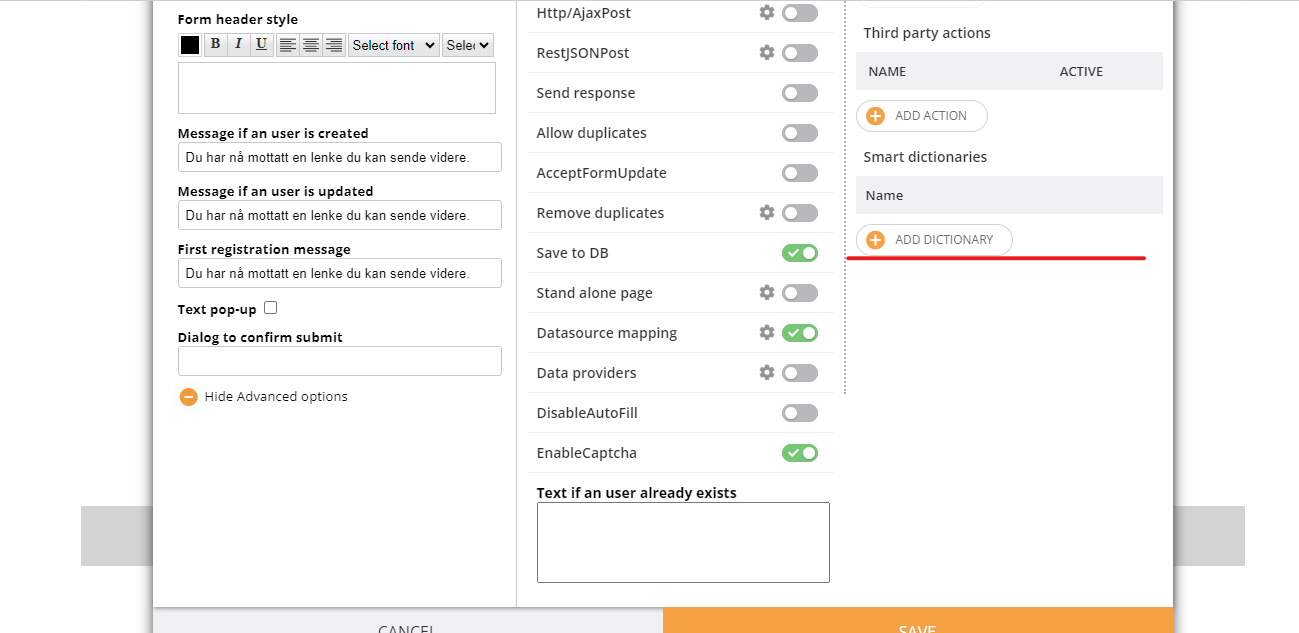
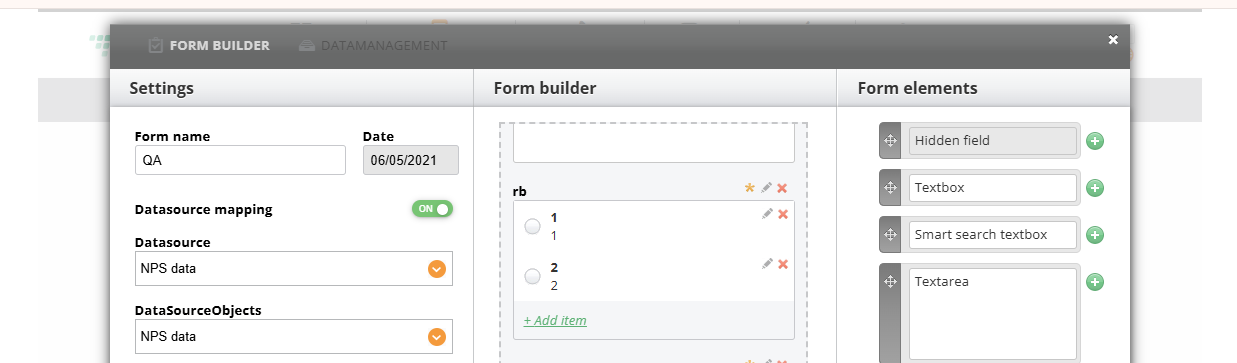
To be able to use the Survey Question, you need to enable the Datasource mapping. Now can be done here:
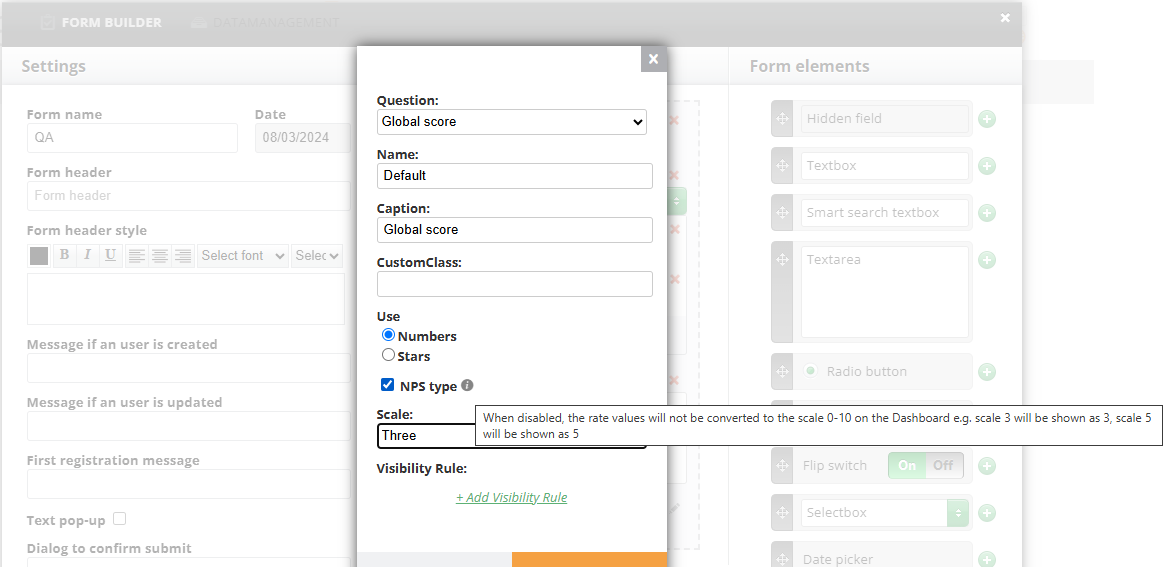
By default, Survey questions are set as NPS type (the checkbox in the screenshot), which will allow all the rates to be converted to 0 from 10 scale on the Dashboard and in data.
When disabling it, the rates will have the same scale as in the form (3 out of 3, six out of 6)
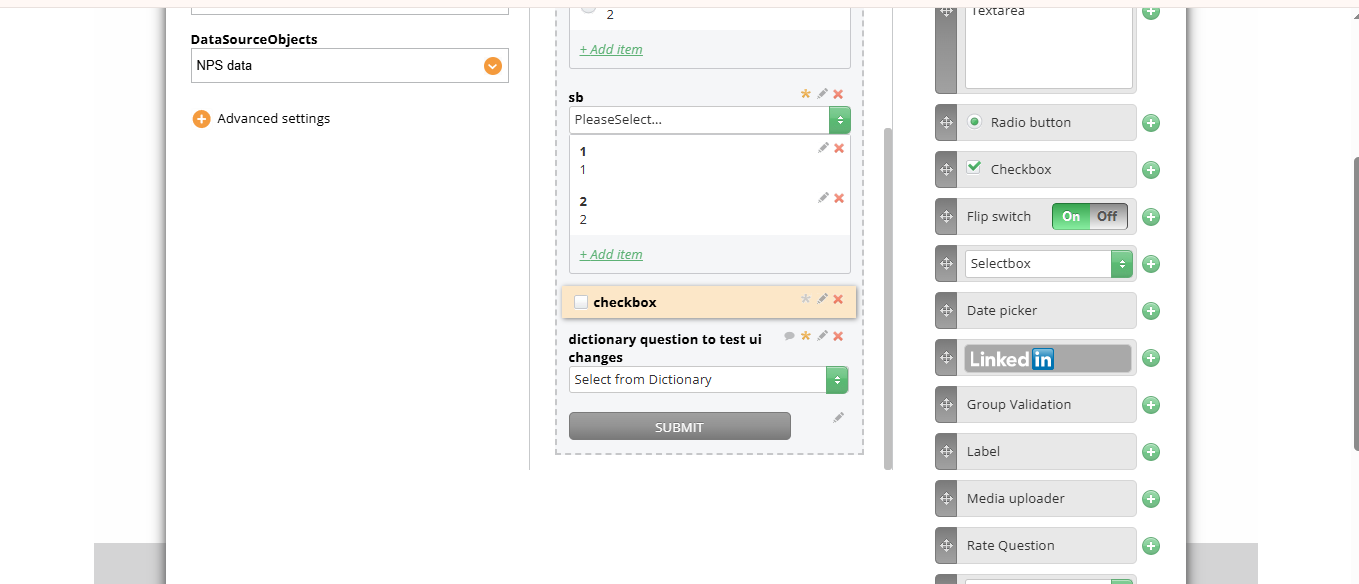
If you have your Dashboard set up with questions, you can add dictionaries to the form. For example, not just questions that require rating but questions that give A, B, C answers. If you have your questions on the Dashboard, you do not need to type them again: once they are on Dash and you map your form with your Survey datasource, you will be able to choose them in the form.
The list of questions from Dashboard
NB! if testing the landing page with this type of element, you may not see these questions. They are only visible if you have a memberlink or in Landing Page Edit mode
¶ If you do not have Survey datasource with dictionary questions set, you can use radiobuttons for a small number of questions or Smart Search Textbox for a larger number (usually the questions are uploaded via Excel)
If you need to change the order of options, click on the select area of the question
Within the area highlighted with red
And change the order by dragging. For changes to be applied, save the form and reload the landing page containing this form.
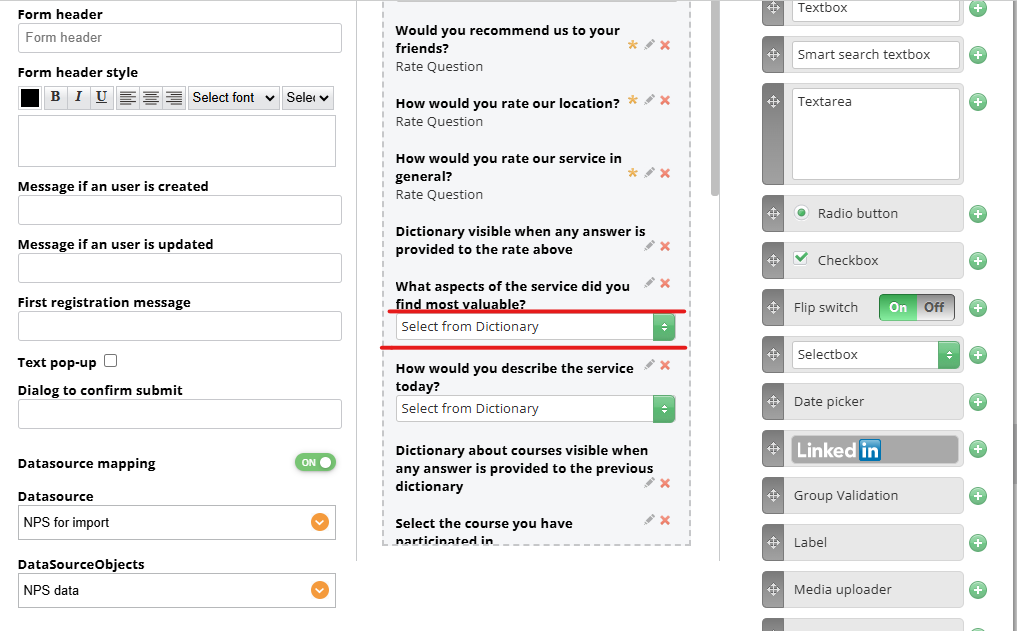
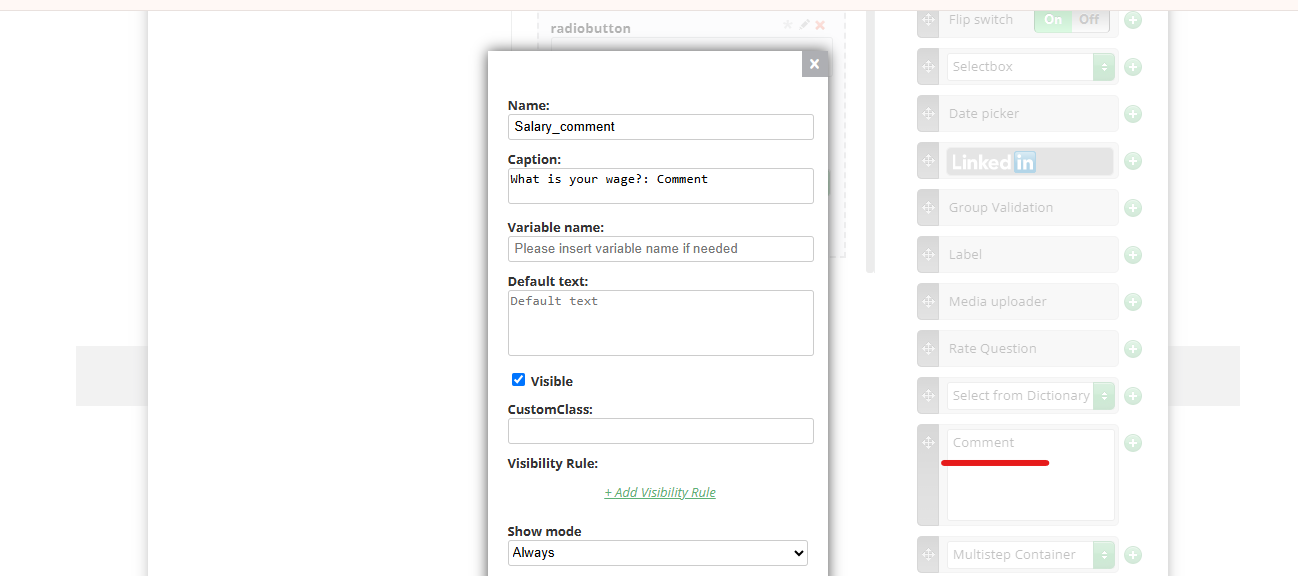
For example, you have a question (Rate or Dictionary) and you want to add a comment that will be visible all the time or will be seen if a member provides a low rate or answer “unsatisfied” and you would like to ask for additional details (to make a question seen under certain conditions, please, check this article).
If you have a mapped form (form that will be using questions from Dashboard for Survey), you can add comments in a few different ways:
1. When adding Rate or Select from Dictionary, there is a checkbox asking “Add a comment connected to this question”. If it is checked, after saving there should be an automatically added Comment, no additional action needed;
2. If Rate and Select from Dictionary have been added previously and now you need to add a comment to them, here (shown in the screenshot), click this icon. When it is colored, the comment connected to this question exists; when it’s grey, it does not exist;
3. If this element is selected without creating a question before that, just connect it to the first question available;
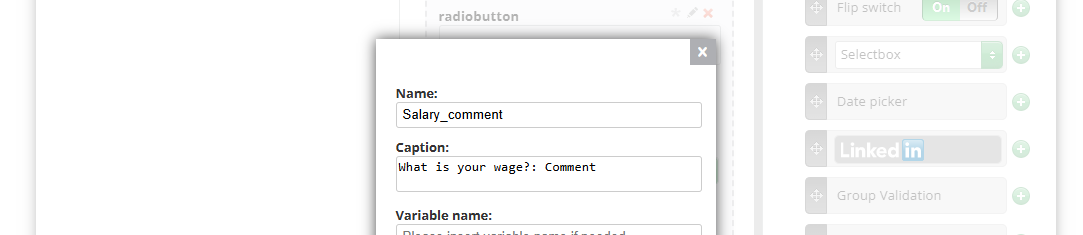
It will have the same name and caption as its parent element, but with the next changes, the name will have a “: Comment” added and the caption will have “_comment” added. For example, Survey Question with the name “NPS_Score” and the caption “Would you recommend our services to your friends?”. The comment element will have the following values: name“NPS_Score_comment” and the caption “Would you recommend our services to your friends Comment?”
But the Name and the Caption are customizable;
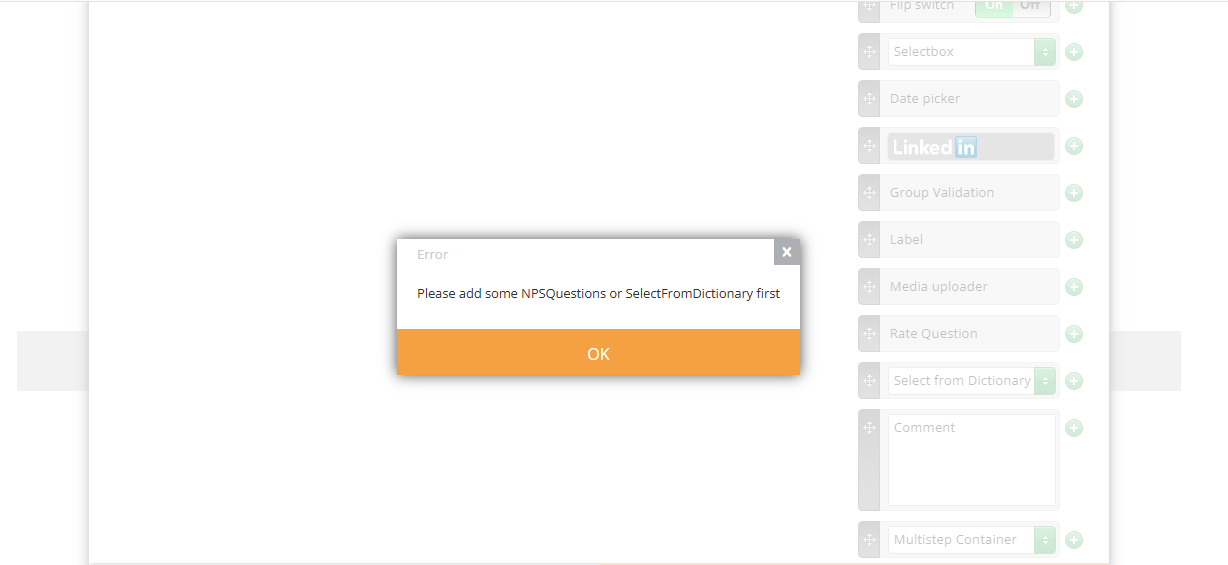
Cannot be added unless Datasource Mapping is enabled and Rate or Select from Dictionary are added to the form.
This element also has required (mandatory) * option;