¶ Guides on Each Step
How to Enable Survey Builder for Customer
Old Platform Features not Available in Survey Builder yet
¶ Access
To access it, log in and hover over Statistics and go to Surveys
If you do not have Survey Builder, contact your tech advisor to enable it (check this article to enable Survey Builder)
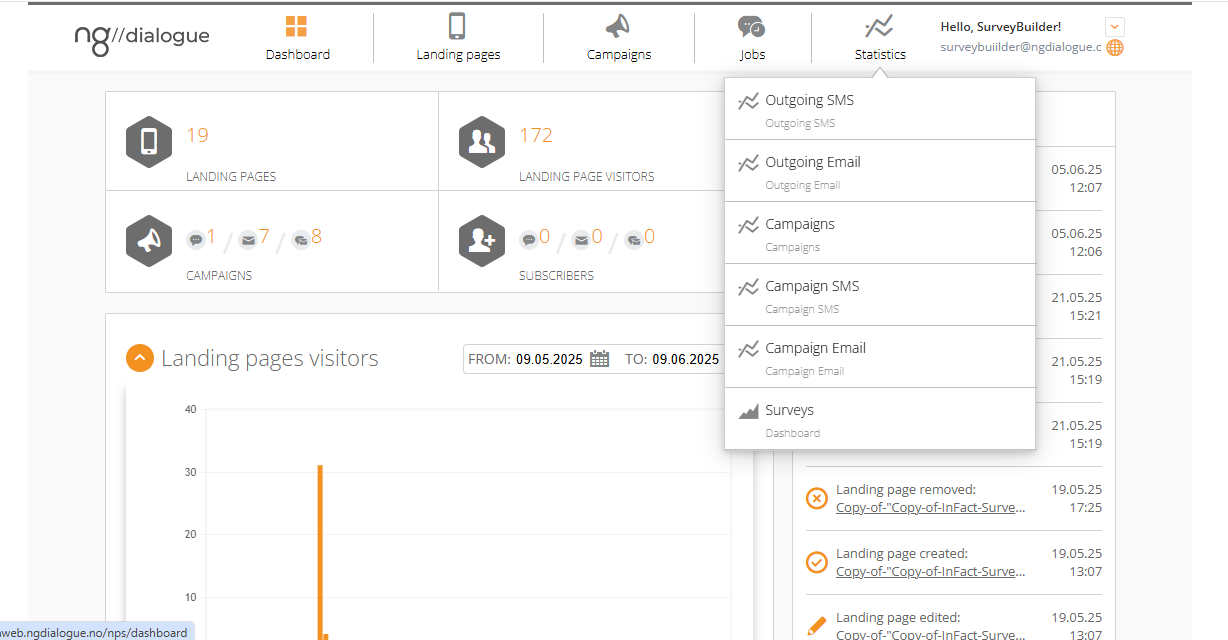
When you are at the Dashboard click “Surveys” and you will see Main Menu:
¶ Creating Questions
Lately, the option to add questions directly in Survey Builder will be accessible, but for no,w it needs to be done prior to setting up a survey:
¶ Question Guide 1. Go to Questions
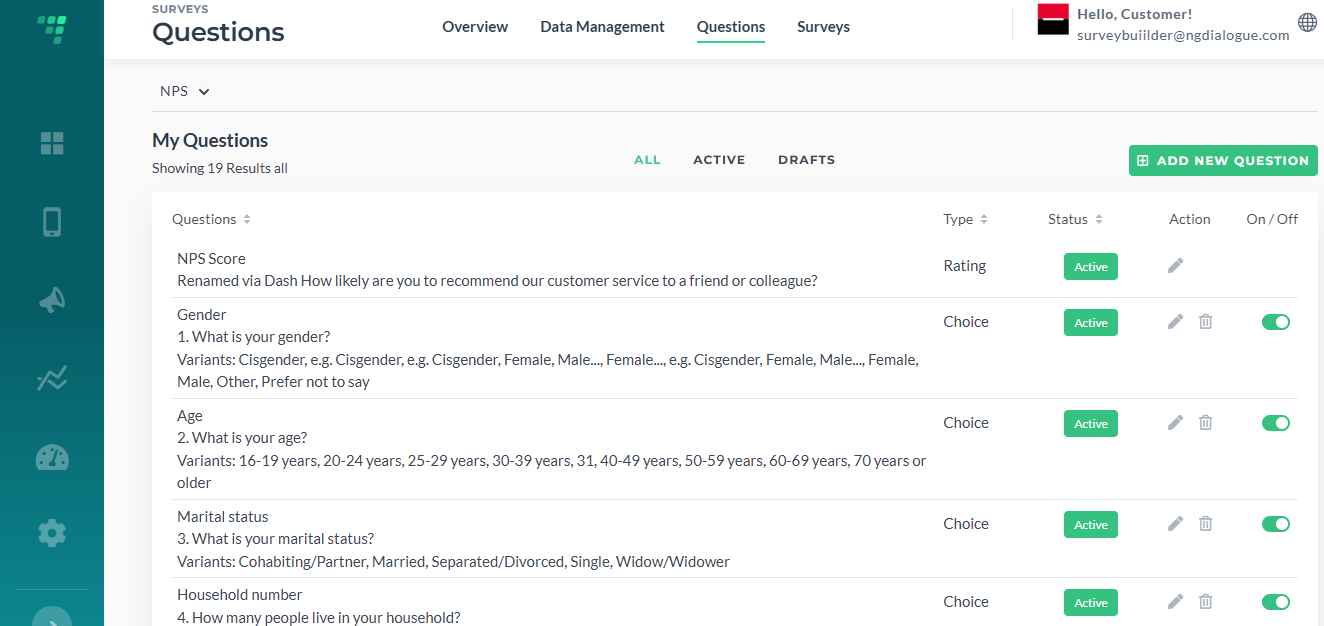
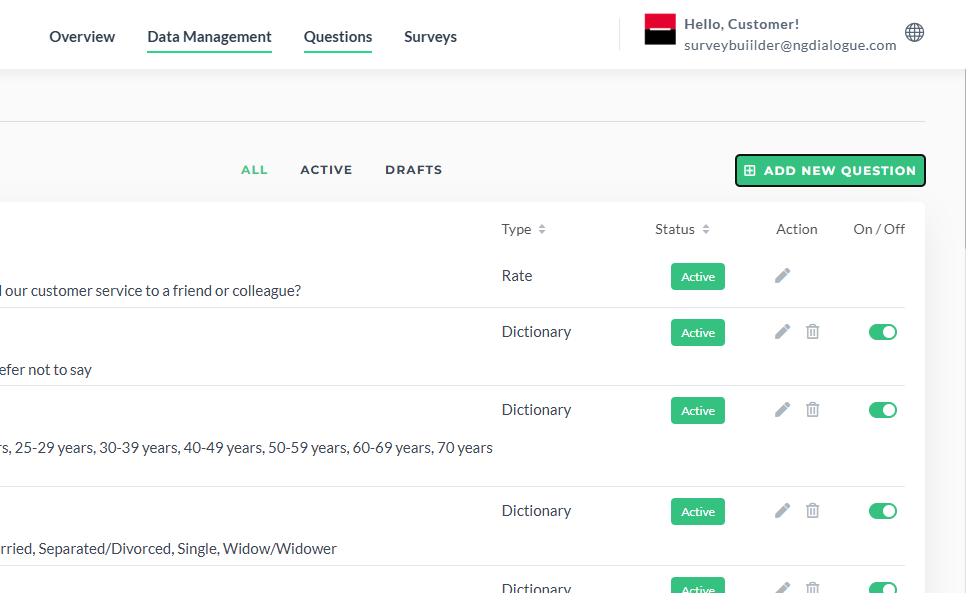
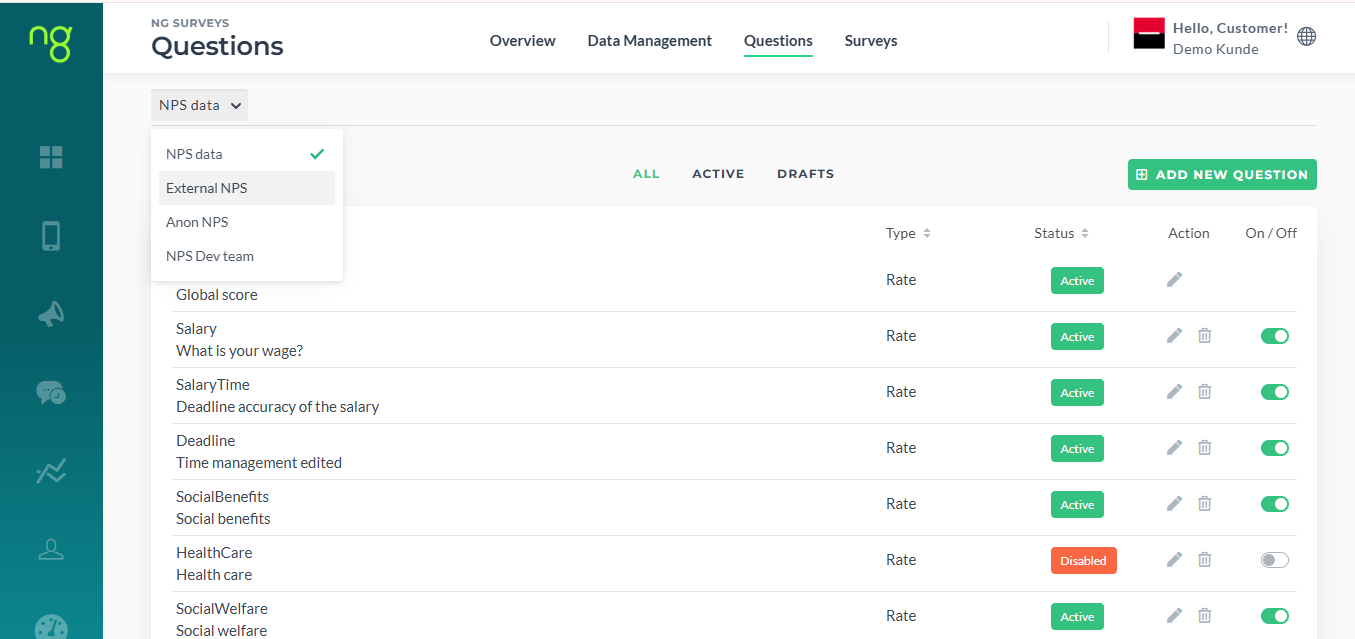
Questions have three sections: all, active and drafts. You can add/delete questions, activate and deactivate them.
¶ 2. Click Add New Questions
Question has a caption and a short name. For example in a question on the screenshot online_facilities is a short name and How happy are you… is a caption.
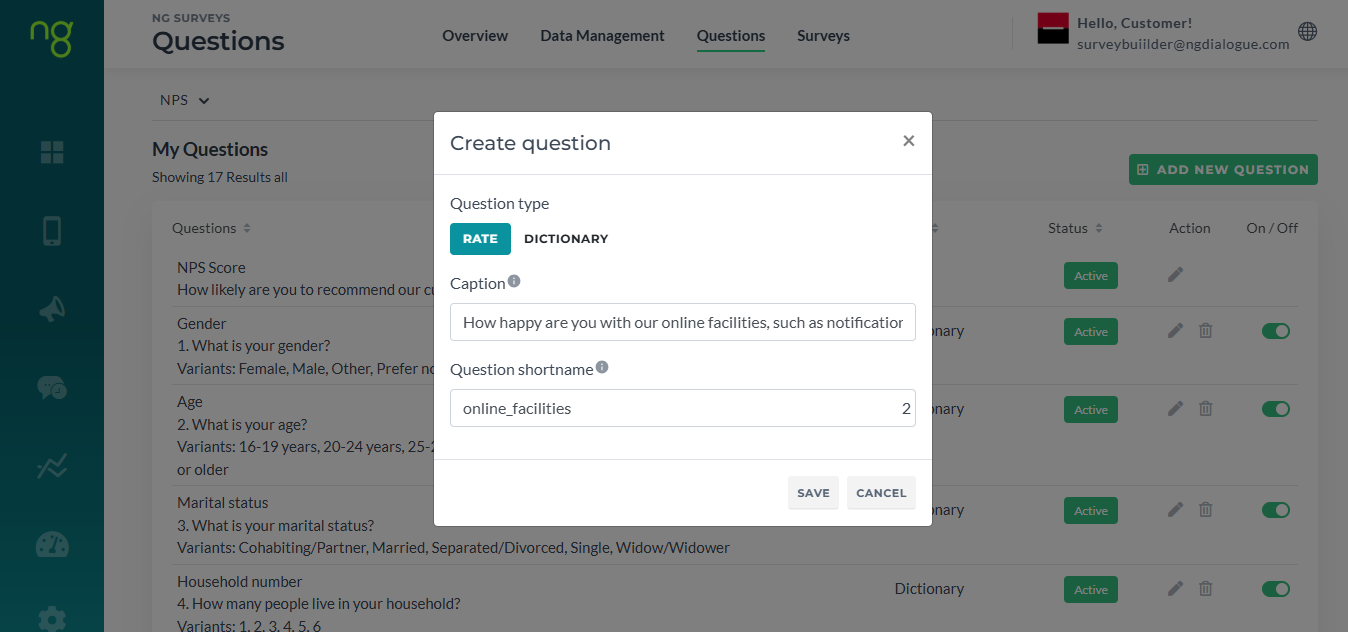
Rate question is a question where answers are numbers, points, stars. When we add them in Dashboard, we can only set up caption and short name. The rest (scale, required or not) can be managed via Survey Builder later.
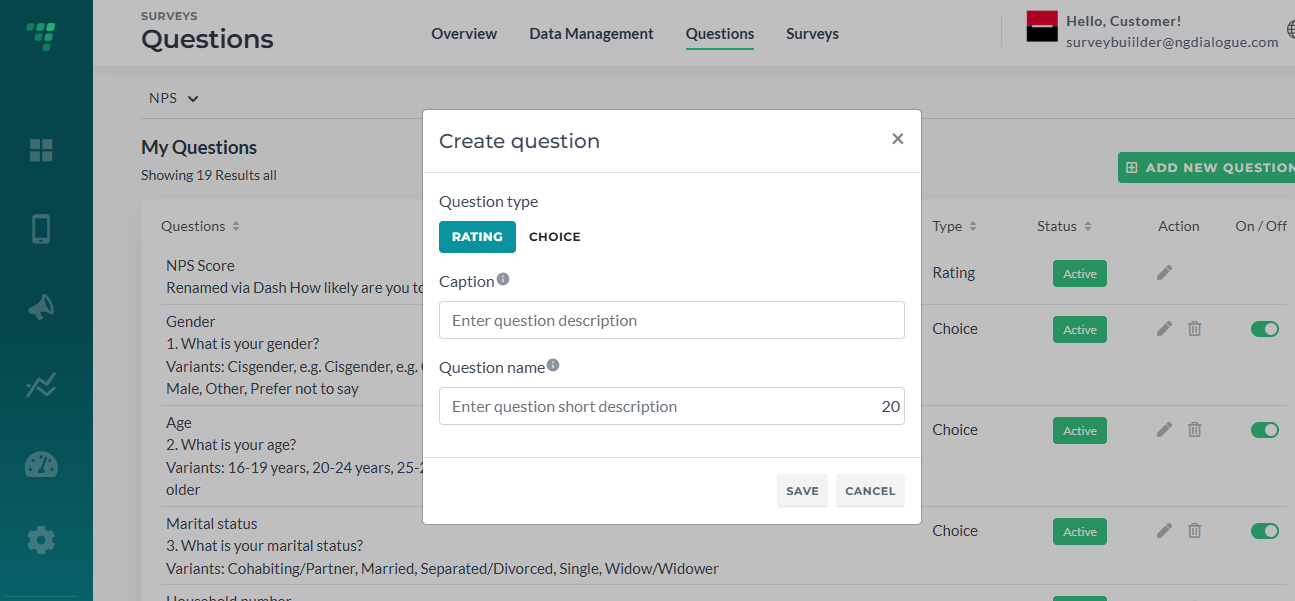
Choice question is a question where answers are provided not as points but as options. For Choice-type question, we also have a dictionary field. This basically is an answer option. There must be more than 1 option (for example Yes and No).
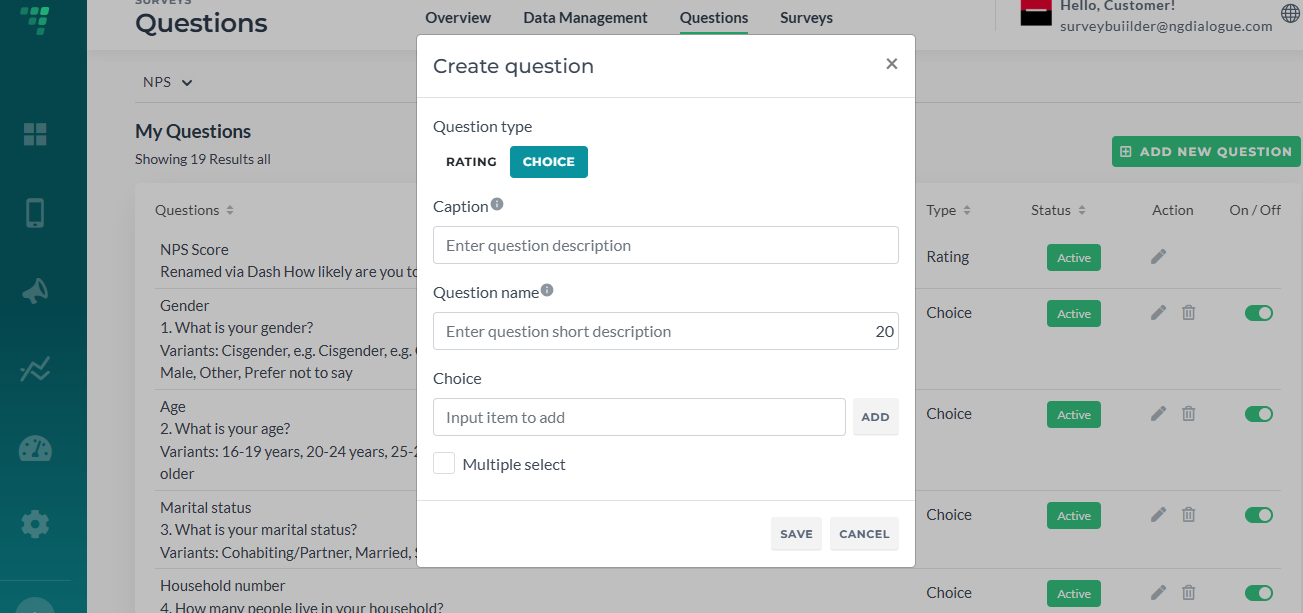
Multi-choice dictionary question
If, for example, your survey includes a question “Which courses have you taken?” and there should be an option to select more than one, you can make your dictionary question a multi-choice. Just tick Multiple select checkbox. You can set up the limit for the multiselect question via Survey Builder.

Open Questions: create Select from Cbut do not add any dictionaries (options).
¶ 3. Different Datasources
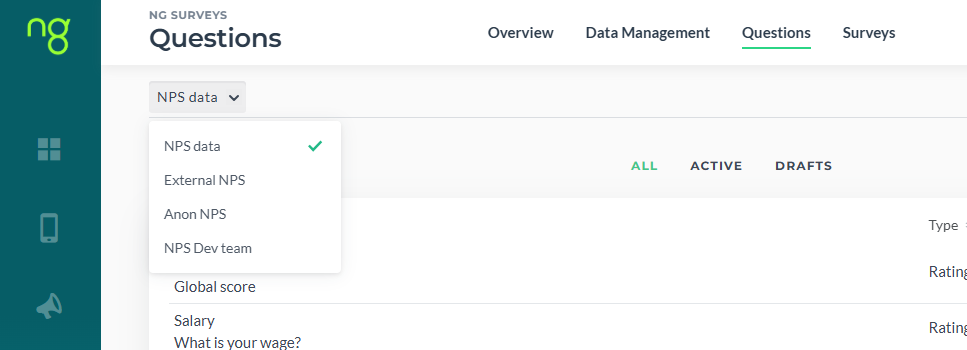
Please note that usually customers have one datasource (storage of records, member records or answers records in our database) but sometimes you may have more than one. For example, one is for your anonymous survey and the second one - non-anonymous with a pre-imported recipients. So make sure you add questions to the correct datasource.
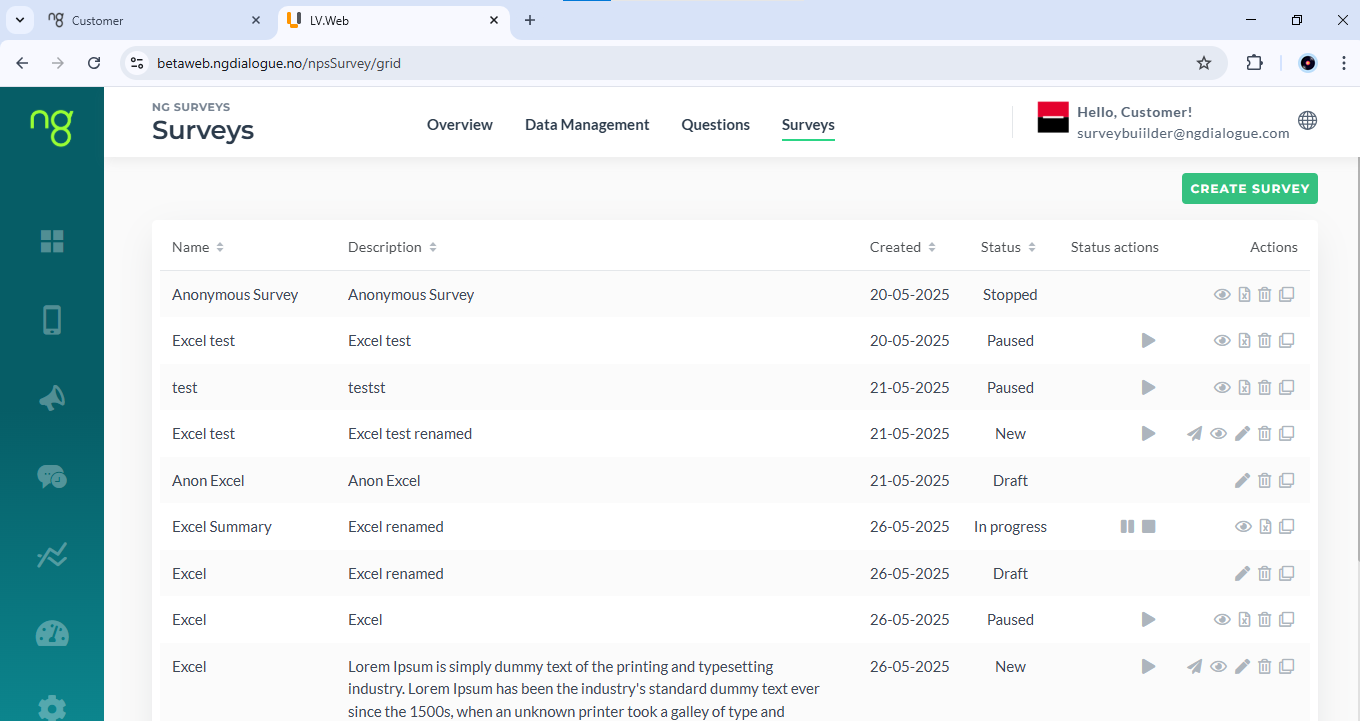
¶ Create Survey
Once you have your questions in order, you can proceed with setting up a survey. You can always get back and add/edit/remove questions later. Click Create Survey button to start.
¶ Step 1. Questions
¶ Basics
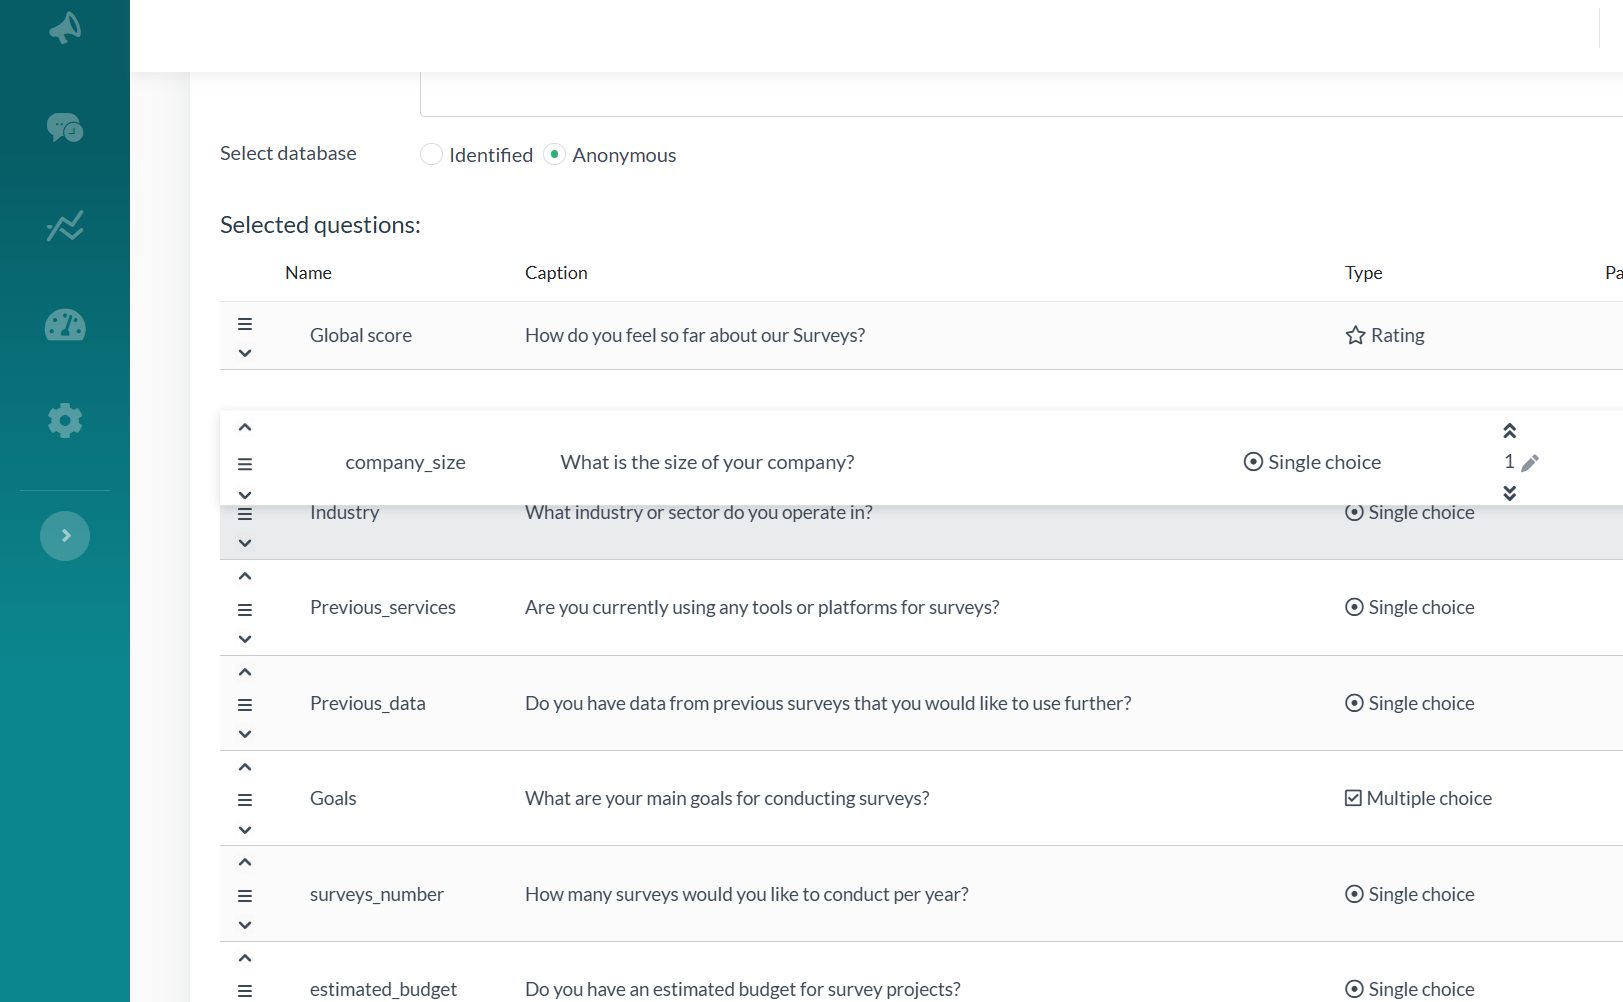
For a start, you need to enter the survey name (min 3 characters and max 20), optional description (up to 250 characters), select data base (will be created by tech team when setting up your account). If you have only one datasource, it will be selected automatically.
Identified database: With an identified database, you can send surveys directly to your member list. Each response will be linked to the correct respondent.
Anonymous database: With an anonymous database, you can run surveys without linking answers to individuals. You can use your existing customer list or upload an Excel file. Results will only be shown in a hashed (hidden) format.
If you do not have an anonymous database, ask tech team to create it. Soon we will implement a feature that allows users to add this database themselves on this step.
Name and Description can be edited any time even if the survey is running:
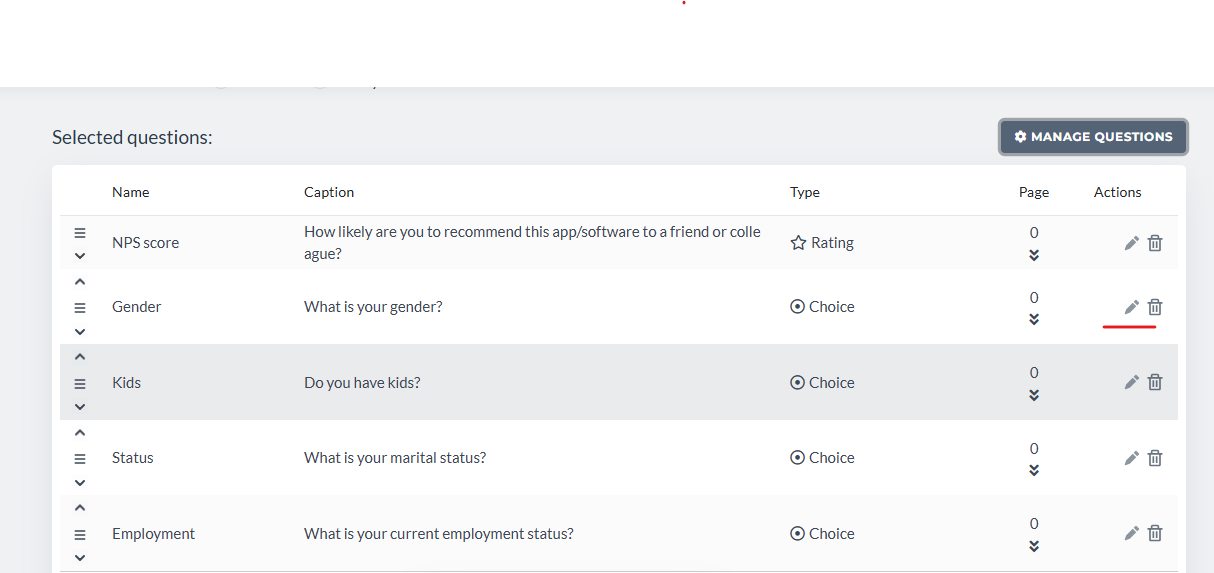
¶ Manage Questions
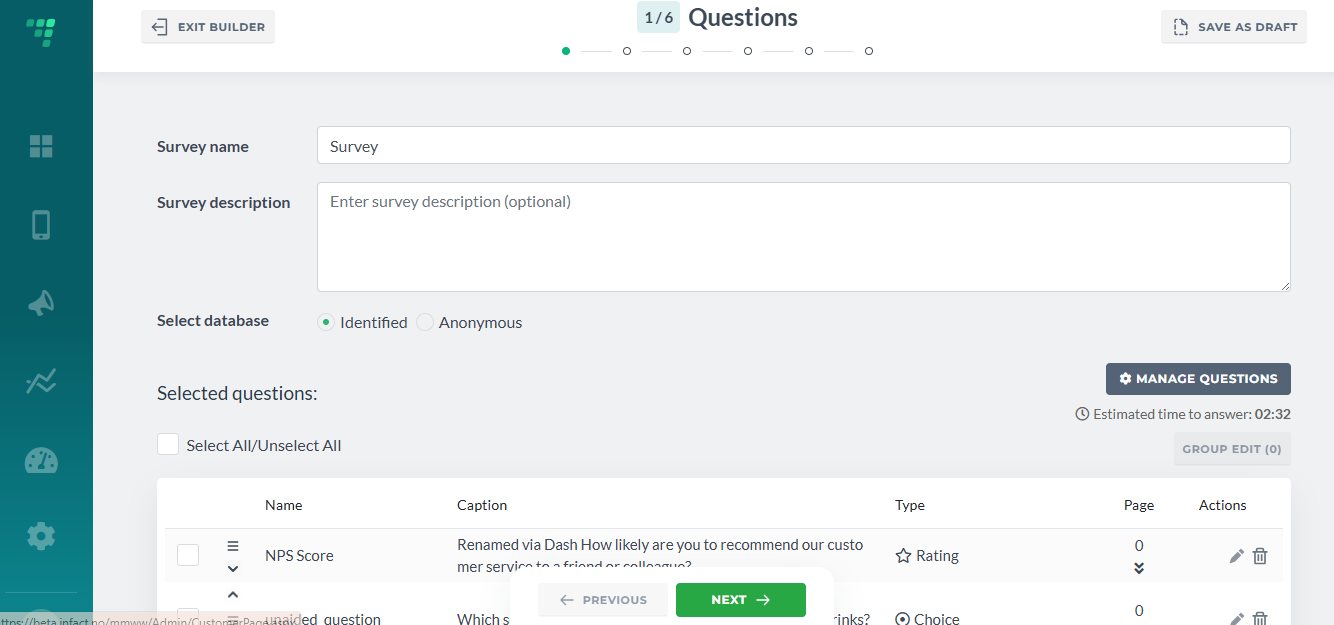
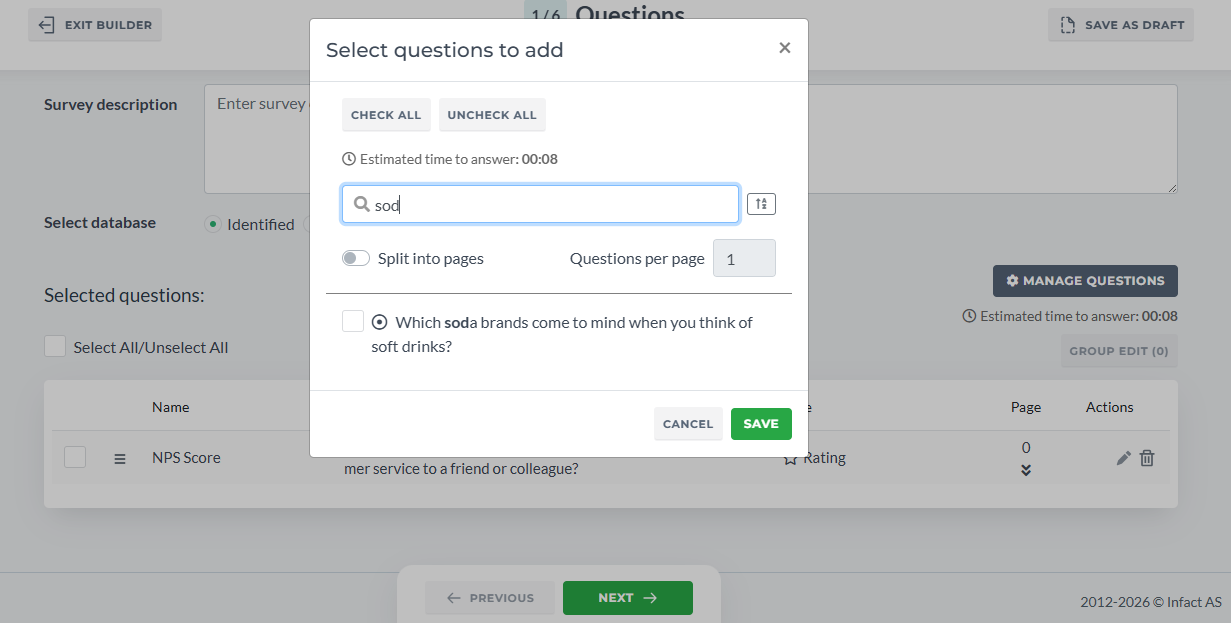
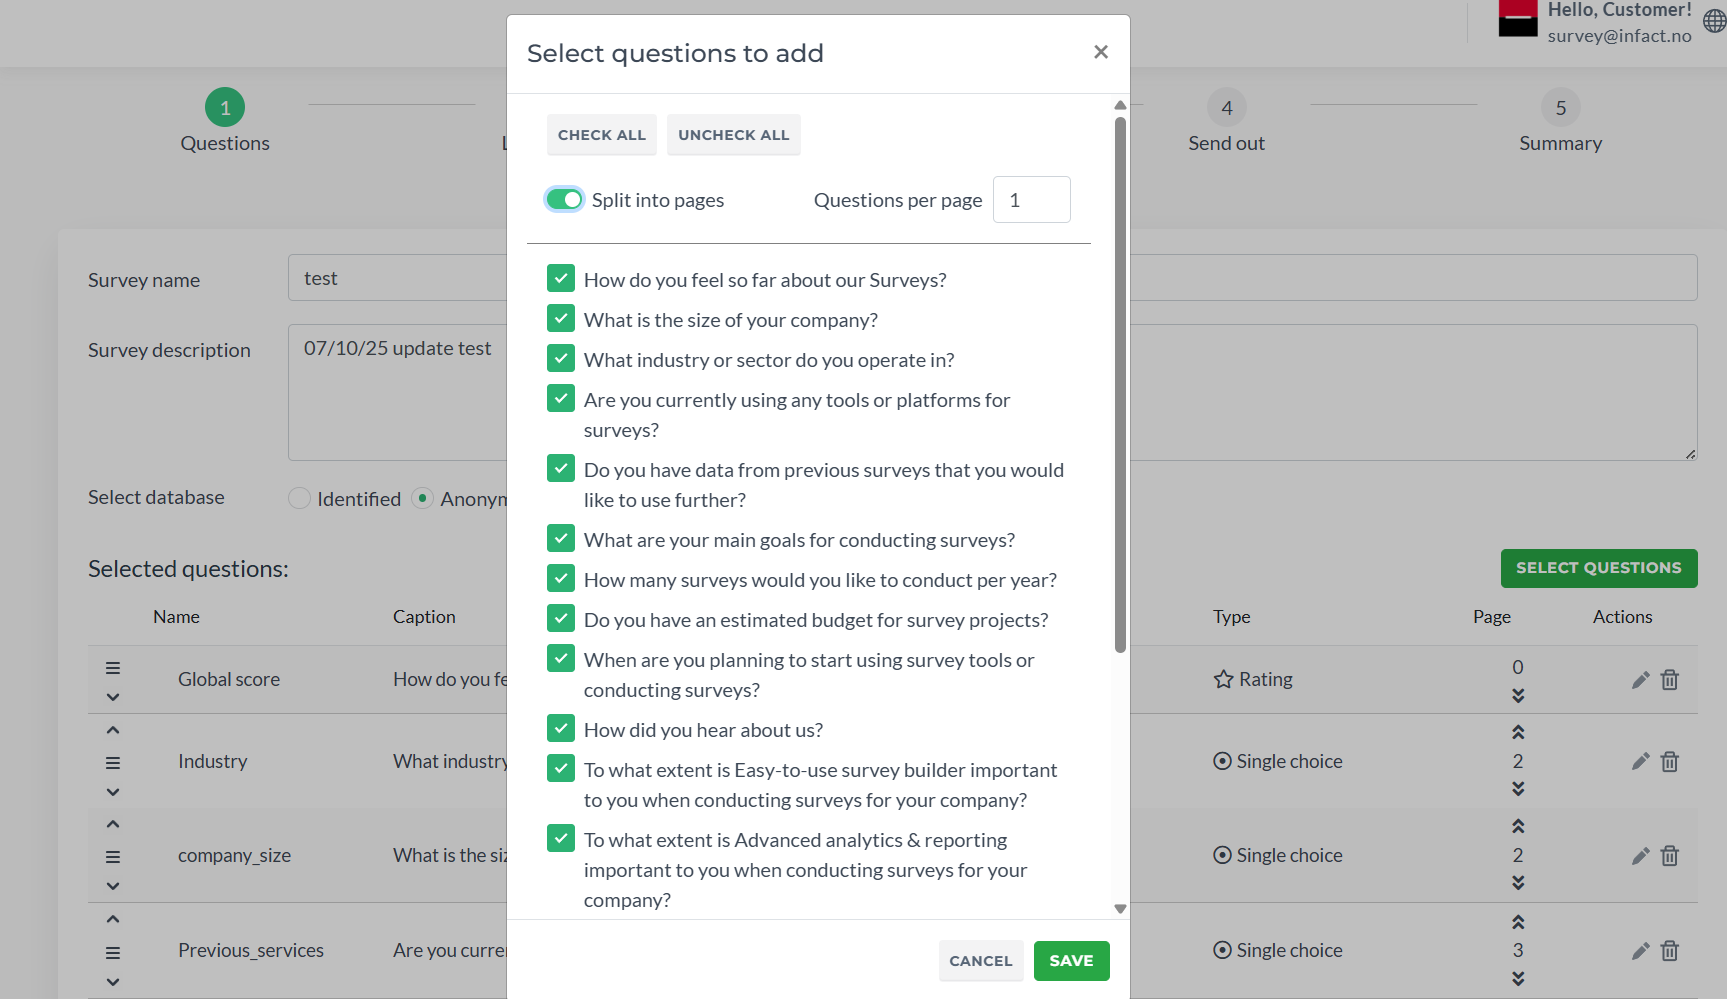
- You can add questions via the window with options Check All and Uncheck All or you can add/remove question by question. At this step you only add questions. Editing is done separately after the questions have been selected
- To add questions on differents pages, use Split into pages toggle
- Questions per page's default is one meaning when splitting questions, 1 question will be placed on 1 page. But you can place 2, 3, 4 questions per page using this options
- This window manages only questions that have not been added. If you placed questions and want to change their placement, splitting, go back to this window, select all needed questions, Uncheck them, save the option and then start again
- You can use Search field and Sort option
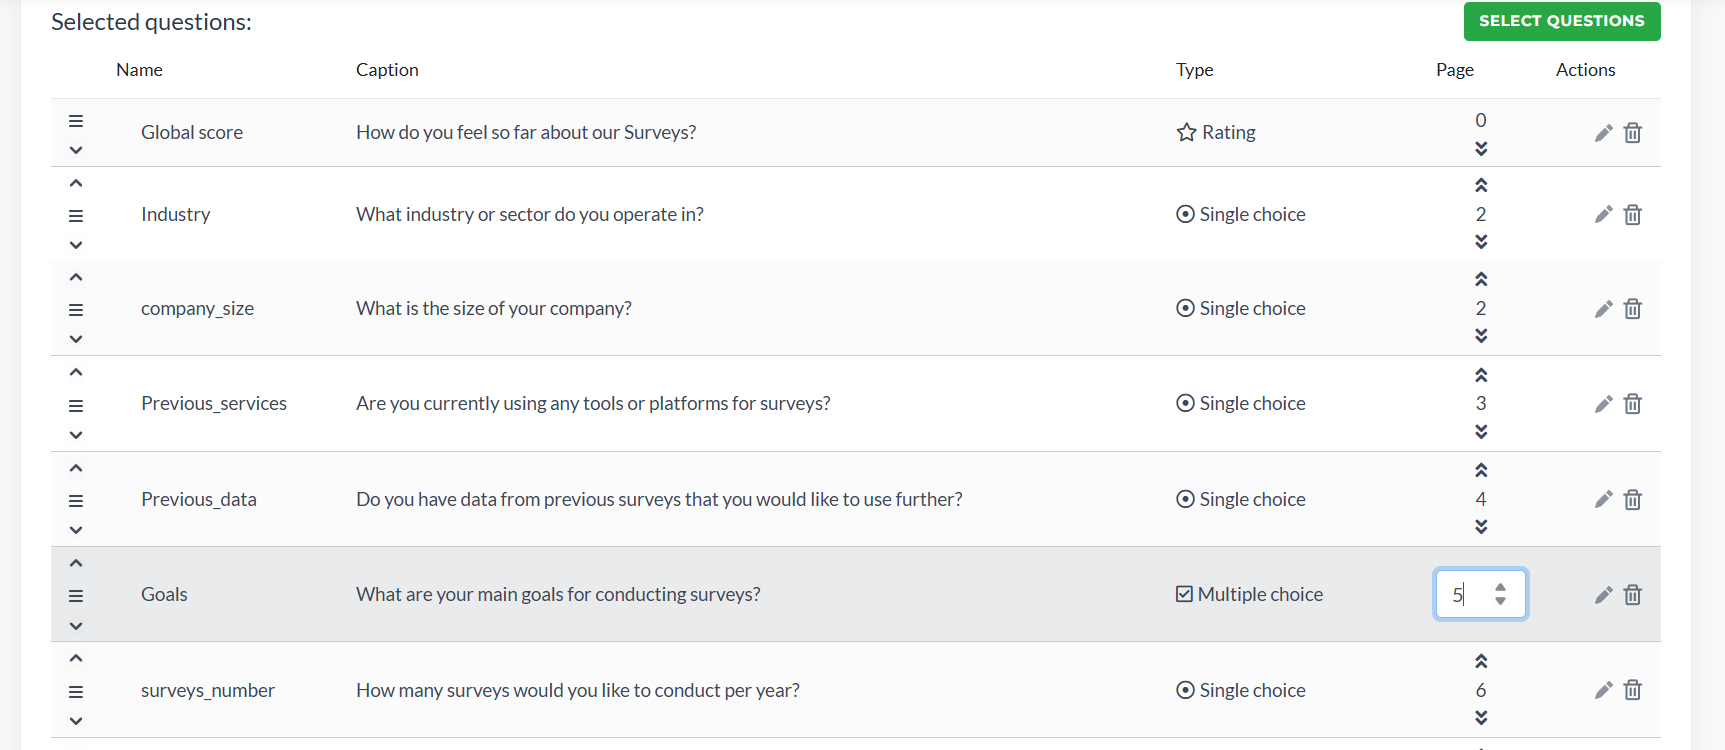
¶ Changing Questions Order
Drag&Drop or arrows on the left to change the order for a one-page survey, which is used by default and Double Arrows with number input on the right to change the page if multipage container is used:
¶ Editing Questions
Clicking Edit allows you to customise questions:
¶ Main Settings
By default, questions are non-mandatory; toggle the Mandatory to change it:
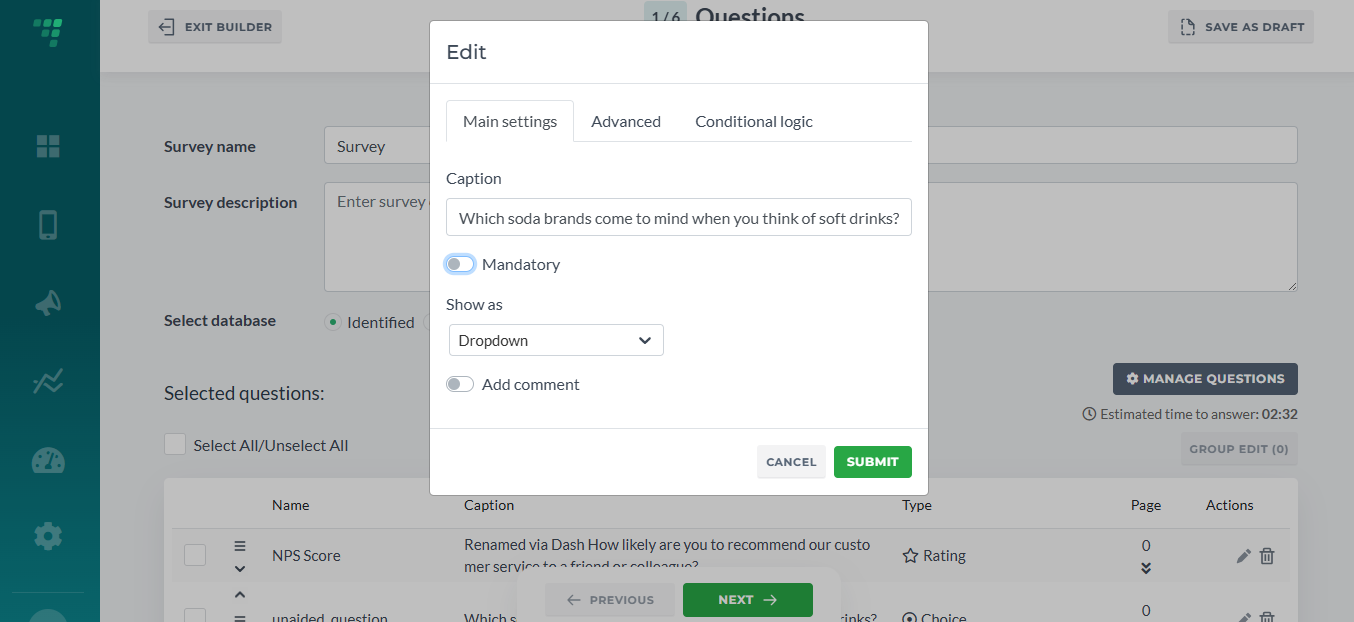
The caption can be changed as well. Note: Renaming the Caption will only work for this specific survey. If will not rename the actual question that can be used in more than one survey. To go that, go back to Question on Dashboard and rename it. Also, renaming will be applied only to further usages of questions. All the previously created surveys will not be affected.
Rate questions can be shown as numbers or stars:
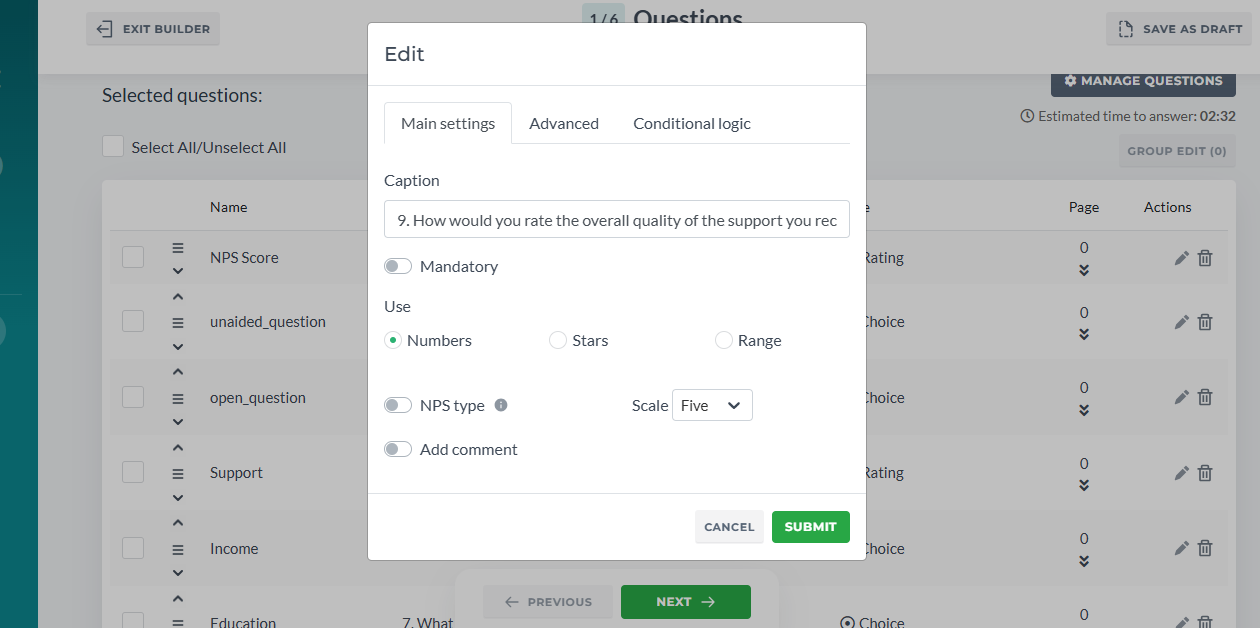
Using different scales is supported as well:
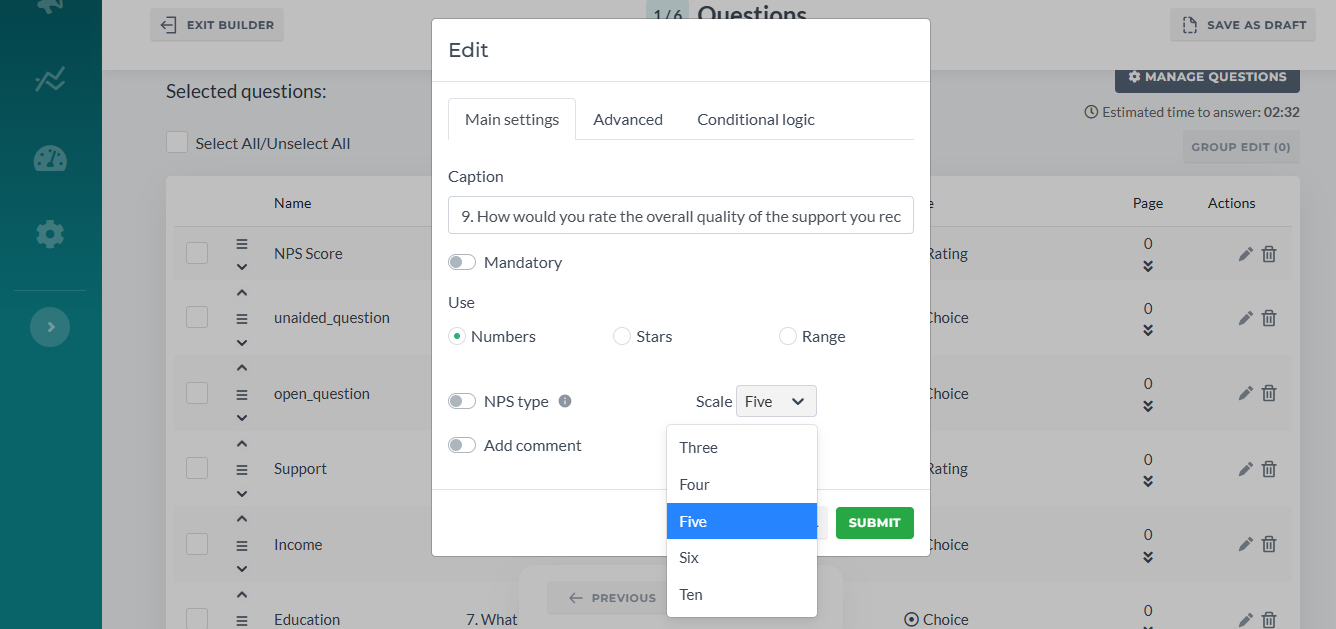
By default NPS type is on (as our cards use this scole for their metrix) and all rates will be converted to NPS scale. Toggle it off to disable. Also, the original NPS scale from 0 to 10 (see the screeshot above) is available only with this toggle on:

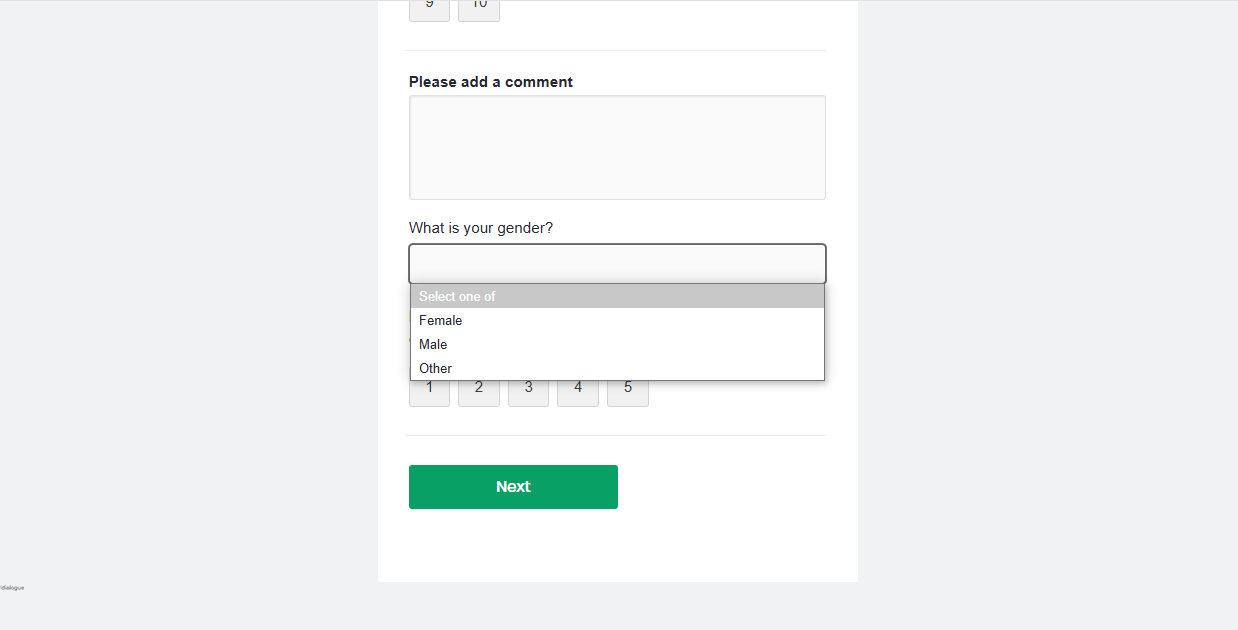
Dictionary questions with single choice have these settings:
Radio Element:

Select Element:
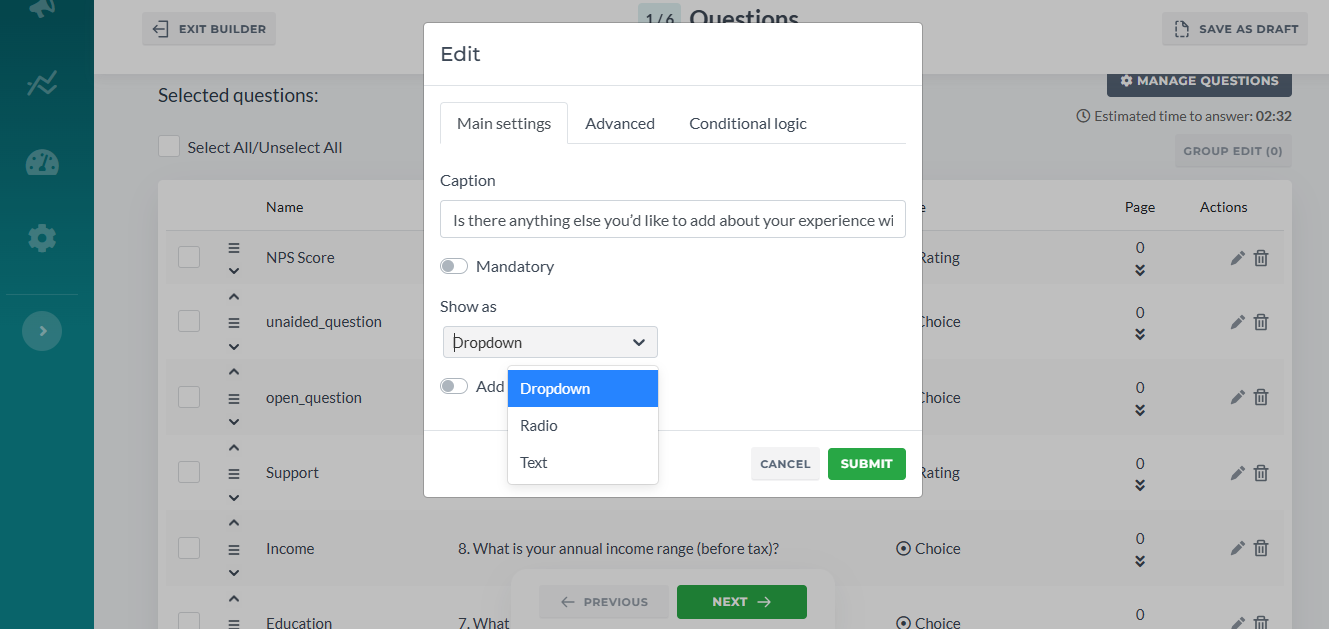
If you need to add Unaided or Open questions, use Select from Dictionary Single Choice question and select Text in Show as:
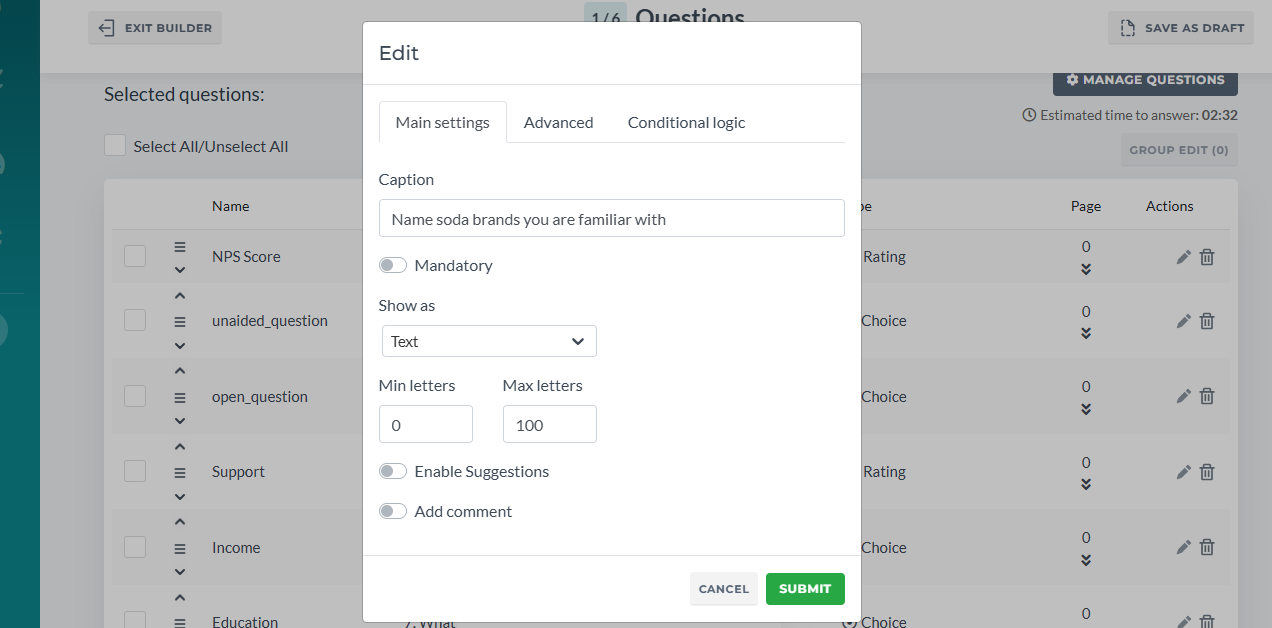
When “show suggestions” is enabled, the respondent will see suggestions which are essentially dictionaries of this question:
Each new answer will be saved as options for next respondents.
If Show suggestions is disabled, the question may either be used as unaided as well or as open question.
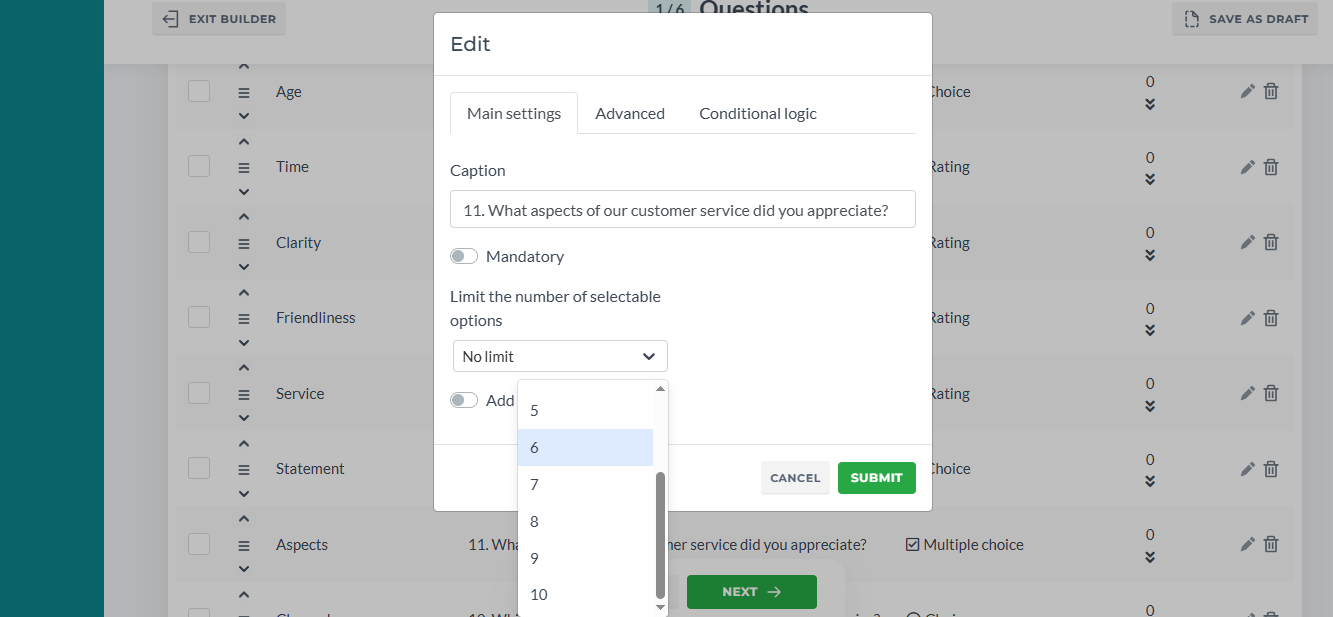
If the question is a Multiple select Dictionary, you can set up the limit:
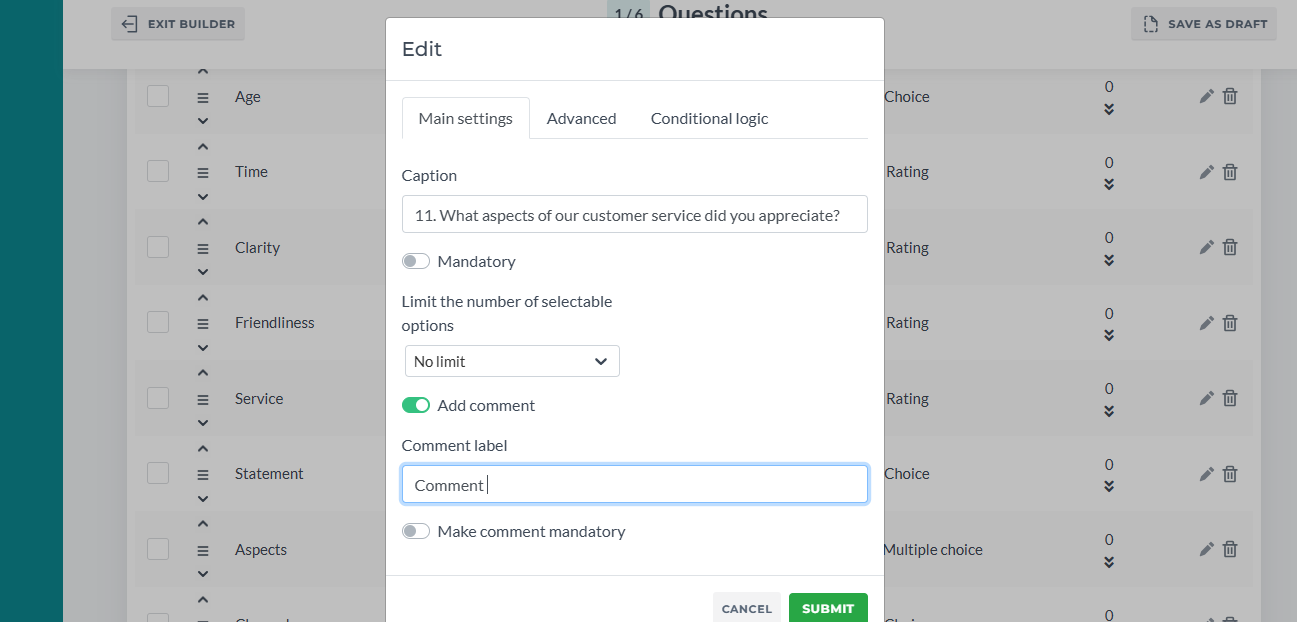
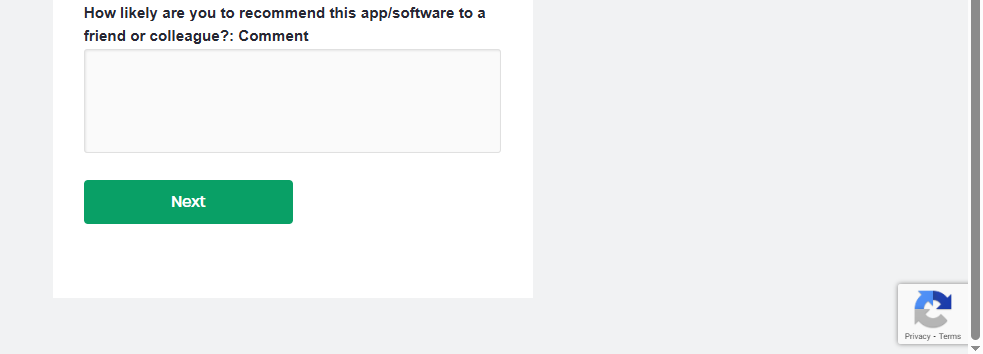
And Add Comment option that automatically adds an open area box for a comment with custom class and customizable caption. Leave it empty if you do not want the comment to have a caption.
¶ Advanced
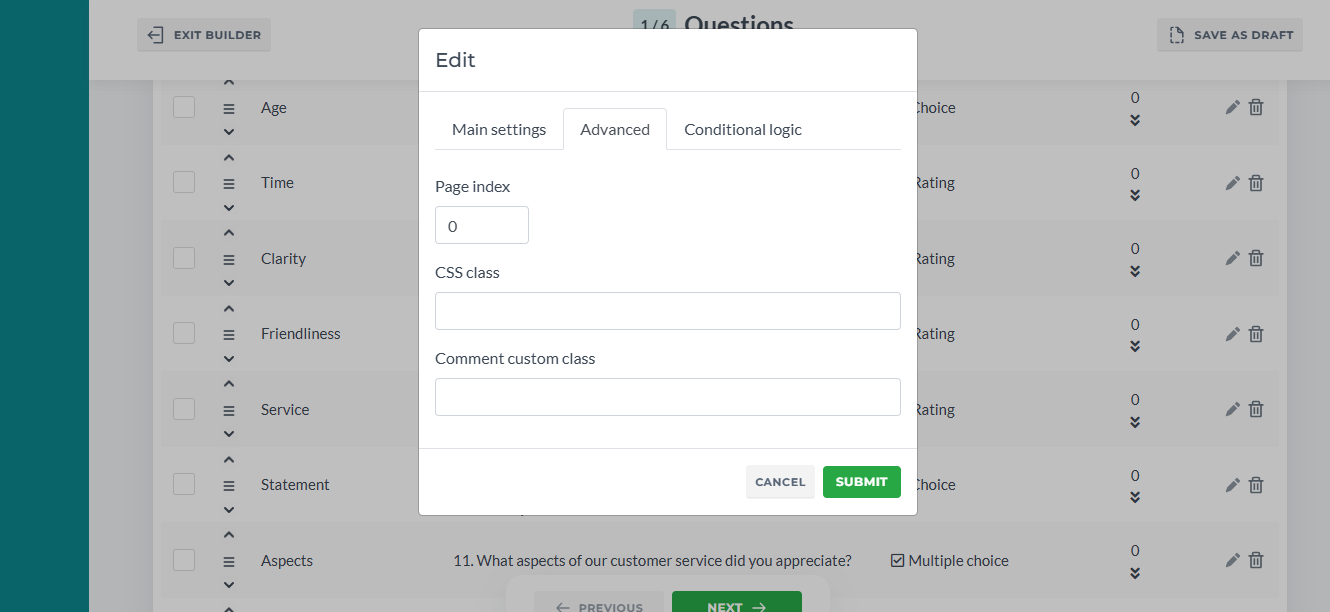
All types of questions also have the next settings: custom class (allows you to add custom classes used in coding for different styles and animation), page index, which basically places questions on pages (Multipage Container). If you want to have only one page, leave it as a default.
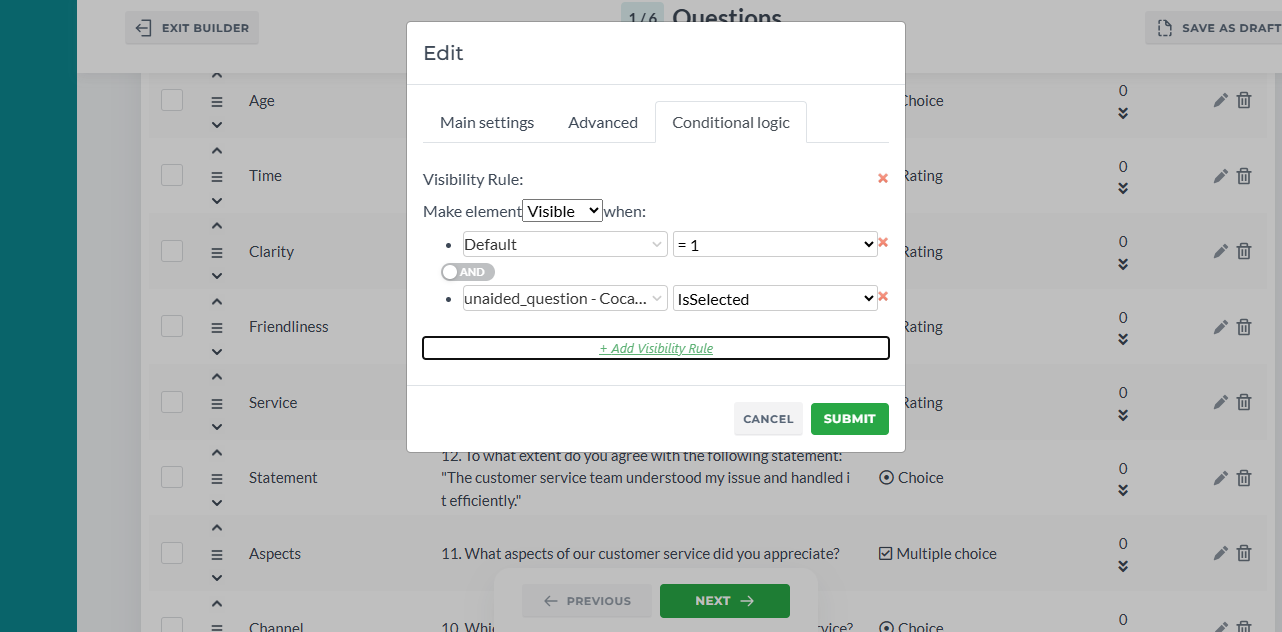
¶ Conditional Logic
Conditional Logic tab allows users to set up Visibility rules for questions. General info on Visibility Rules here
¶ Multipage Control
Apart from the page index setting in the Advanced tab, a user can change the question or questions page in Page column via arrows or input:
Additionally, when adding new questions via Select Question, you can specify the number of questions per page you want to have and place them in bulk. Note that this feature works for newly added questions only. To re-apply it for already added questions, uncheck them, save and go back to this window
¶ Landing Page
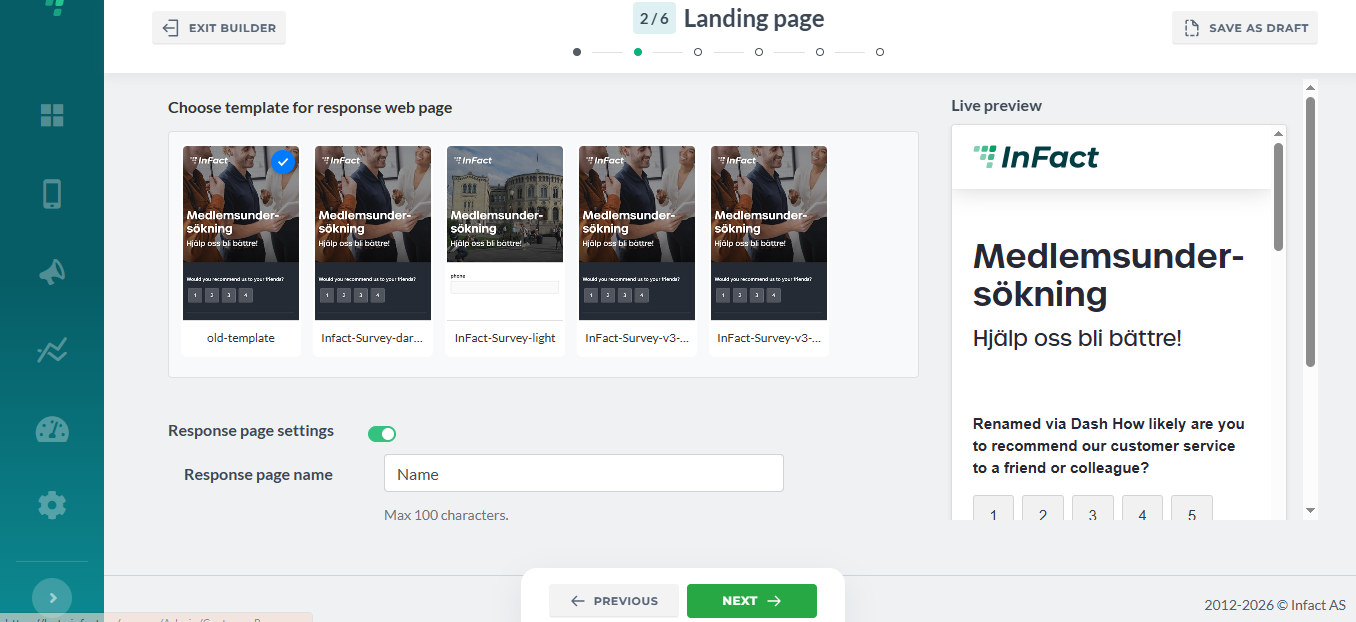
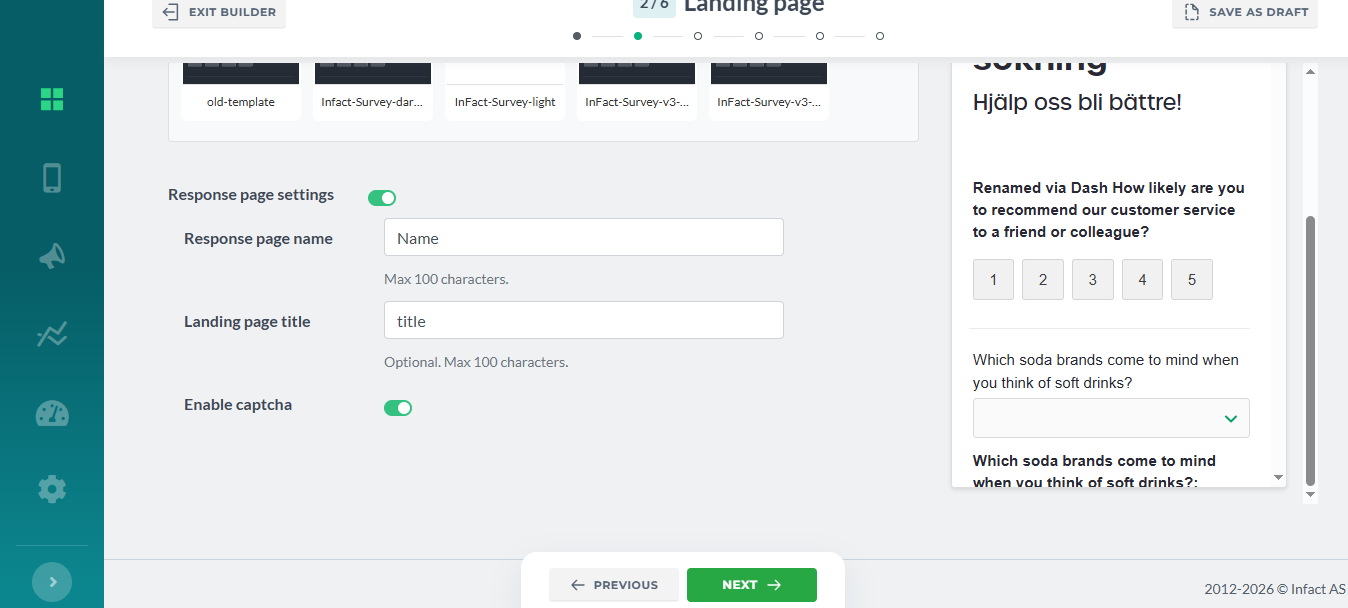
¶ Template
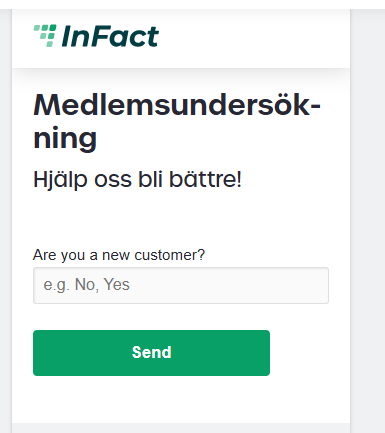
Select the template from the list. You can preview it after the survey is saved and change as well or here in Live Preview window:
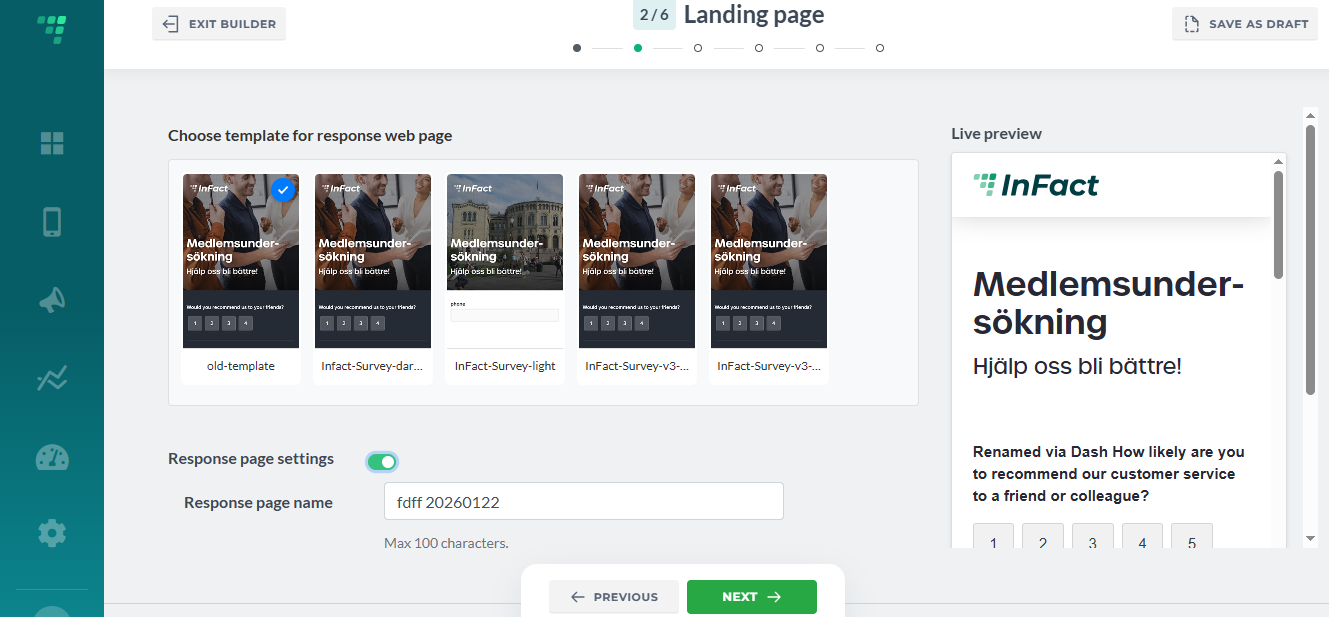
Every Customer has access to default Infact-style templates. Contact your digital advisor regarding custom-styled templates.
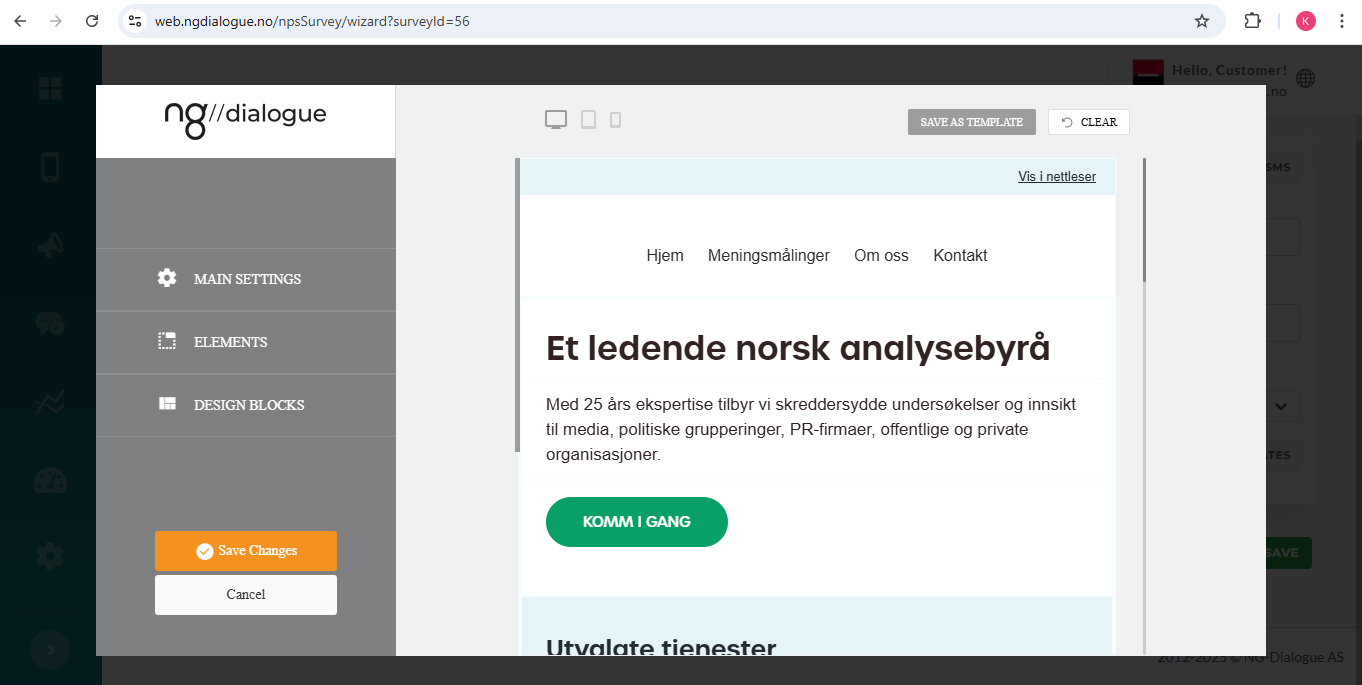
¶ Live Preview
This window shows every change live (template, question, progress tracking). You can interact with the elements there, although you cannot use it directly to edit, for example, questions. To do so, go back to the previous step.
¶ Response (Landing) Page Settings
¶ Response Page Name
Add a unique name, as this name will be used for survey links when sending out:
Internal name for you.
Helps you recognise this page in the system. Users will not see it:
By default, the Response page name is the name of the survey + creation date:
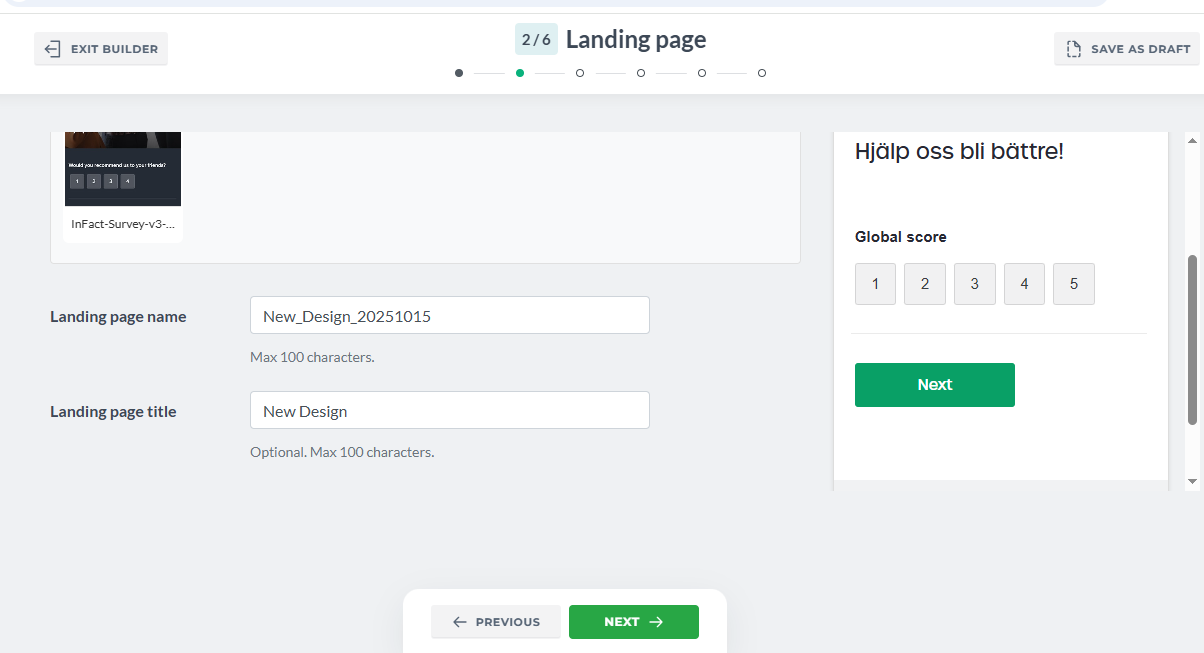
¶ Response Page Title
The title shown to users on the page (for example, in the browser tab or page header).
By default, it is the same as the survey name and if used as a tab title:

Title is optional. If you leave it empty, the title will be the same as the landing page name.
¶ CAPTCHA
Turn this on to protect the page from bots and spam.
Users will need to confirm they are human.
¶ Progress Tracking
When your survey has more than one page, you can also set up Progress tracking:
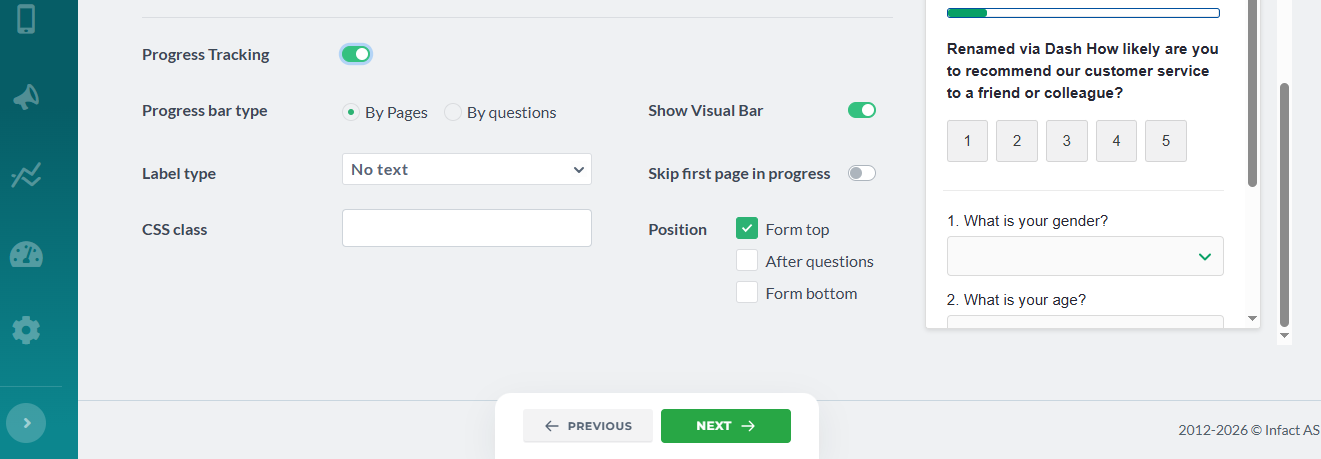
What can be modified within Progress Tracking:
- Label type - show %, show page number or nothing
- Show Visual Bar - do you want to show numbers only or show the actual progress bar
- Progress bar type - show progress by how many pages the user goes or by the questions they provide an answer to
- Skip the first page in progress - if the first page is introductory and you do not want to count it, skip it. If the progress bar type is questions, this toggle is blocked
- CSS class - assign a class that has some special style in your template settings or that you will describe later in landing page extensions when it is generated (after the survey is saved)
- Position - place the bar on the top of the form, on the bottom, after questions or combine these options
¶ Recipients
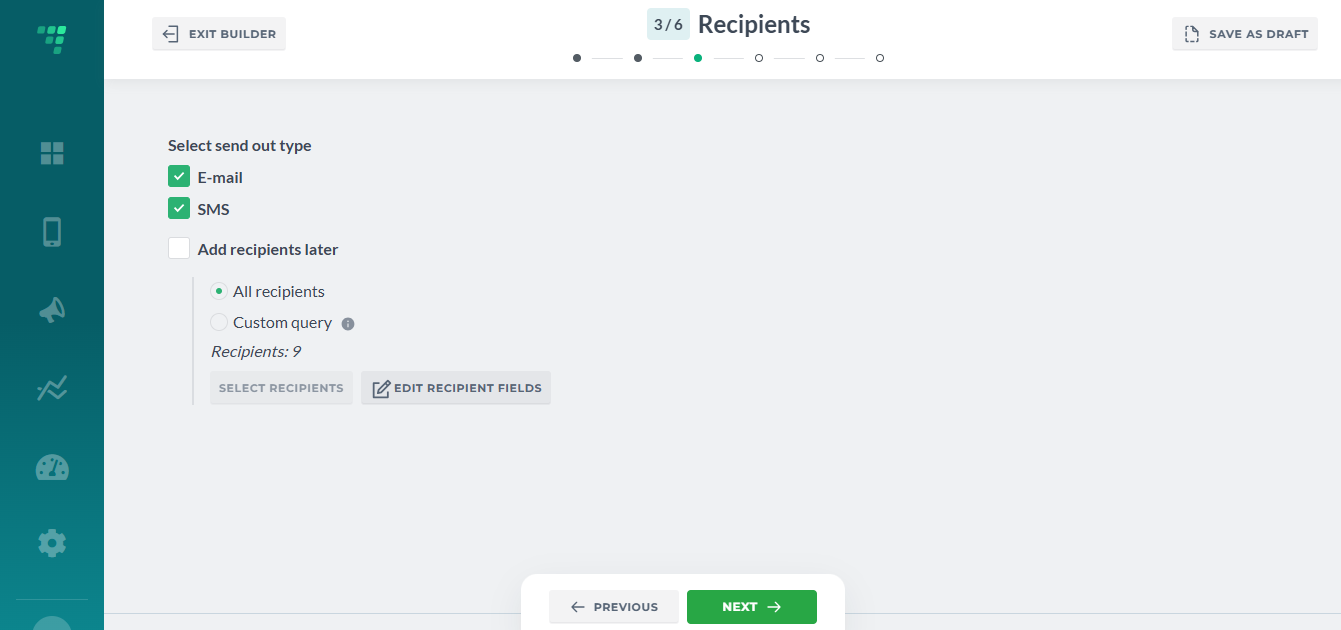
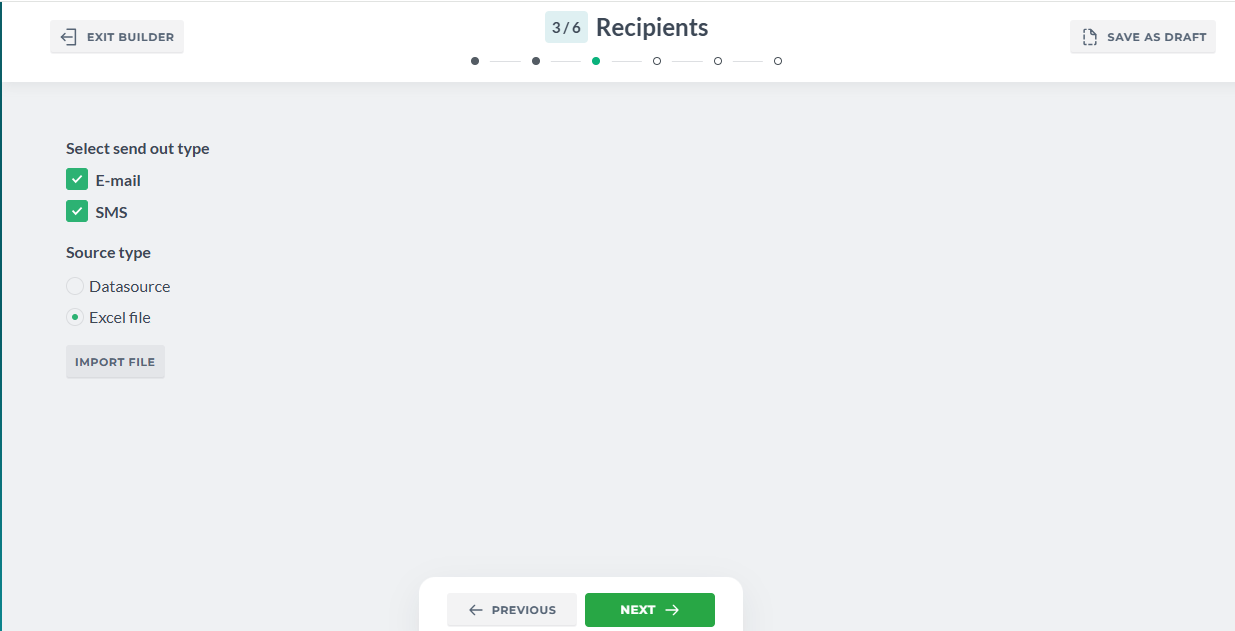
¶ Sendout Type
We need to configure SendOut's type to properly assign recipients (respondents).
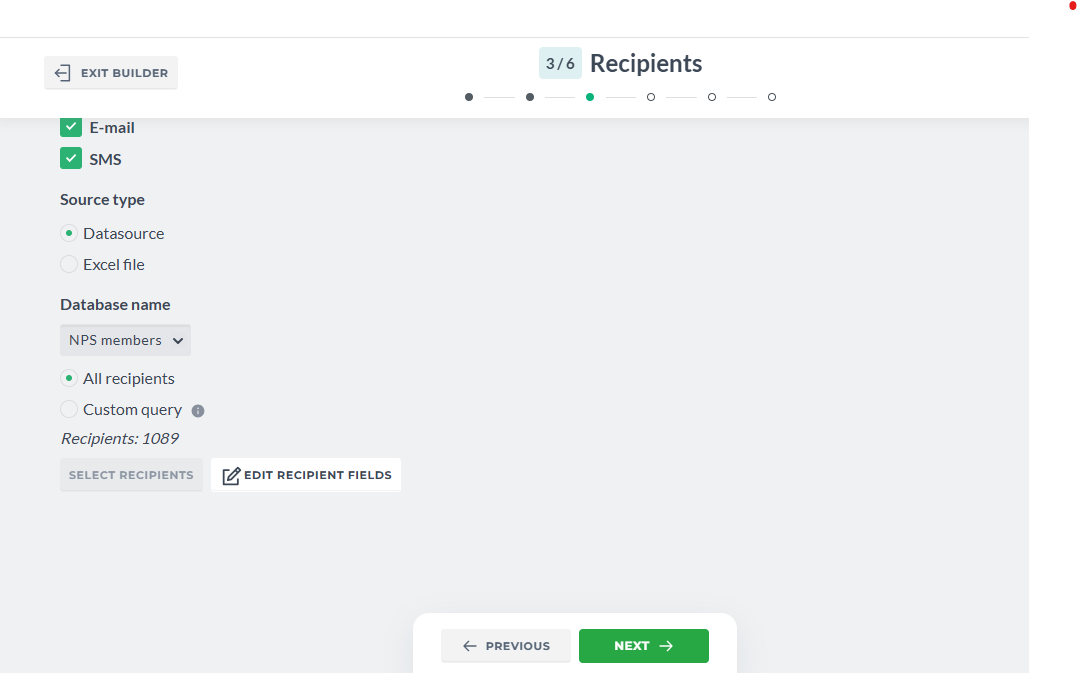
Select the campaign type: Email, SMS or Email and SMS and proceed:
¶ Source Type
¶ Datasource
It can be either datasource (database), previously created with imported members.
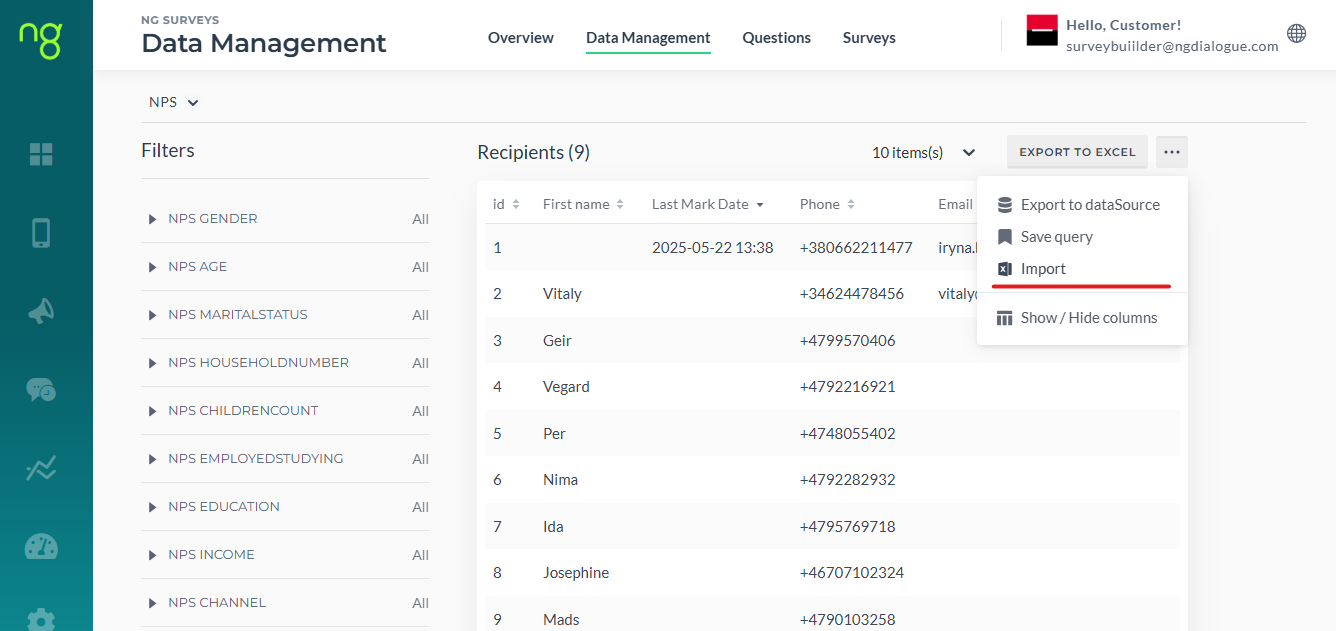
Import can be set up by tech team or you can manually import recipients via Dashboard/Data Management Page/Import: read more here
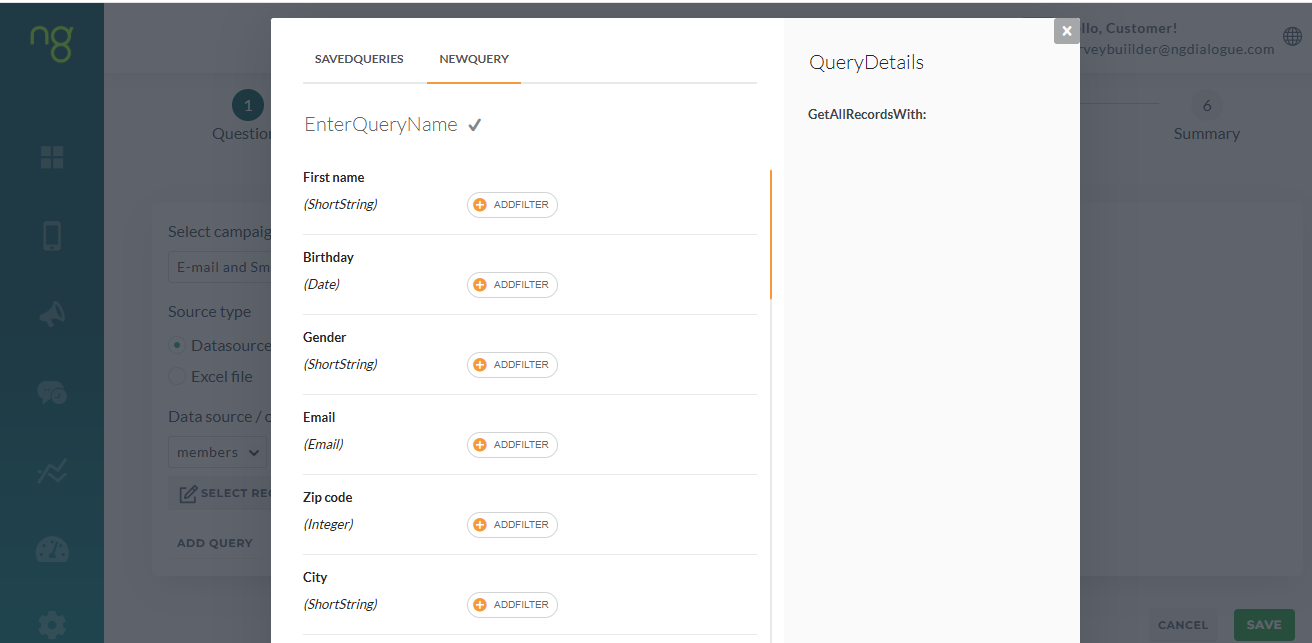
If you selected “Datasource”, click Add Query (Article on how to use filters in Query) to filter out your recipients by age, name, any other field.
Or use All recipients instead:

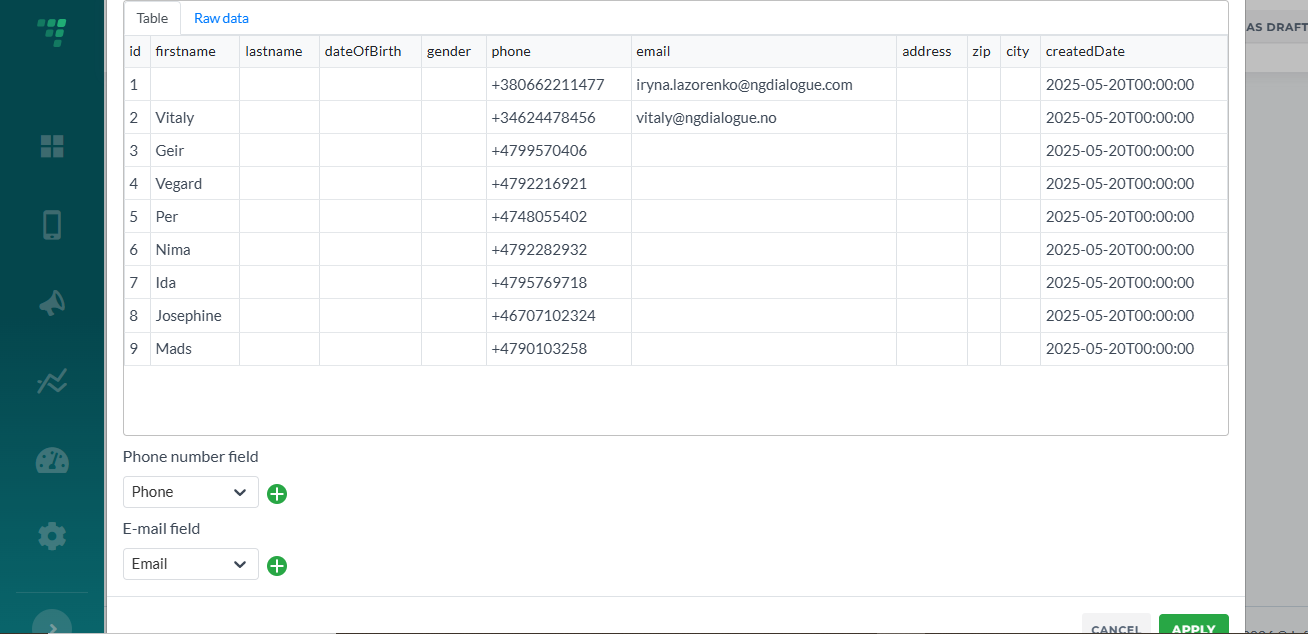
Select Recipients Fields is used mostly when the recipients have more than 1 phone or email field (primary, secondary email, for example) and you need to change that:
Or you have one column for both phone and email. You can view the database and select the columns that represent phone and email columns. But this is optional; in most cases the default settings work and do not require you to change anything:
Datasources can be used for both anonymous and non-anonymous surveys. For non-anonymous, you always have a pair of databases: members and NPS (or Surveys) where one stores members and other - their answers. That is why you need to make sure you use the correct datasource when configuring Recipients.
If your survey is non-anonymous, you must use the same datasource for recipients as you used for questions. Example: customer has two datasources: Gym Members and Spa Members. You cannot select questions created for Gym Members to send out to Spa Members as Answers for non-anonymous must be stored with their respondents.
¶ Excel
If you are sending out an anonymous survey, you can use the Excel file as well:
Click Import File, Drag&Drop the file and map the fields. Toggle “Use the first row as a header” if the header contains the titles like “phone”, “email” to speed up the process.
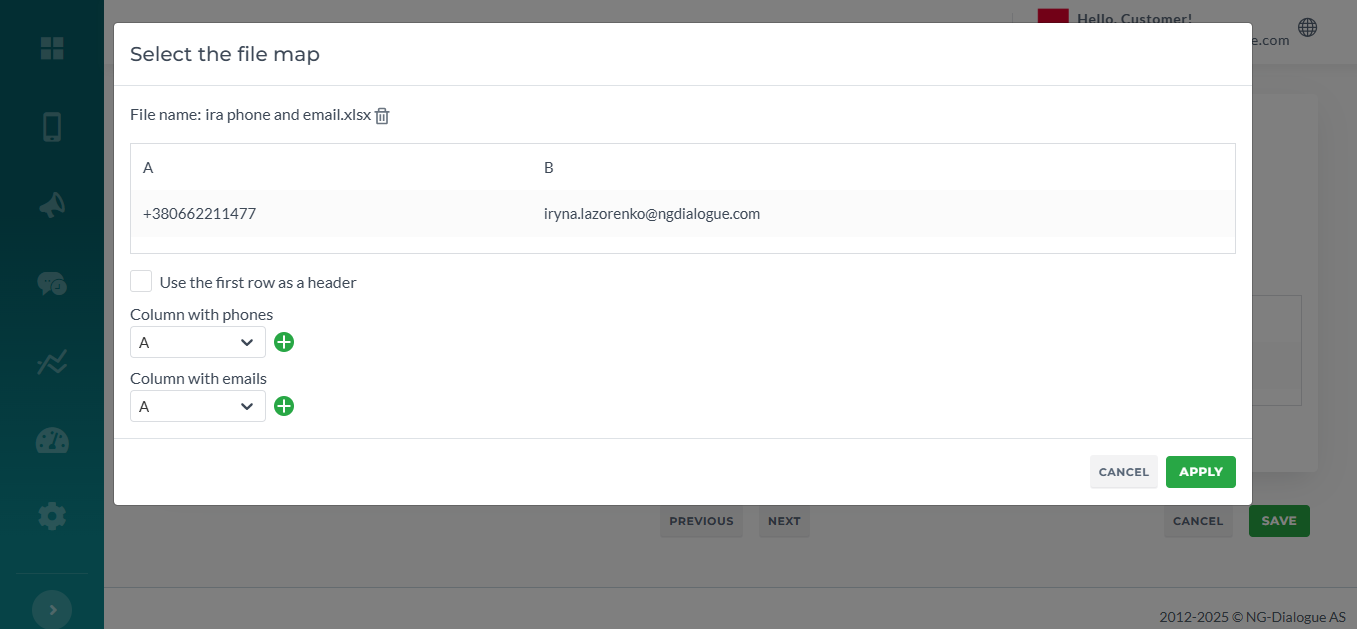
You can always get back and change the query/the file/re-map the fields.
Click Apply and proceed to the next step.
¶ Anonymous survey
Note that for this type of survey you can use not just any Excel, you can use any existing members datasourcr or a form that stores the records.
¶ Sendout
Depending on the type from the previous step, you may either enter SMS/Email or both SMS and Email Content here
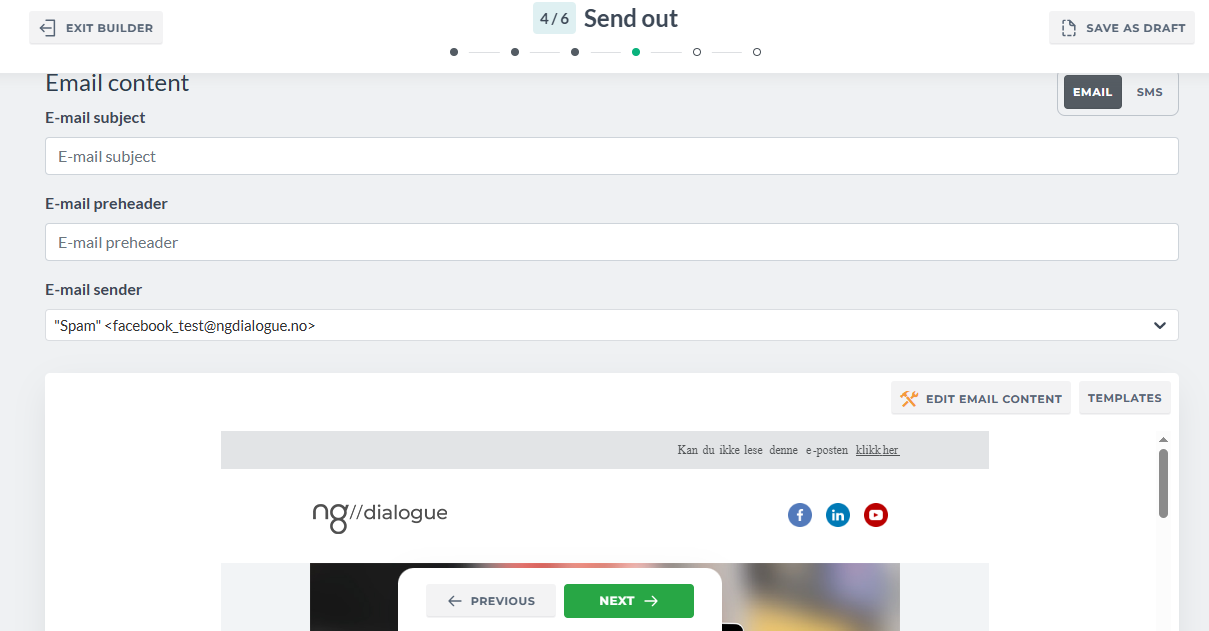
Email consists of:
- Email Subject - 2 words are required, or 1 if there is preheader used
- Email preheader - not required or 1 word if Email Subject contains 1 word
- Email Sender - required, there is always a default one, to add the custom ones with your subdomain name contact your advisor
- Email Editor - not required, edit an existing template or create your own
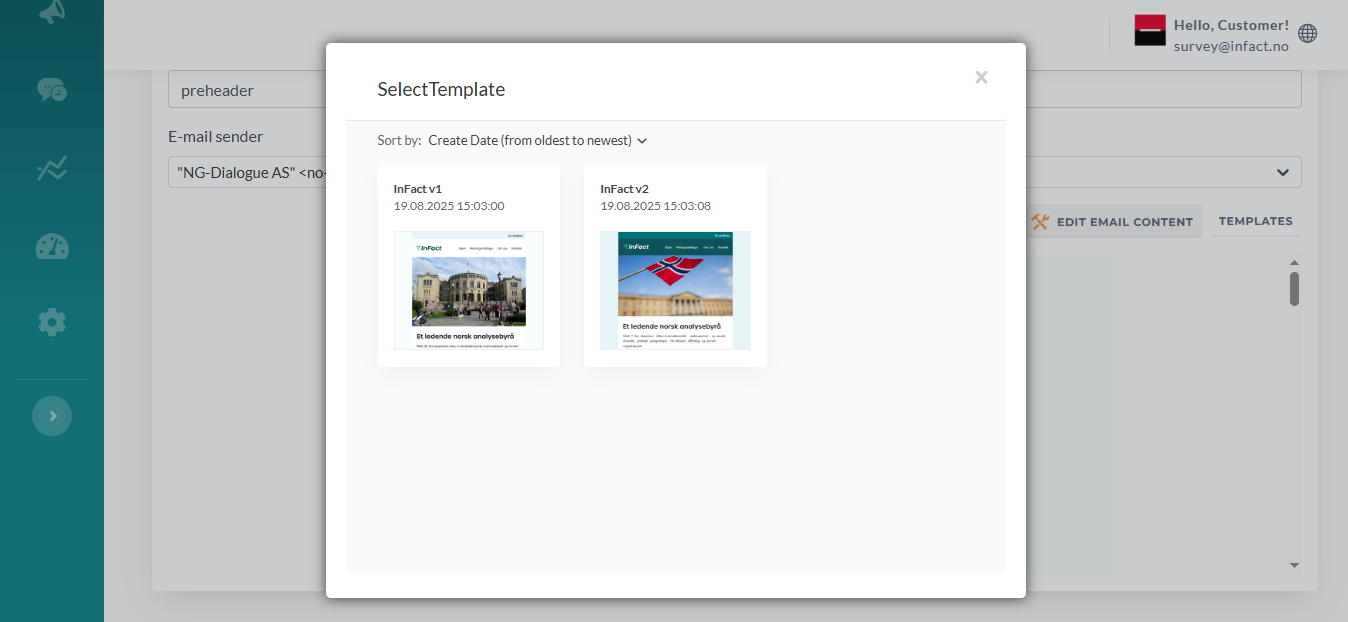
- Email Template - required for use, standart ones are available via this button, custom ones are created and added by designer, the first one is used by default
¶ Email Editor
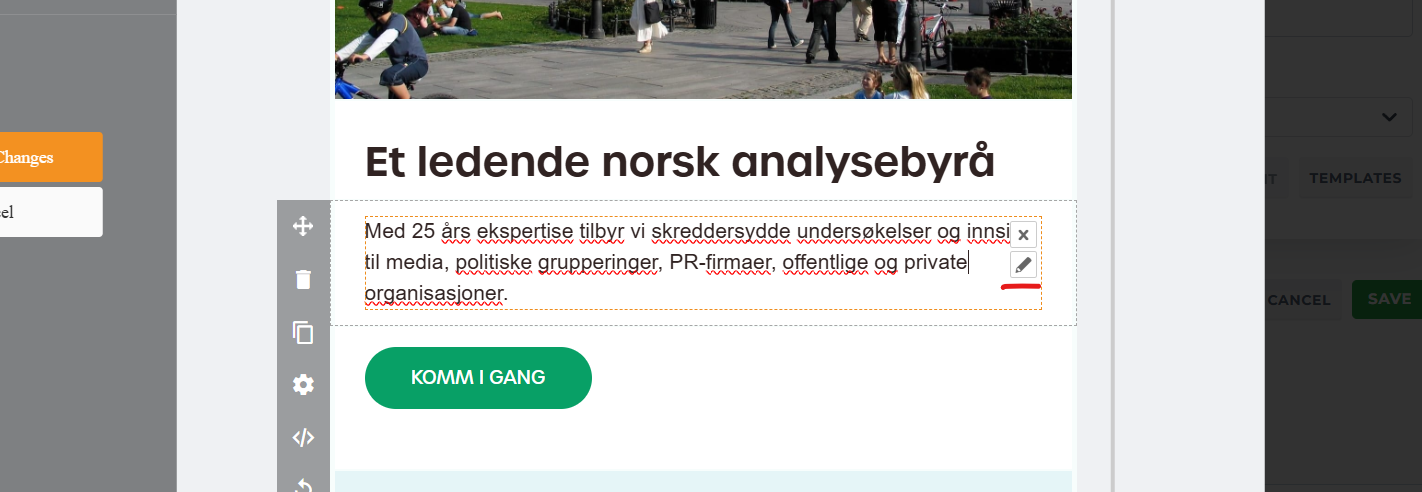
Click Edit Email Content button to add some minor changes: pictures, links, buttons, texts
New templates can be created via this button:

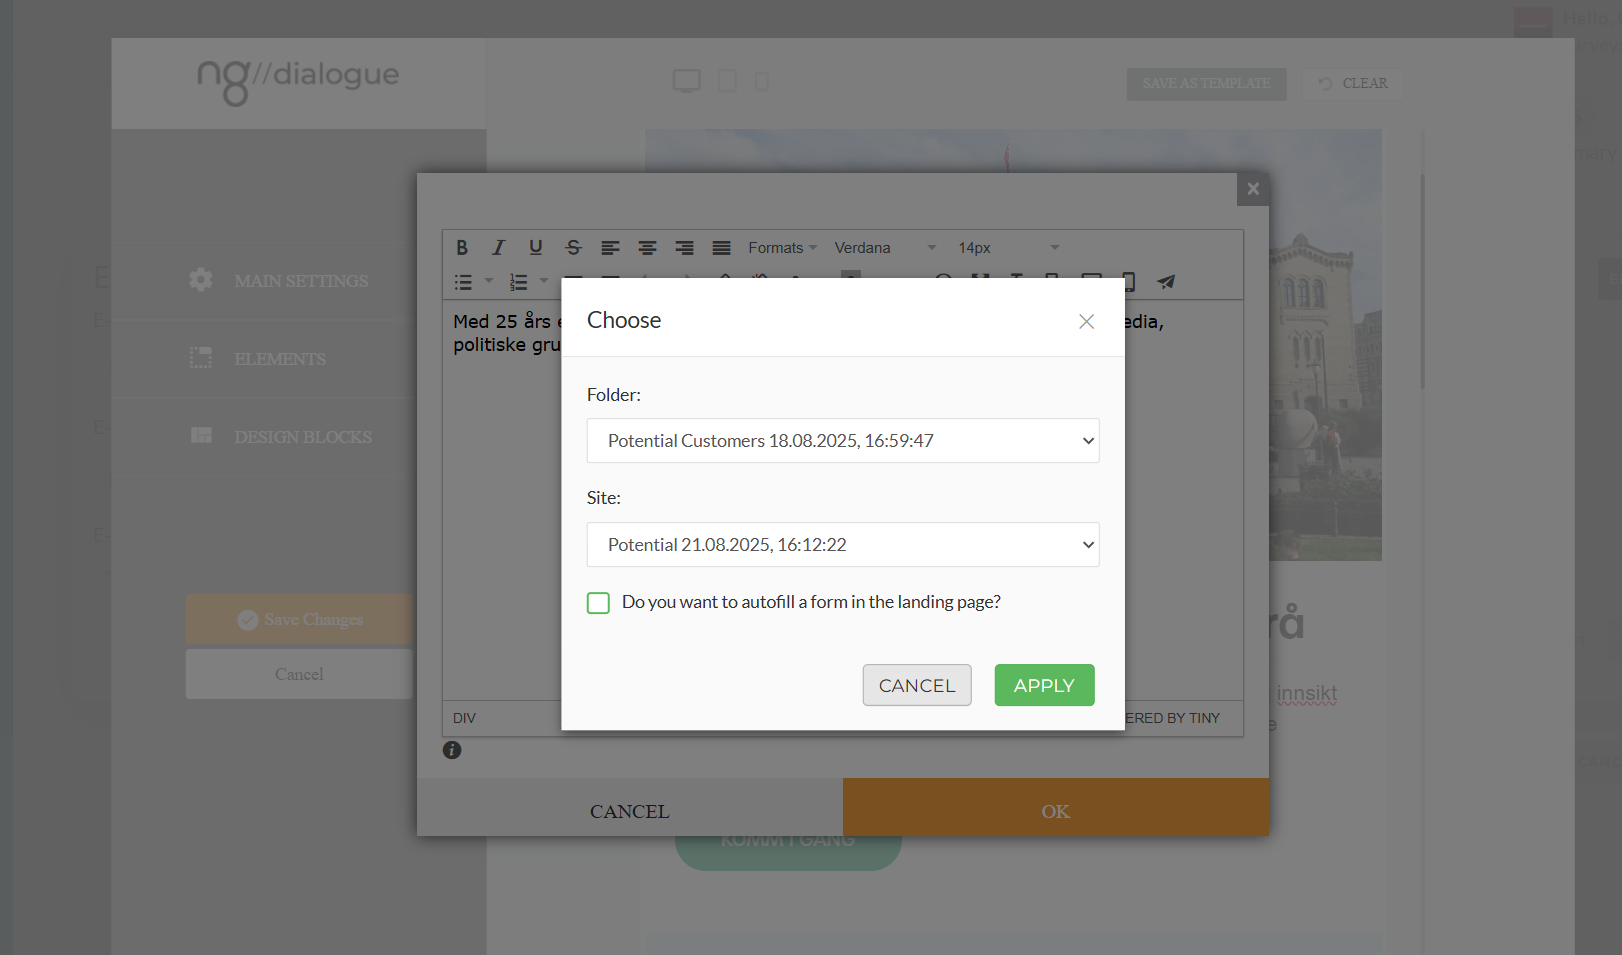
To add a link to the landing page, click Edit a textbox:
And select Insert Landing Page Link:
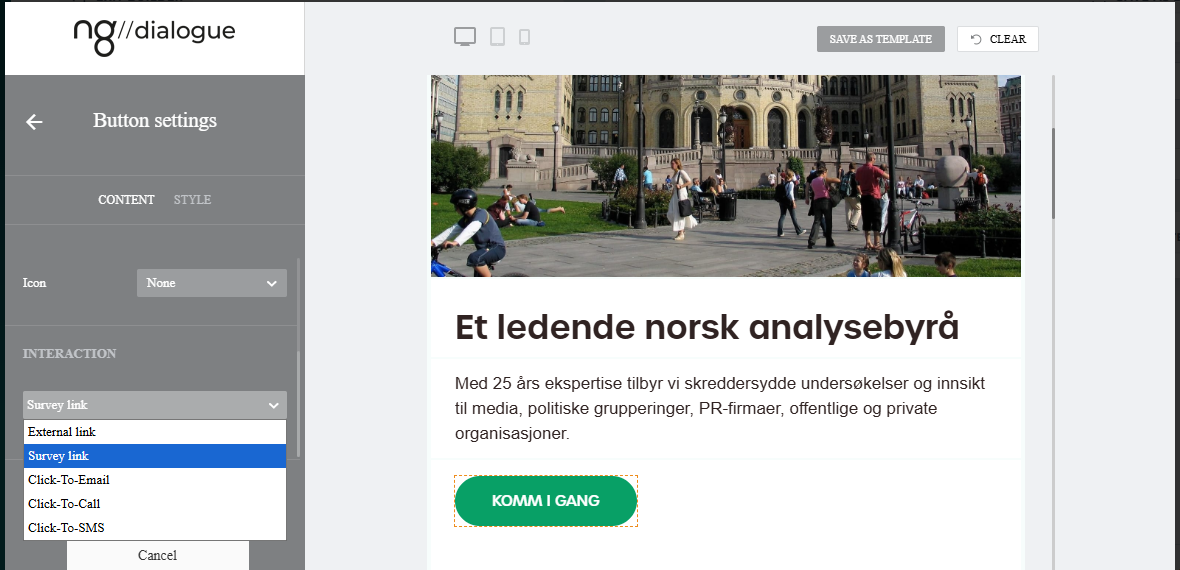
For recipients to participate in the survey, they need to receive an email with the survey link. To add it, use a survey variable. Either add it via “Insert variable” and select Survey Link which will add %%SURVEY_LINK%% to a button or a textlink.
Or use button's Survey Link option directly:
¶ SMS
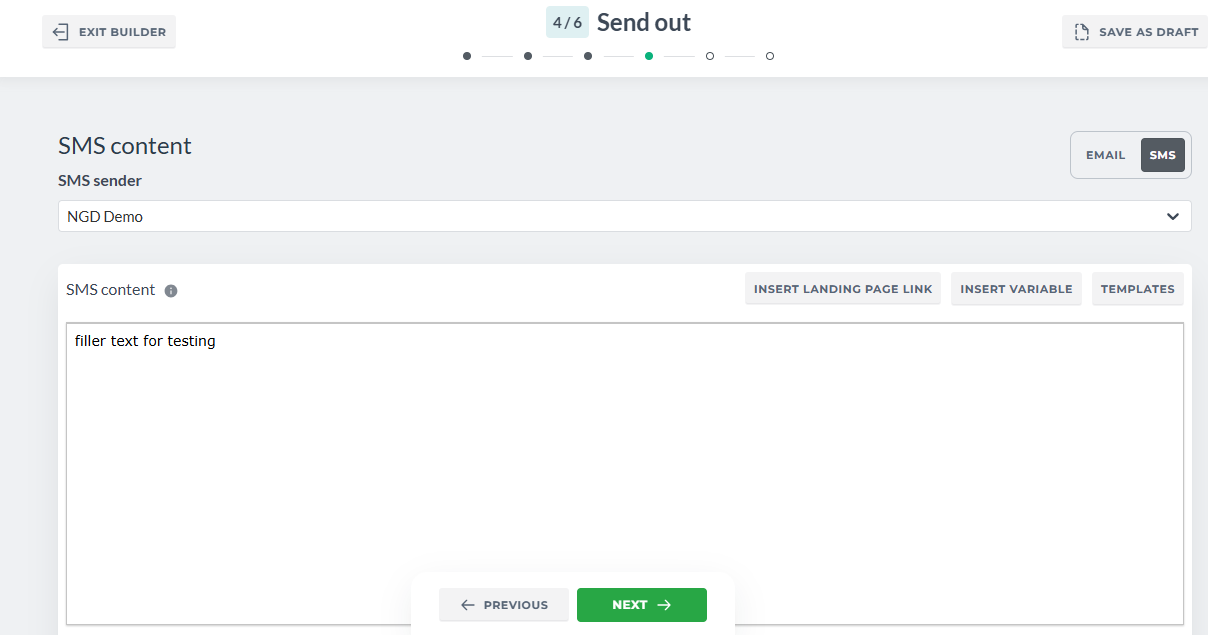
SMS consists of:
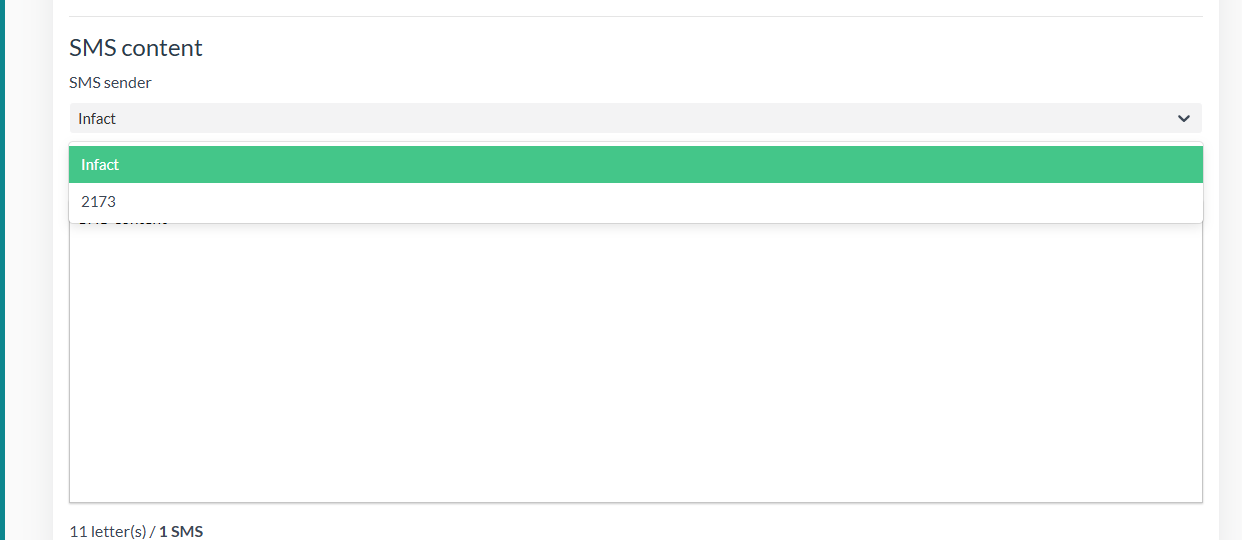
- SMS Sender - is required, there is a default number that depends on the country set in the account settings, you can always request the advisor to add more Senders (A-number in Customer Settings, 2 characters are the minimum)
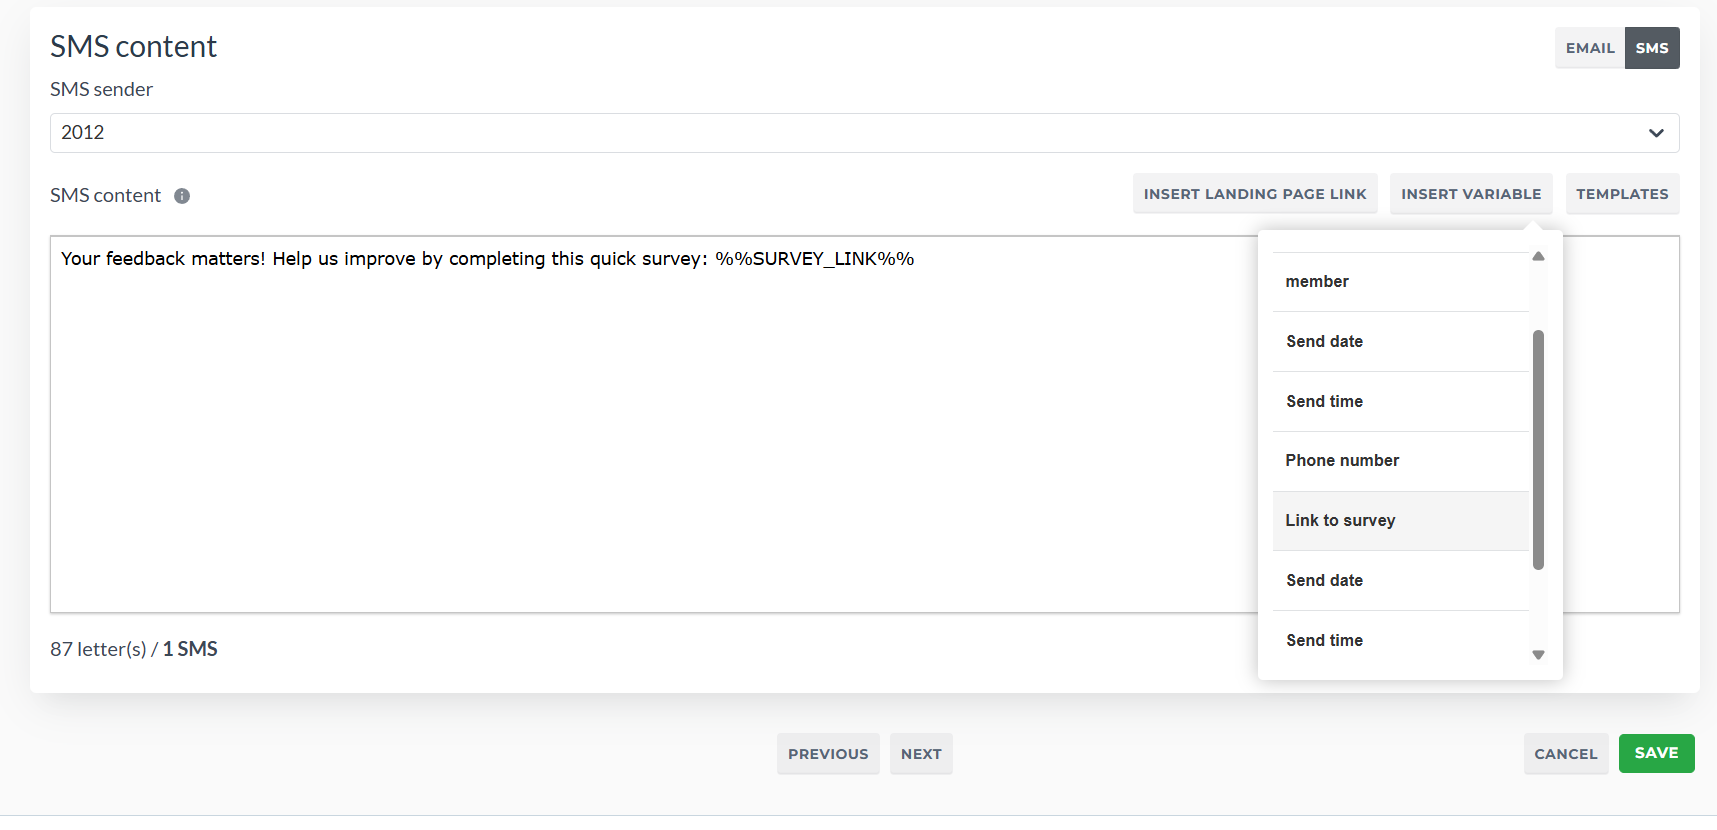
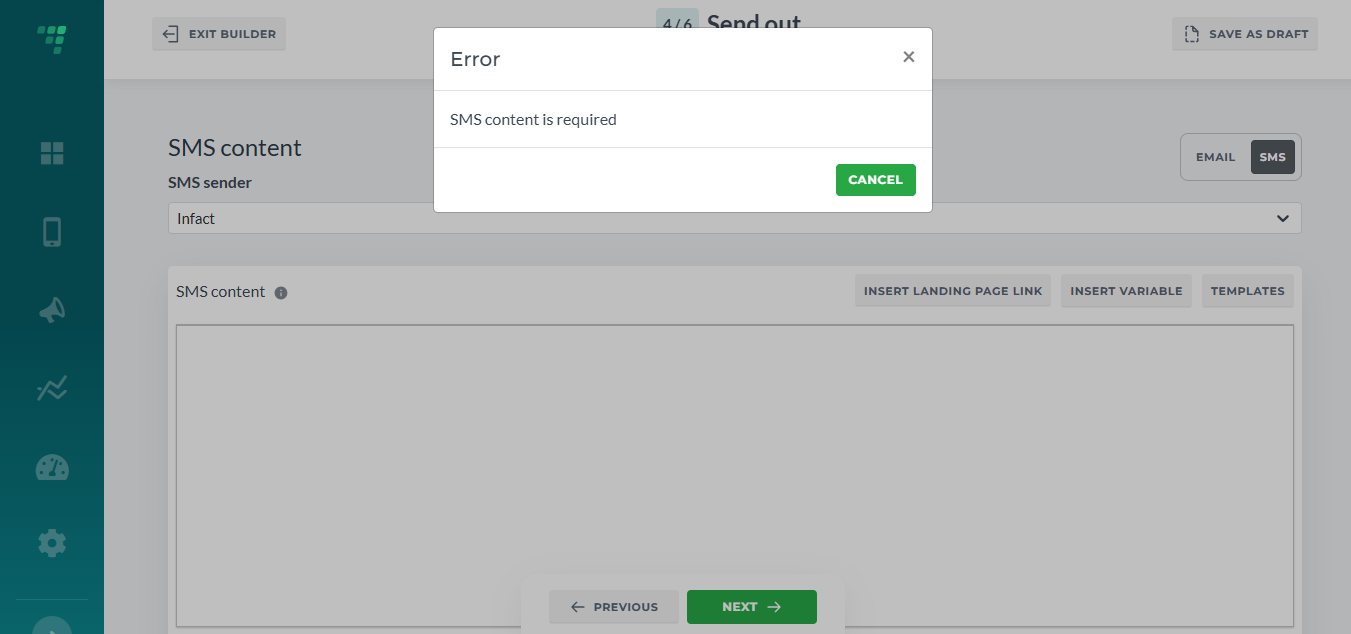
- SMS Content is required as well. You can either use a template or add your own content.
To enter variables, click Insert Variables (for example, you want each SMS to contain the recipient's name), start typing % character and you will see the list of available variables. The most important variable is the Survey Link (highlighted in the list on the screenshot) which will be unique for each recipient and will lead to your survey.
¶ Scheduling
In development, hidden now.
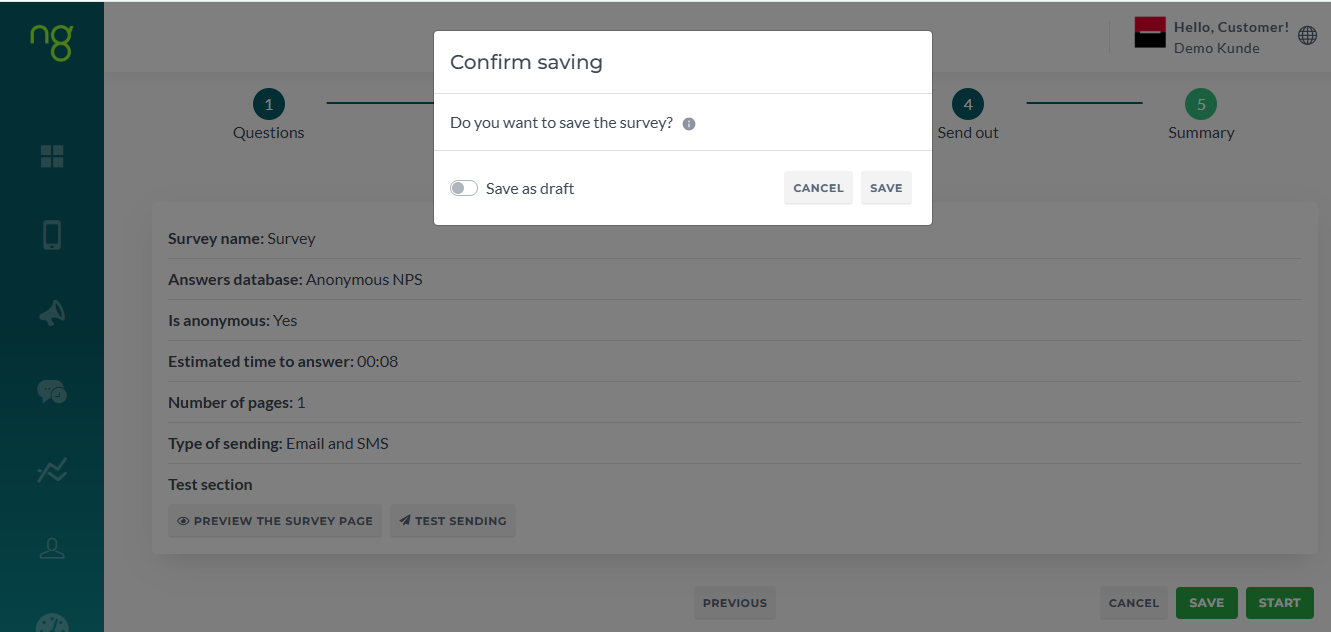
¶ Summary
It has all the info about the survey and here you can preview and test your survey
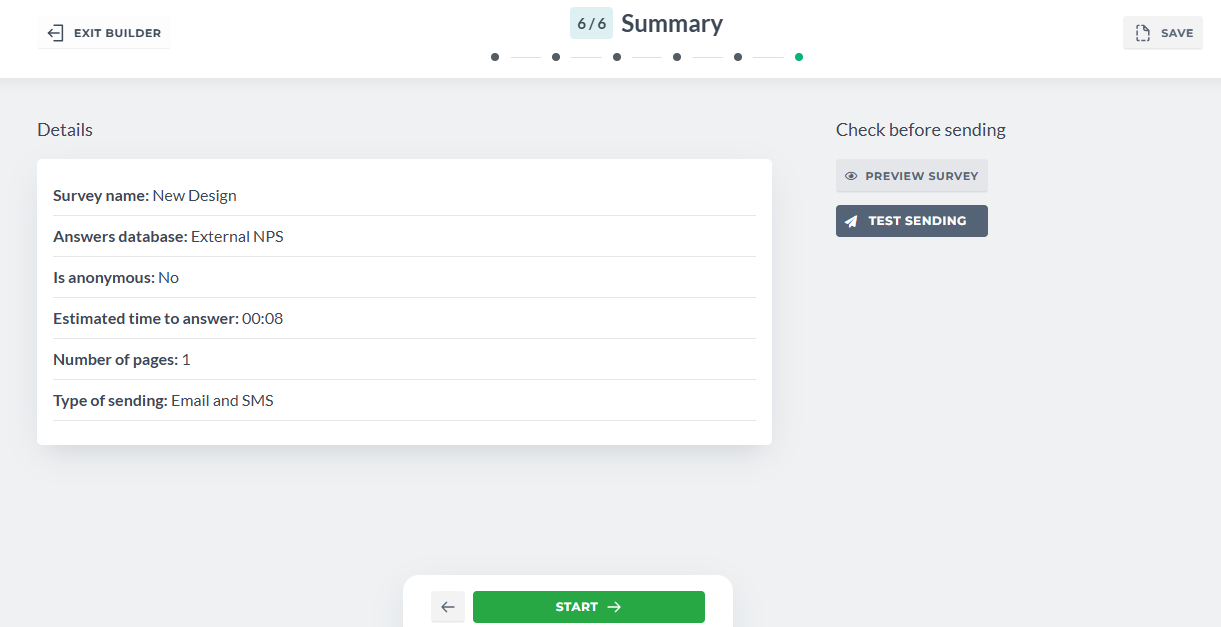
Saving a survey on any step but the last will save it as a draft. Saving on the last step will allow you to save it both as draft and a new survey that can be previewed, tested and send.
Drafts cannot be tested or previewed:
Note! If you create a New survey and then edit it, you need to proceed to the Summary step to save it as Survey. If you save it during any but the Summary step, it will be saved as Draft (drafts do now have preview and test actions).
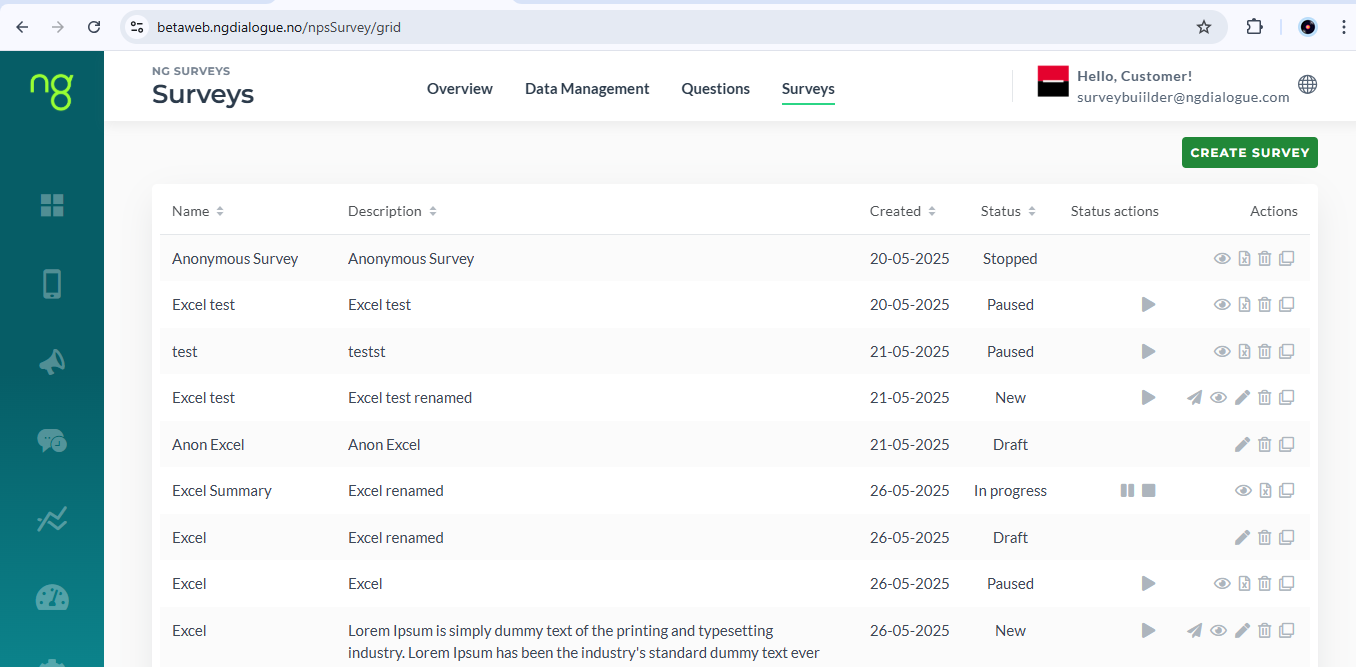
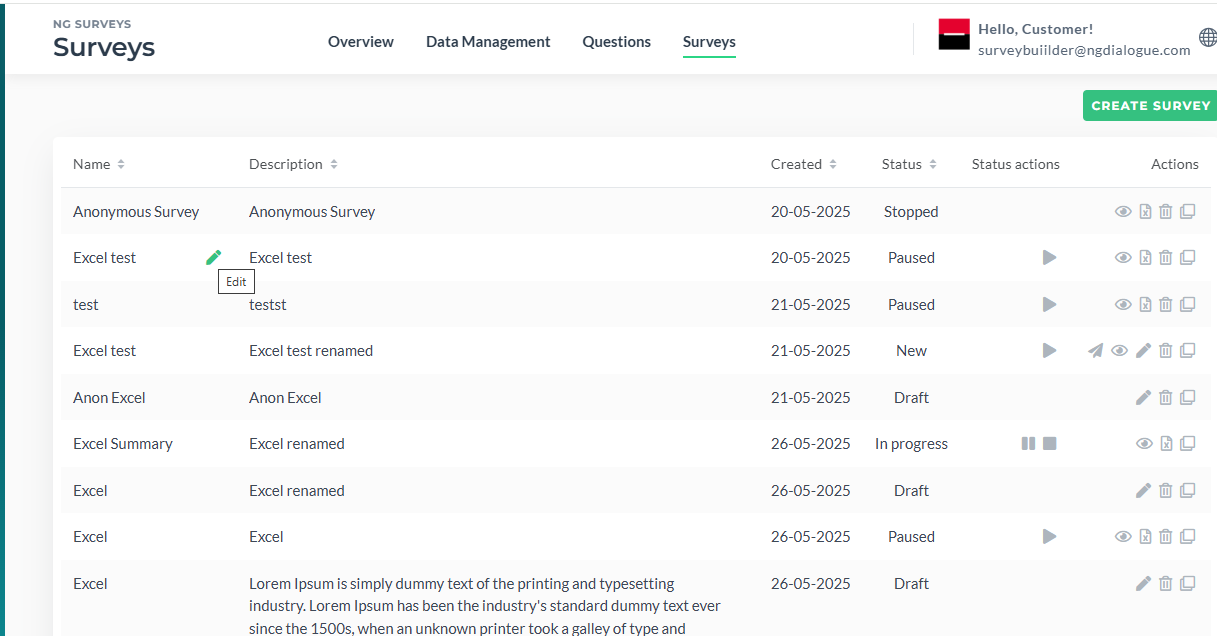
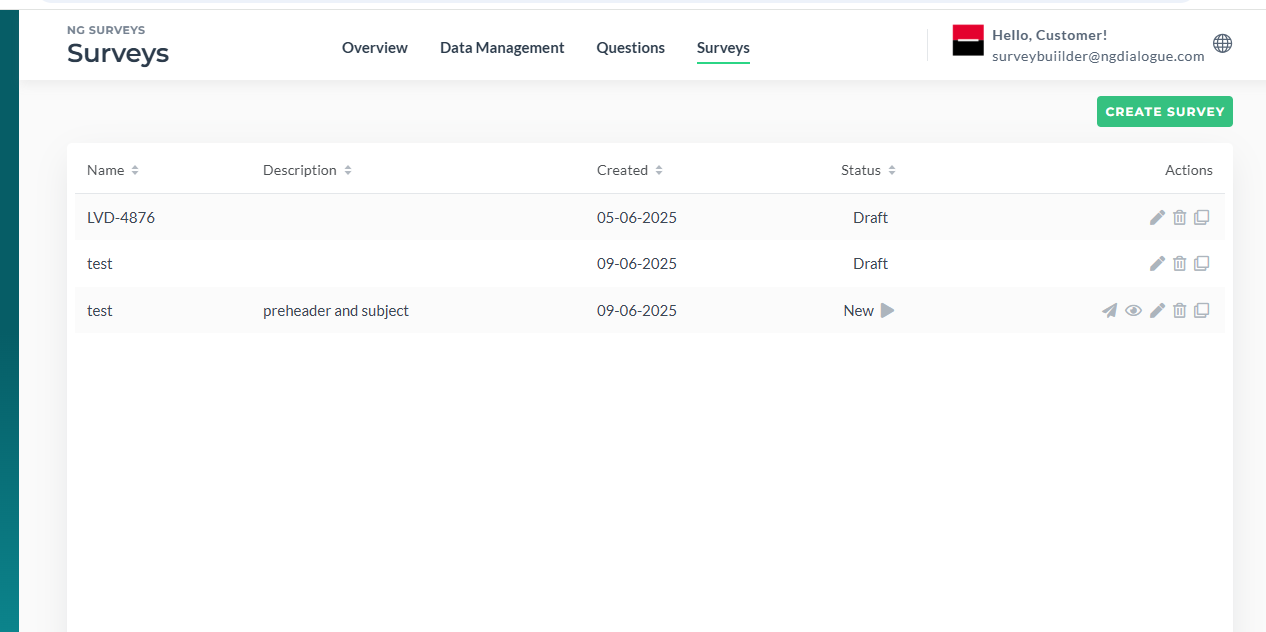
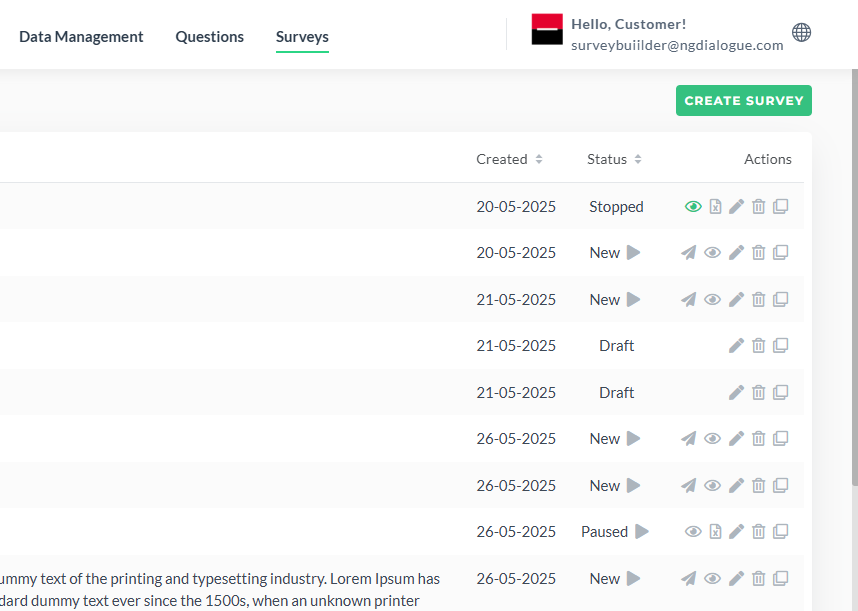
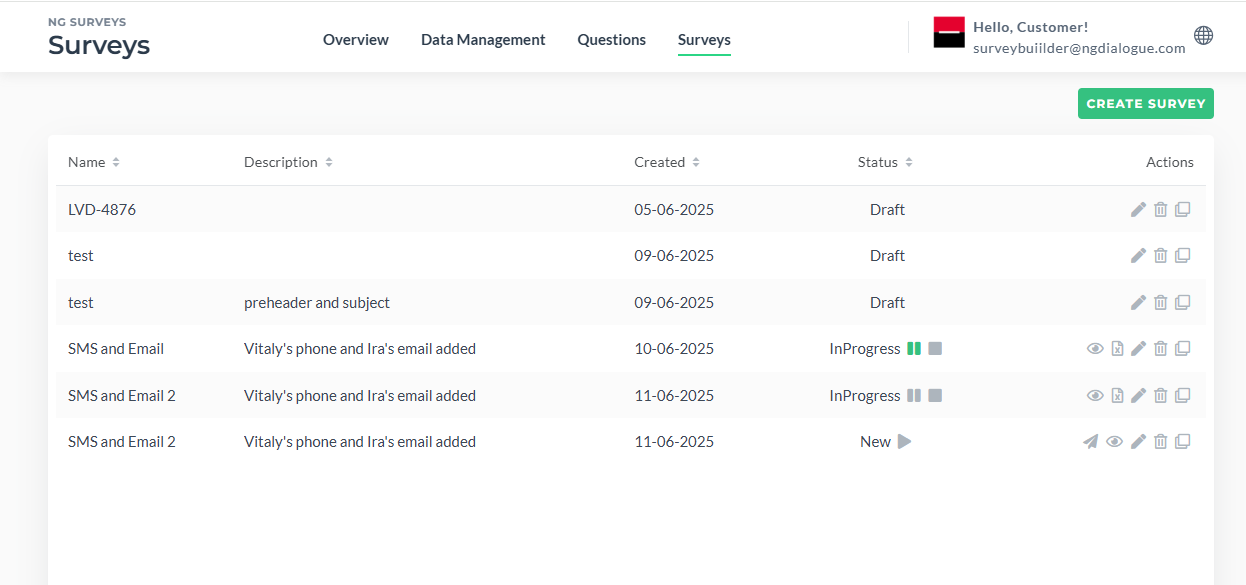
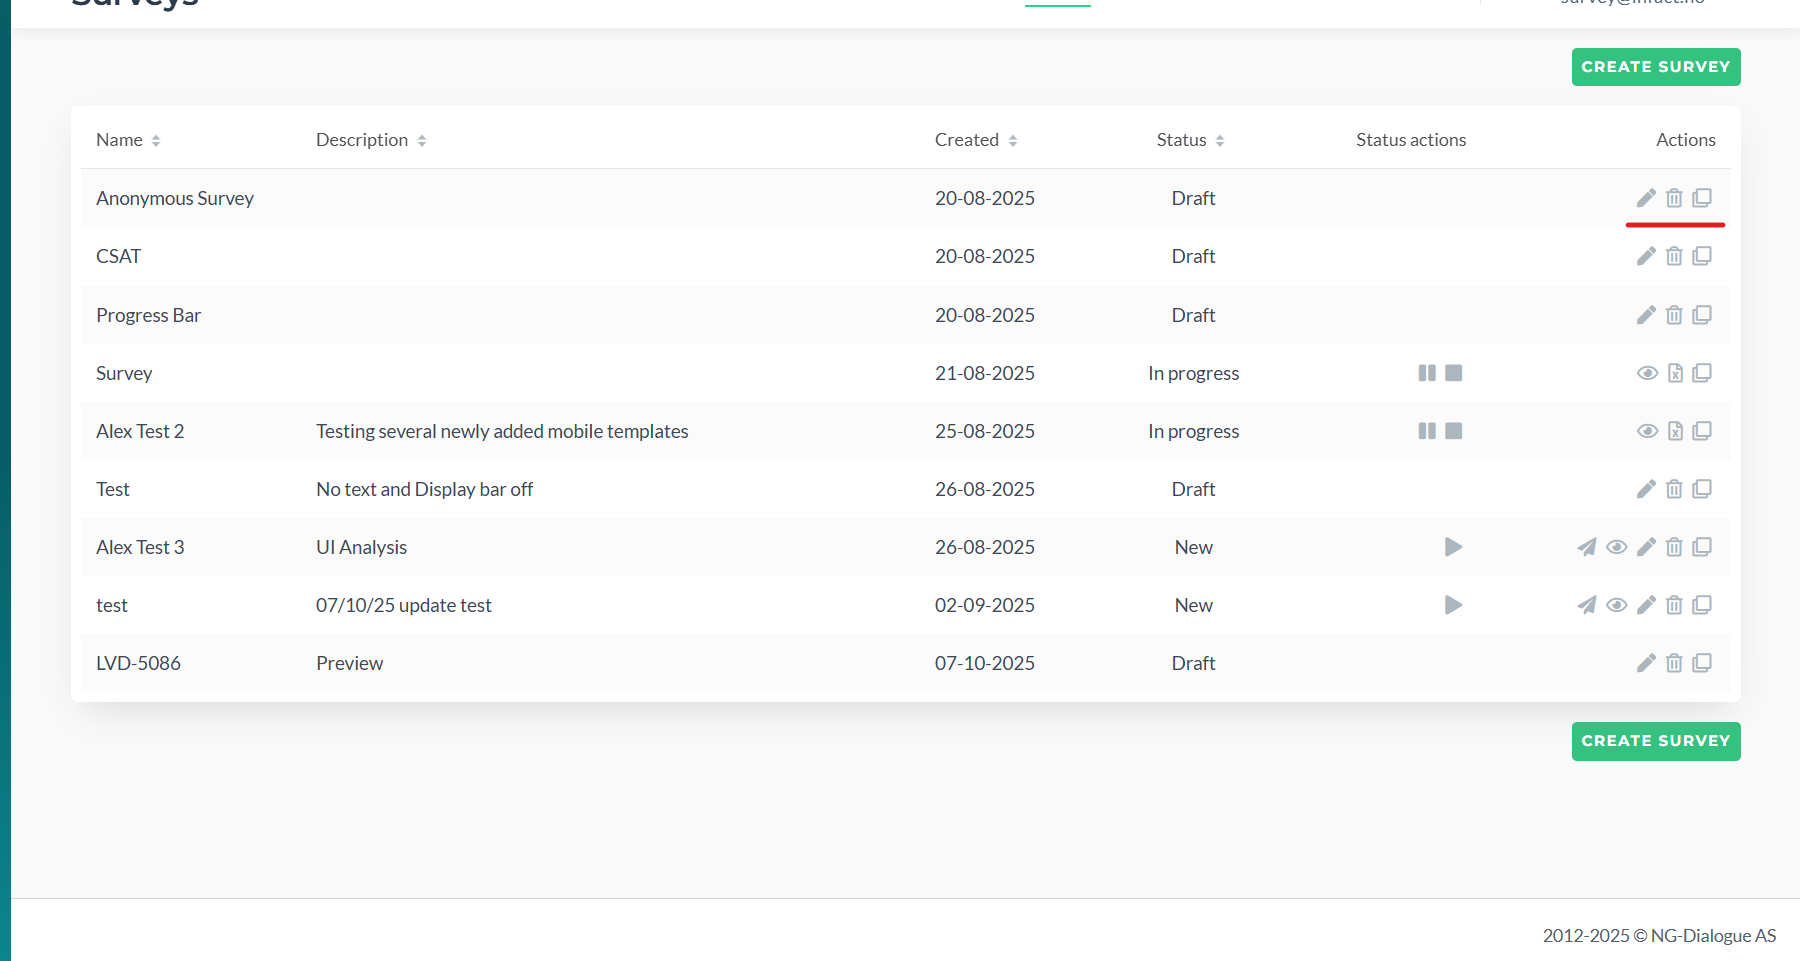
¶ Statuses and Actions
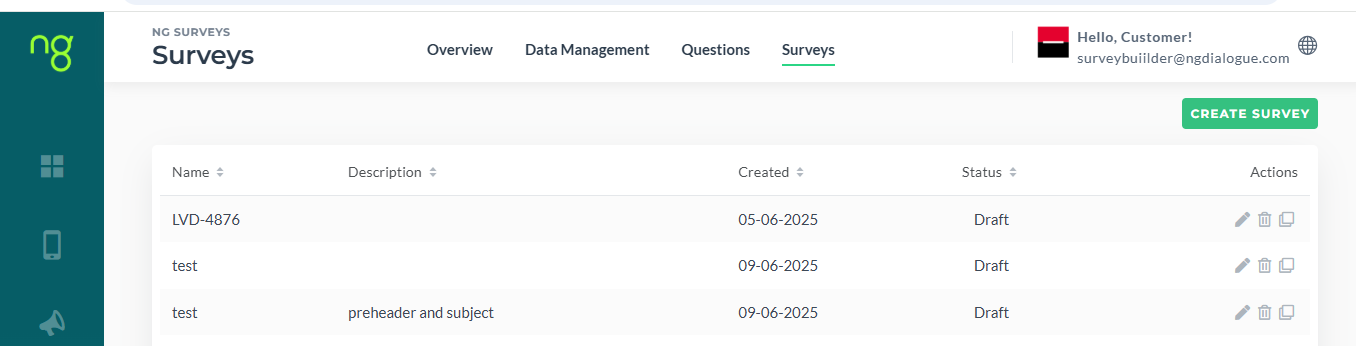
If the survey is saved on any step but the last (Summary), it has a Draft status:
If the Survey is saved on the last step, it has status New and can be started by clicking Play icon:
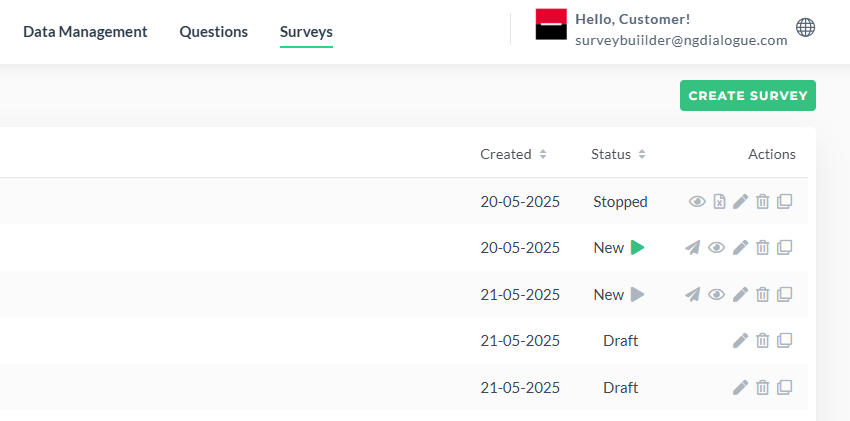
Also it can be viewed by clicking Eye icon:
It will be opened with a test link to interact with the elements:
Do not use the test link to send out the survey, it will not be stored correctly!

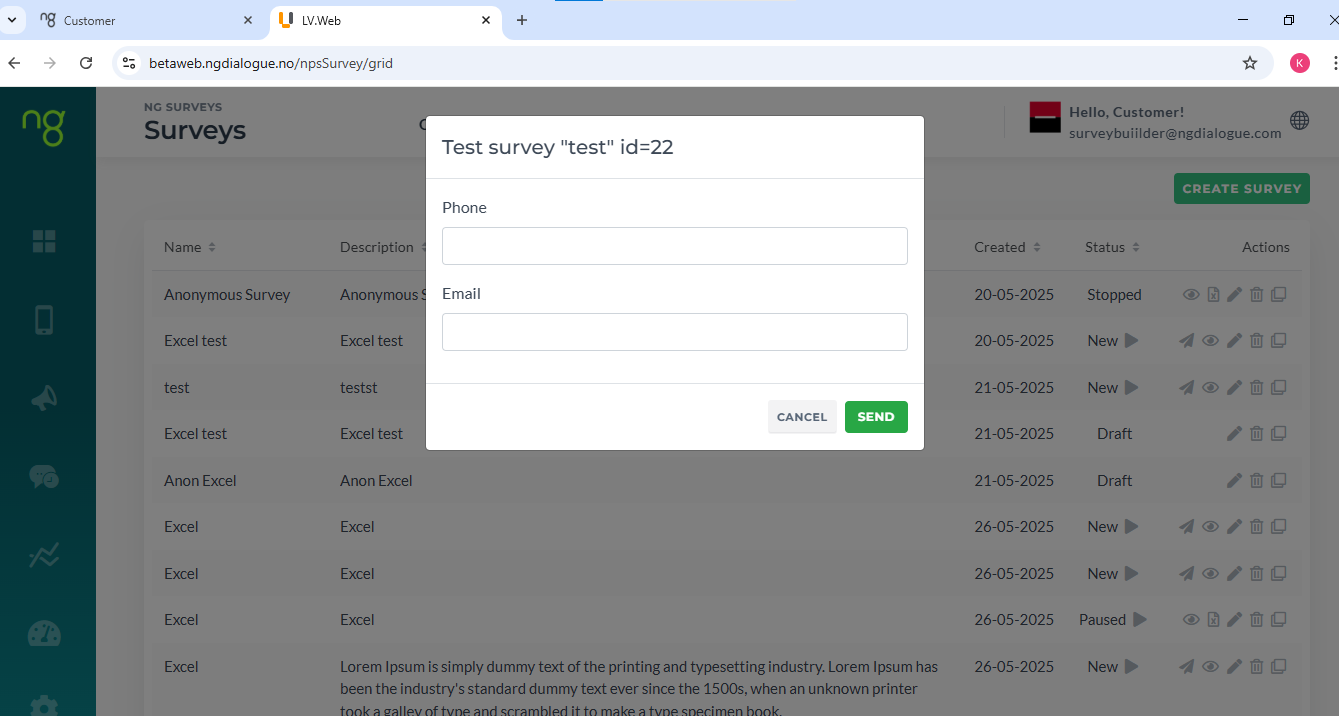
Clicking Test icon will allow you to send a test campaign to your phone or email:
When the survey is being sent, it ias status In Progress.
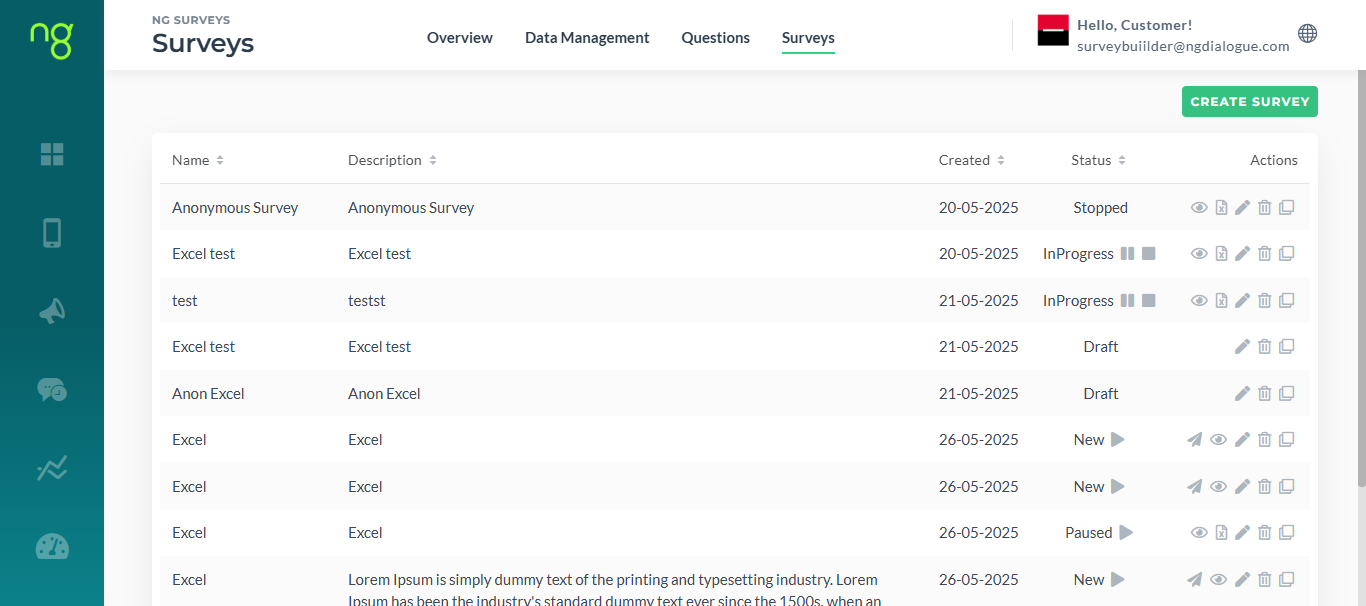
It can be paused if clicking Pause icon:
And Restarted:
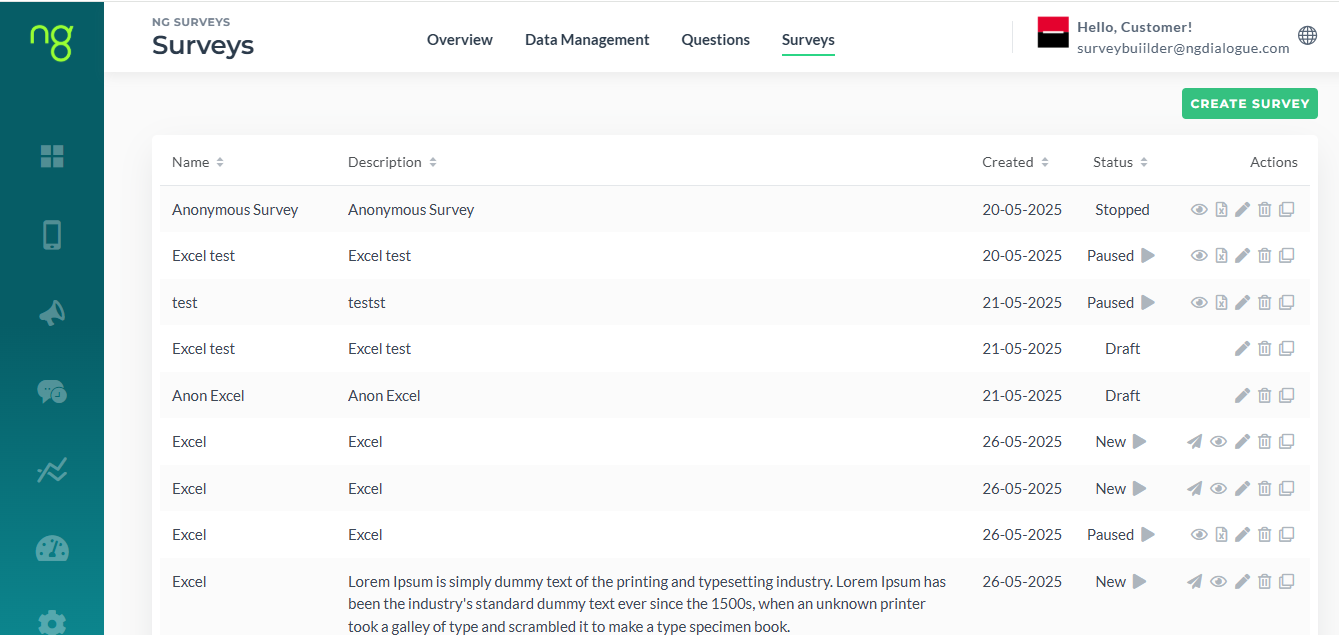
If you click Stop icon, the Survey cannot be restarted:
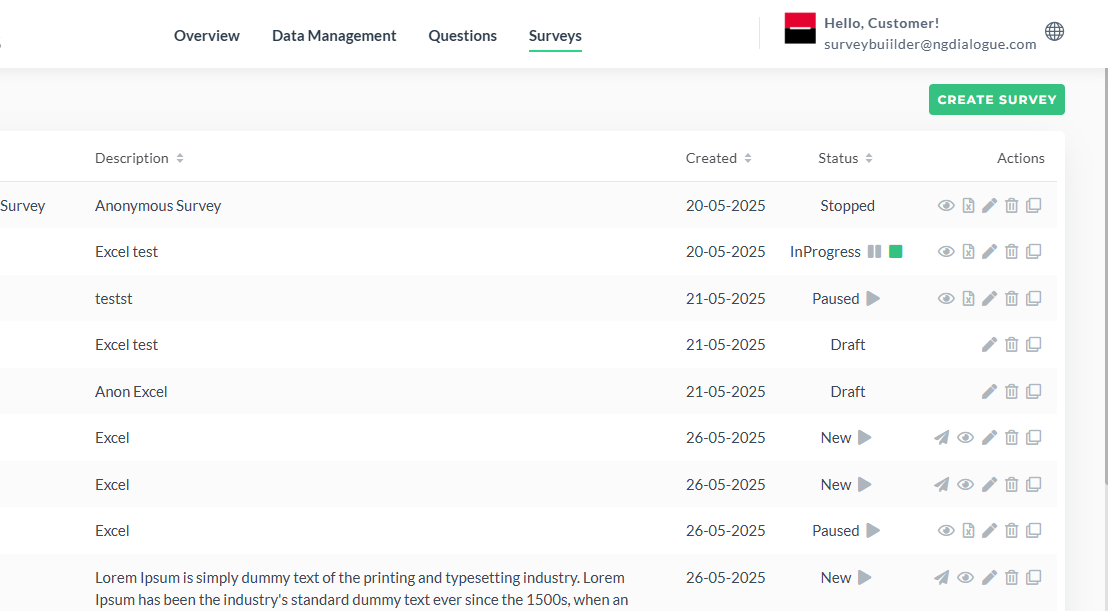
The same with Completed surveys (completed status are shown when the end date in Scheduling is reached).
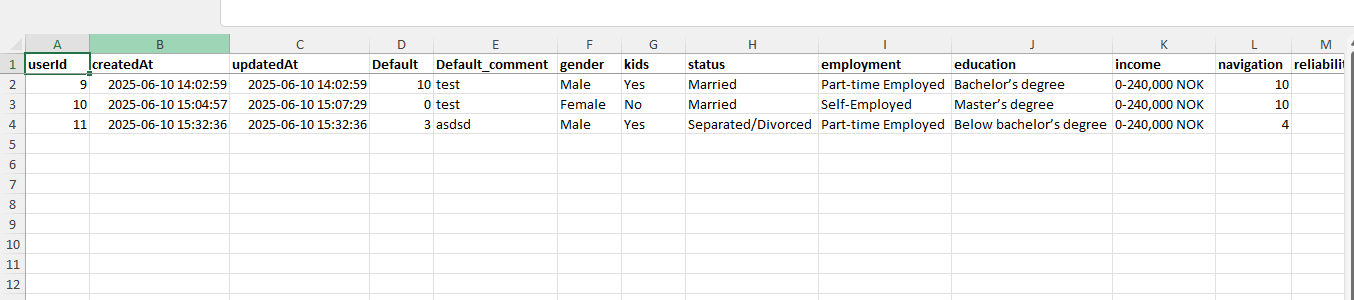
The File icon will allow you to download the survey results in Excel:
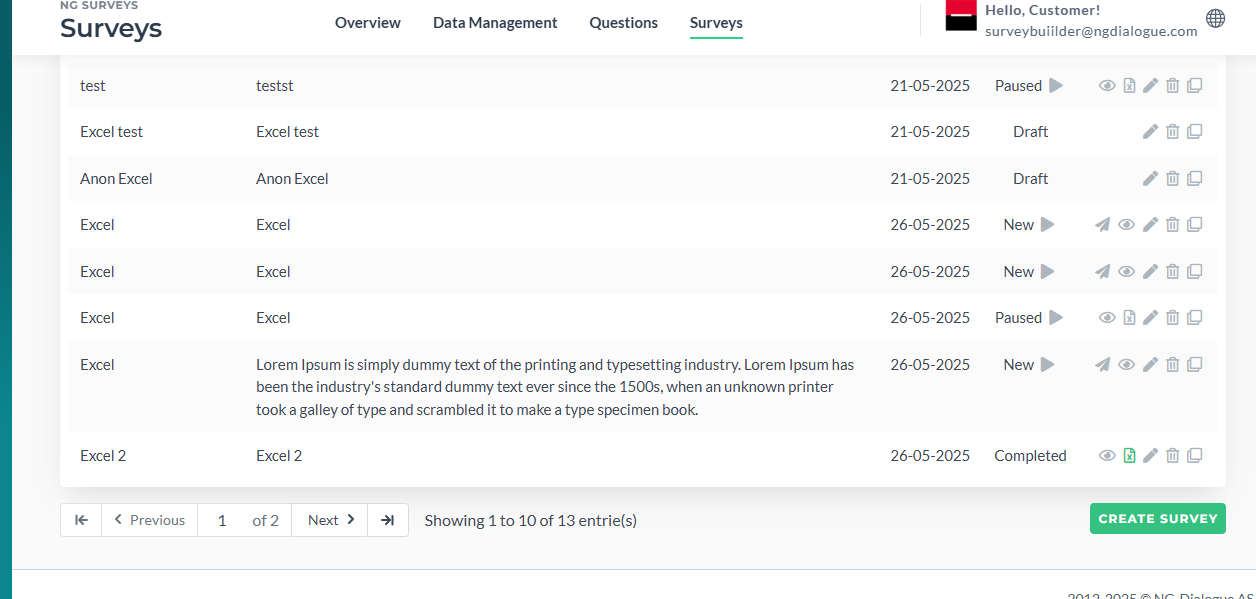
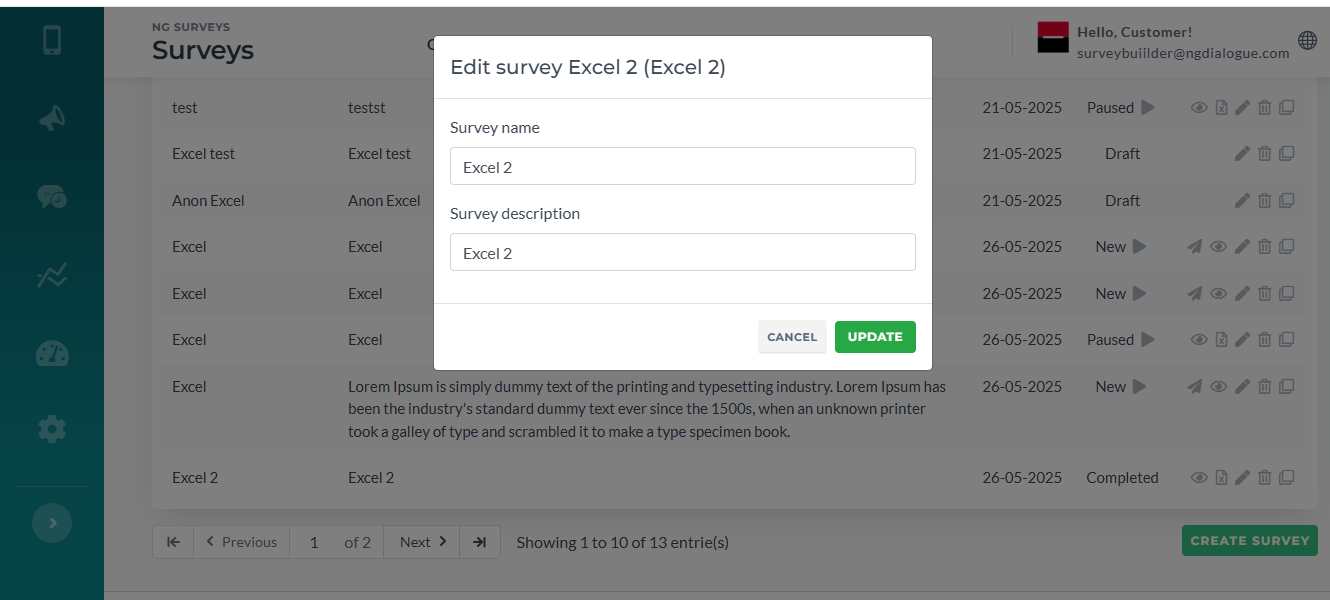
If the survey is New or Draft, you can edit it but when it is In Progress, you can only change the name and description:
Also, all surveys can be deleted or copied:
¶ Advanced
There are some features that are not yet shipped to Survey Builder like Visibility Rules, changing the order of dictionaries or Advance Form setting like Send Response, use the main site.